# Welcome to AI Studio!
Vonage AI is a **conversational** **AI platform** built to handle complex interactions between businesses and customers, lowering operational costs and significantly improving service levels.
{% hint style="info" %}
*Want to know why Studio is the right choice for you? Visit our* [*homepage*](https://www.vonage.com/communications-apis/ai-studio/?icmp=megamenu%7Cmainnav_products_gotothecommunicationsapispage_aistudio_novalue) *to learn more about why our customers have stuck with us.*
[*Sign up*](https://ui.idp.vonage.com/ui/auth/registration?icid=tryitfree_comm-apis-aistudio-hp_nexmodashbdfreetrialsignup_banner\&utm_campaign=bizdirect\&attribution_campaign=bizdirect\&adobe_mc=MCMID%3D51934559228218297380678346228763269314%7CMCORGID%3DA8833BC75245AF9E0A490D4D%2540AdobeOrg%7CTS%3D1666784311) *to try our product for free or* [*Contact us*](https://www.vonage.com/communications-apis/ai-studio/?icmp=megamenu%7Cmainnav_products_gotothecommunicationsapispage_aistudio_novalue) *with any queries today!*
{% endhint %}
The AI Studio Platform offers a set of software solutions that give businesses new ways to **interact with their customers through voice and text,** and for developers, a new way to design a voice interface for any commercial or personal use.

Studio is a **No Code/ Low Code conversation designer** that empowers developers and non-developers alike to design, create and deploy Virtual Agents that operate in natural language.
Alongside rich conversations with multiple flows, Virtual Agents can automate any process and integrate into almost any service out there.
Design flows by dragging and dropping modules and actions, making requests to backend services using webhook actions, and much more.
### AI in action
The core of our solution is an artificial intelligence (AI) powered voice agent, which is built on Vonage AI's proprietary natural language understanding (NLU) algorithms to enable conversational interactions. In other words, a digital **AI Virtual Assistant** that is able to **communicate in natural language**, and doesn't require users to formulate their questions in a specific way, use certain keywords, or choose from a set of options.

# Platform Updates
Bug Fixes & New Features
### July 29, 2024
You can now accept Latitude/Longitude as a location response within our WhatsApp Virtual Assistants. Learn more [here](https://studio.docs.ai.vonage.com/whatsapp/nodes/conversation/collect-input#receiving-location-as-a-response).
### April 17, 2024
Stop Recording functionality now available for your voice agents, learn more [here.](https://studio.docs.ai.vonage.com/voice/nodes/actions/stop-recording)
### April 15, 2024
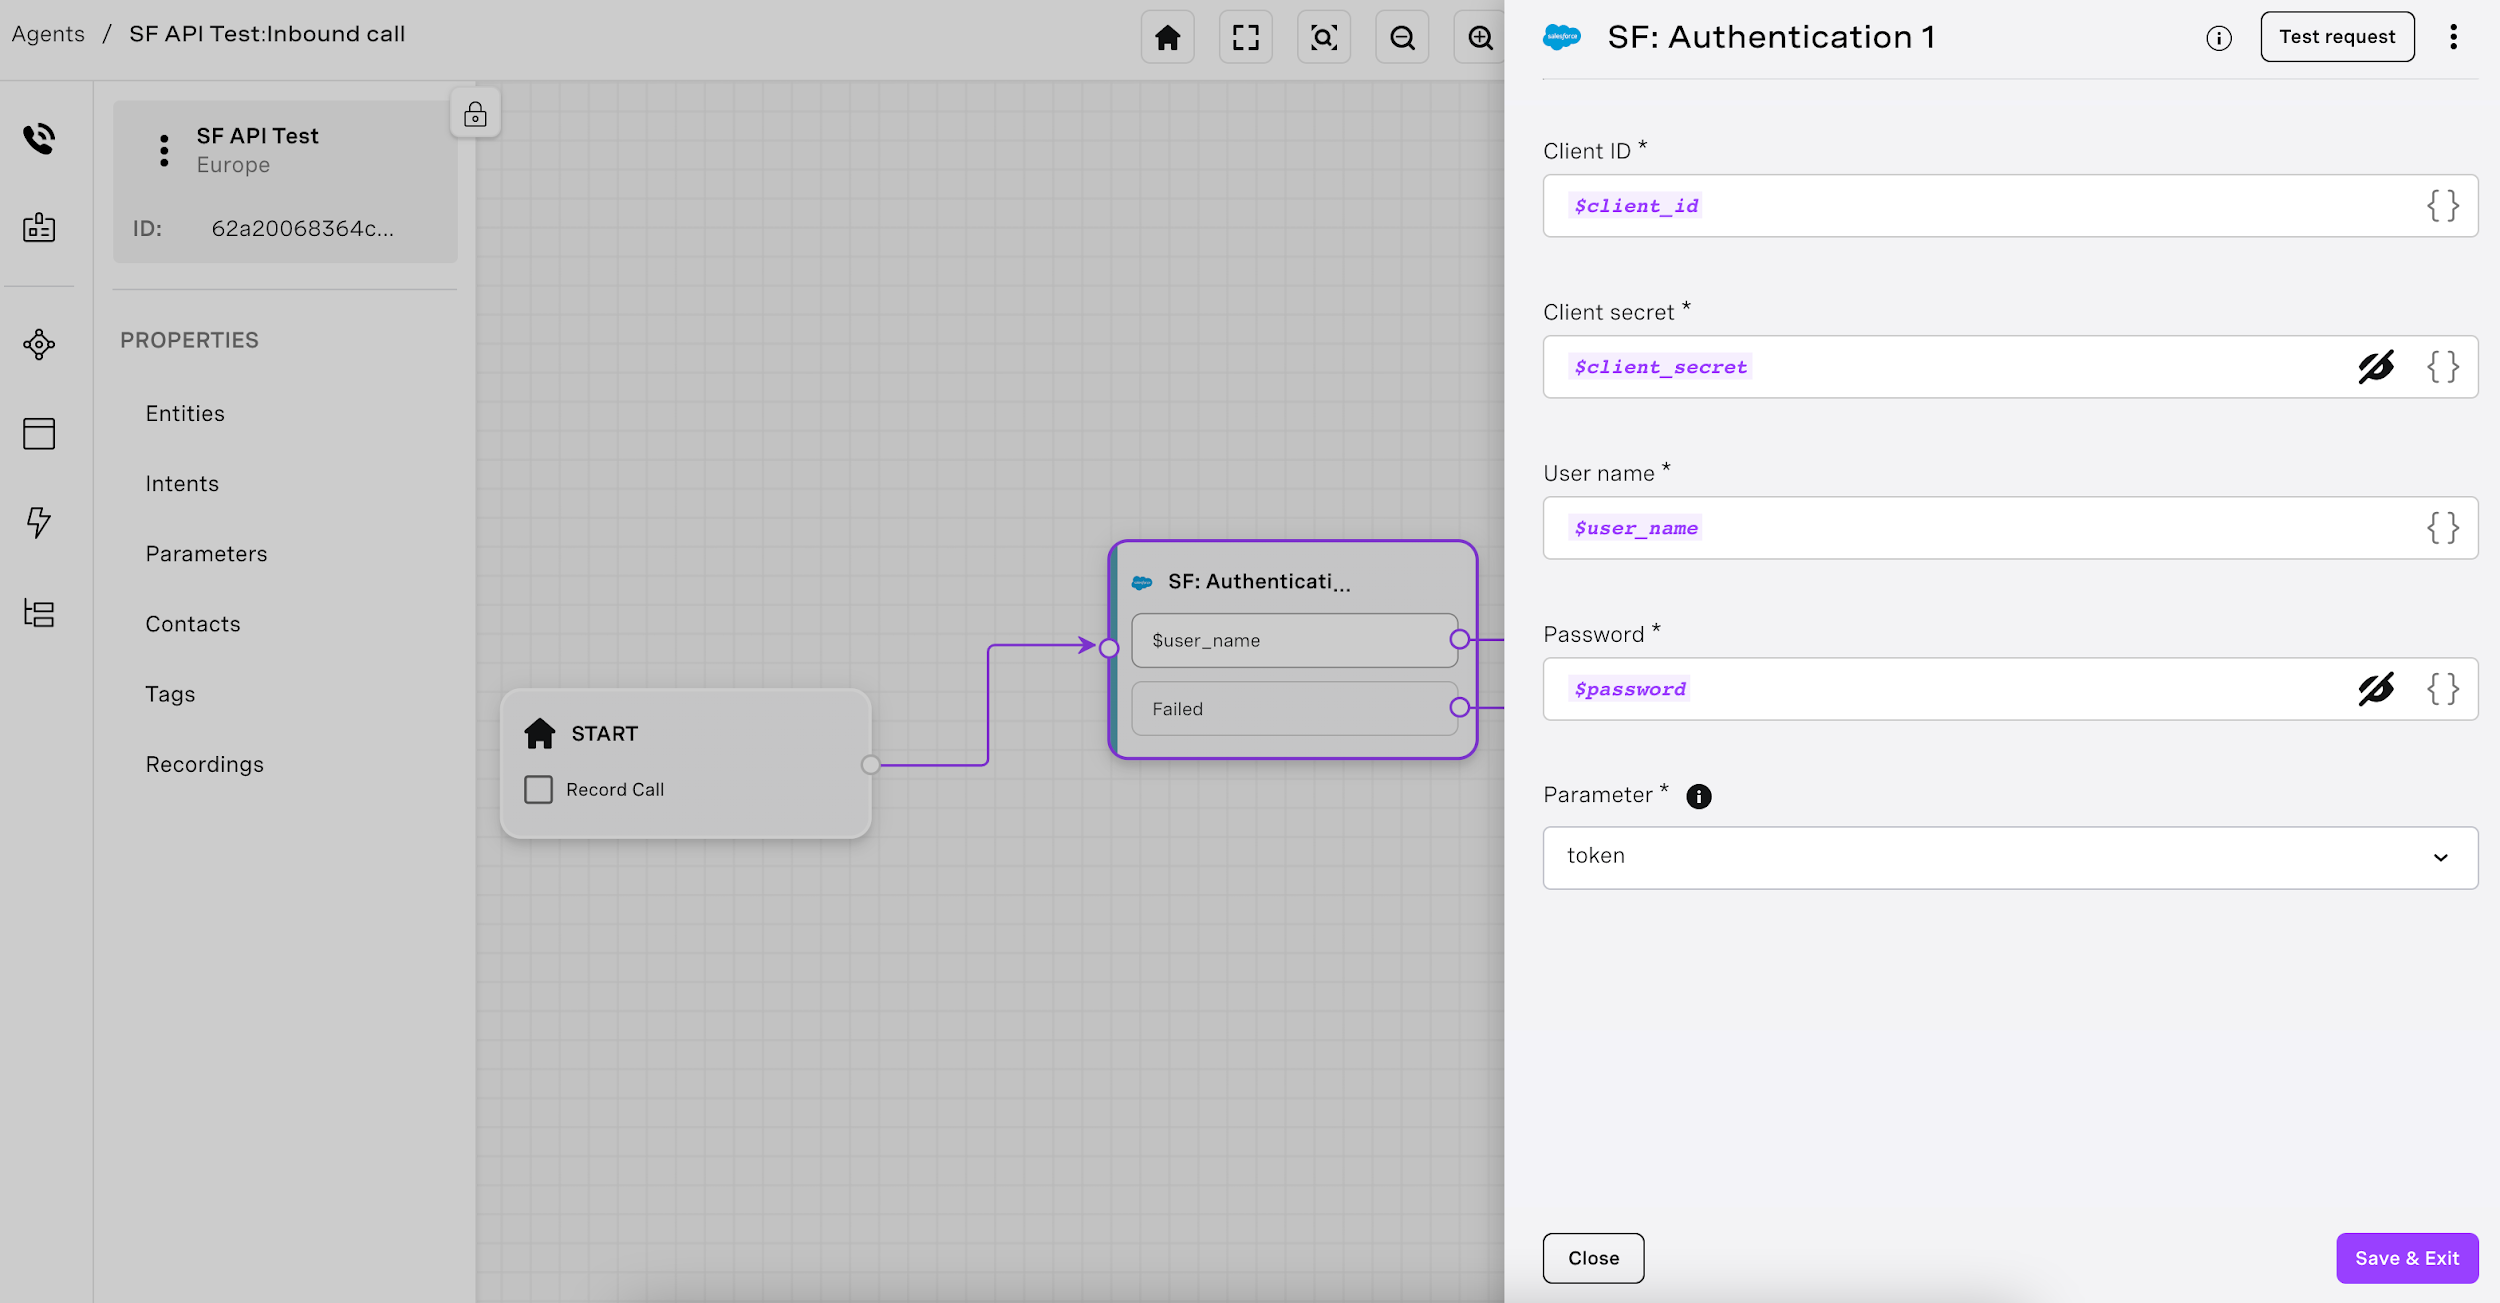
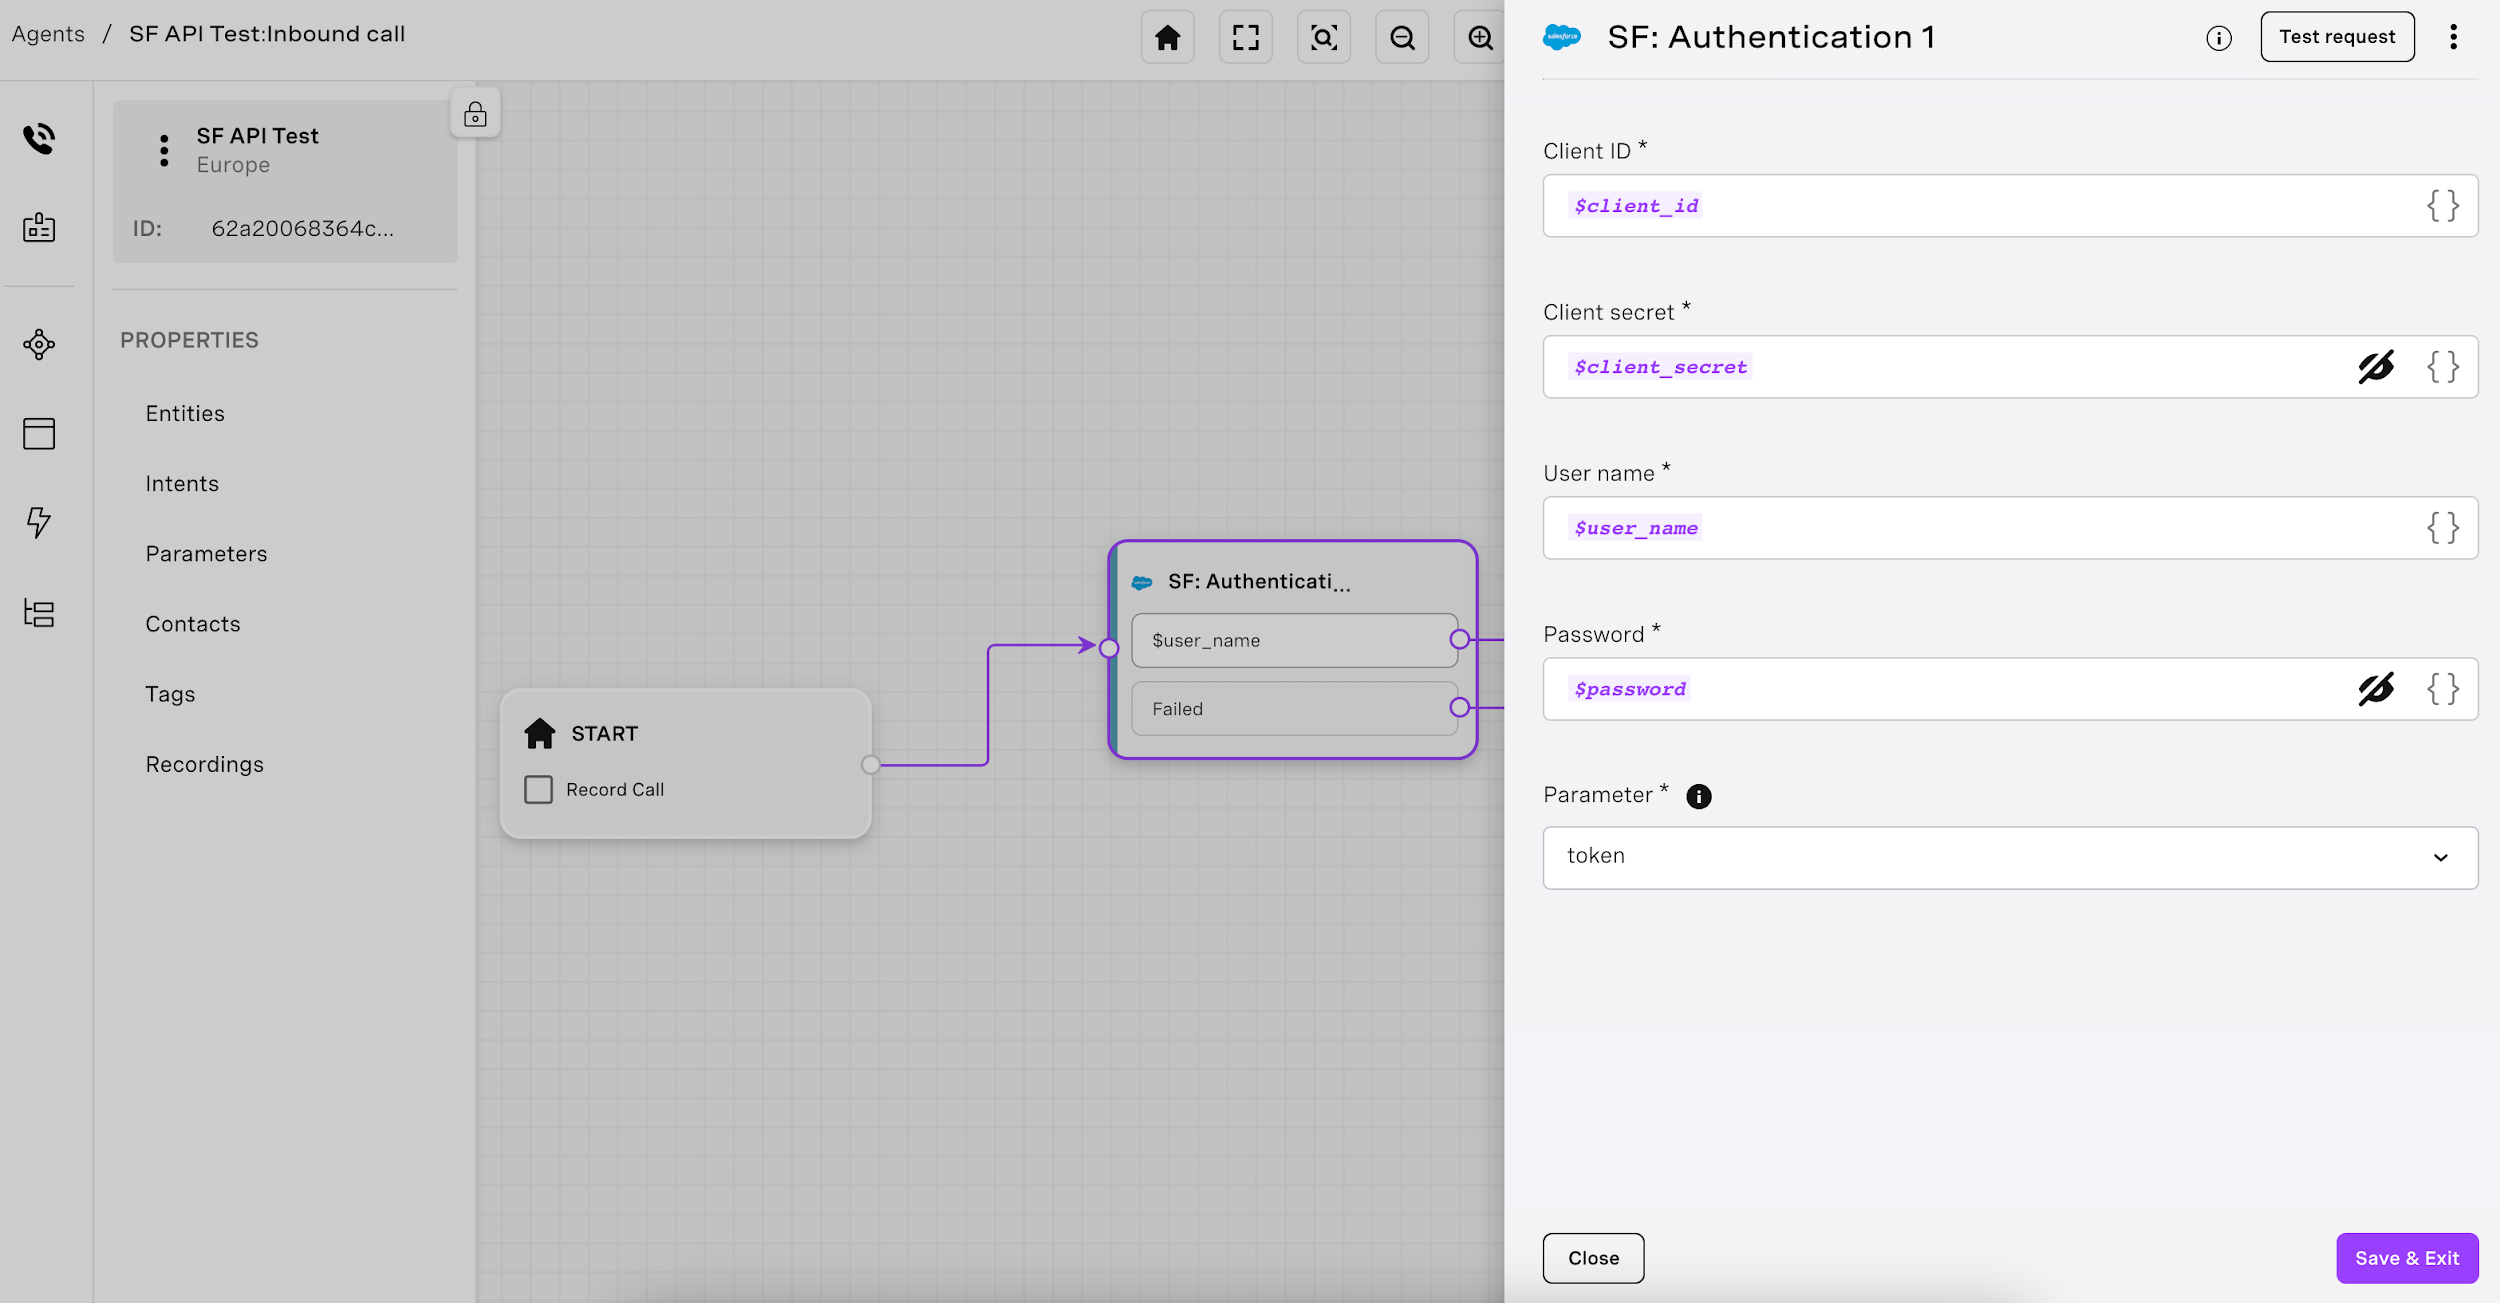
We’re changing the way you integrate! SalesForce Integration can now be set up directly from the API dashboard, learn more [here!](https://studio.docs.ai.vonage.com/voice/nodes/integrations/salesforce-authentication)
### March 24, 2024
Outbound Call Rate Limits Changed for Voice, WhatsApp and SMS Agents
All outbound calls and sessions are now limited to 1 per second. To increase your outbound limits to either 3 or 5 calls/sessions per second, please email [support@aistudio.vonage.com](mailto:support@aistudio.vonage.com) with the following details:-
* API key
* Agent ID(/s)
* Increase request: You can choose to increase your limit to 3 or 5 calls per second.
Once you receive confirmation from our teams that your request has been processed, please publish your agents and wait for about 5 minutes before you start triggering any new outbound calls.
Please note that if your agent is not approved for a higher limit, any call or session made over the 1 call/session per second limit will fail and return a 429 error!
### March 6, 2024
UI/UX Updates!
Based on some of the early feedback we received, our developers made a bunch of updates to Studio's UI!
### February 21, 2024
We now support Outbound Calls to SIP endpoints. Learn more [here](https://studio.docs.ai.vonage.com/voice/get-started/telephony).
### January 24, 2024
New dialect release!\
You can now access English (Canada) in all four channels within AI Studio.
### December 20, 2023
New UI release!
Our developers worked hard to release a more user-friendly version of AI Studio. Let us know what you think by leaving feedback [here.](https://studio.ai.vonage.com/support)
### September 11, 2023
GenAI Node phase 2 released!
With new features including Actions, the process of configuring your virtual assistant with the power of GPT has become much more efficient!
### August 21, 2023
GenAI Node beta release!! Learn more about the node [here.](https://studio.docs.ai.vonage.com/voice/nodes/integrations/generative-ai)
### July 18, 2023
Call ping timeout increased to 30 seconds from 10 seconds
* This means that now you can choose to control the timeout for the [Webhook](https://studio.docs.ai.vonage.com/voice/nodes/integrations/webhook) and [NCCO](https://studio.docs.ai.vonage.com/voice/nodes/telephony/ncco-node) node.
### May 14, 2023
New premium voices were made available on the Voice channel!
* You can choose from a wide variety of human-sounding voices for your voice agents. Learn more about Voices [here](https://studio.docs.ai.vonage.com/voice/get-started#voices-offered).
### April 9, 2023
Added Polish Language
* Learn which languages are supported [here](https://studio.docs.ai.vonage.com/theres-more/languages-available).
### March 26, 2023
Enable/Disable webhook signature - learn more [here](https://studio.docs.ai.vonage.com/voice/nodes/integrations/webhook#webhook-signing).
# Create a new agent
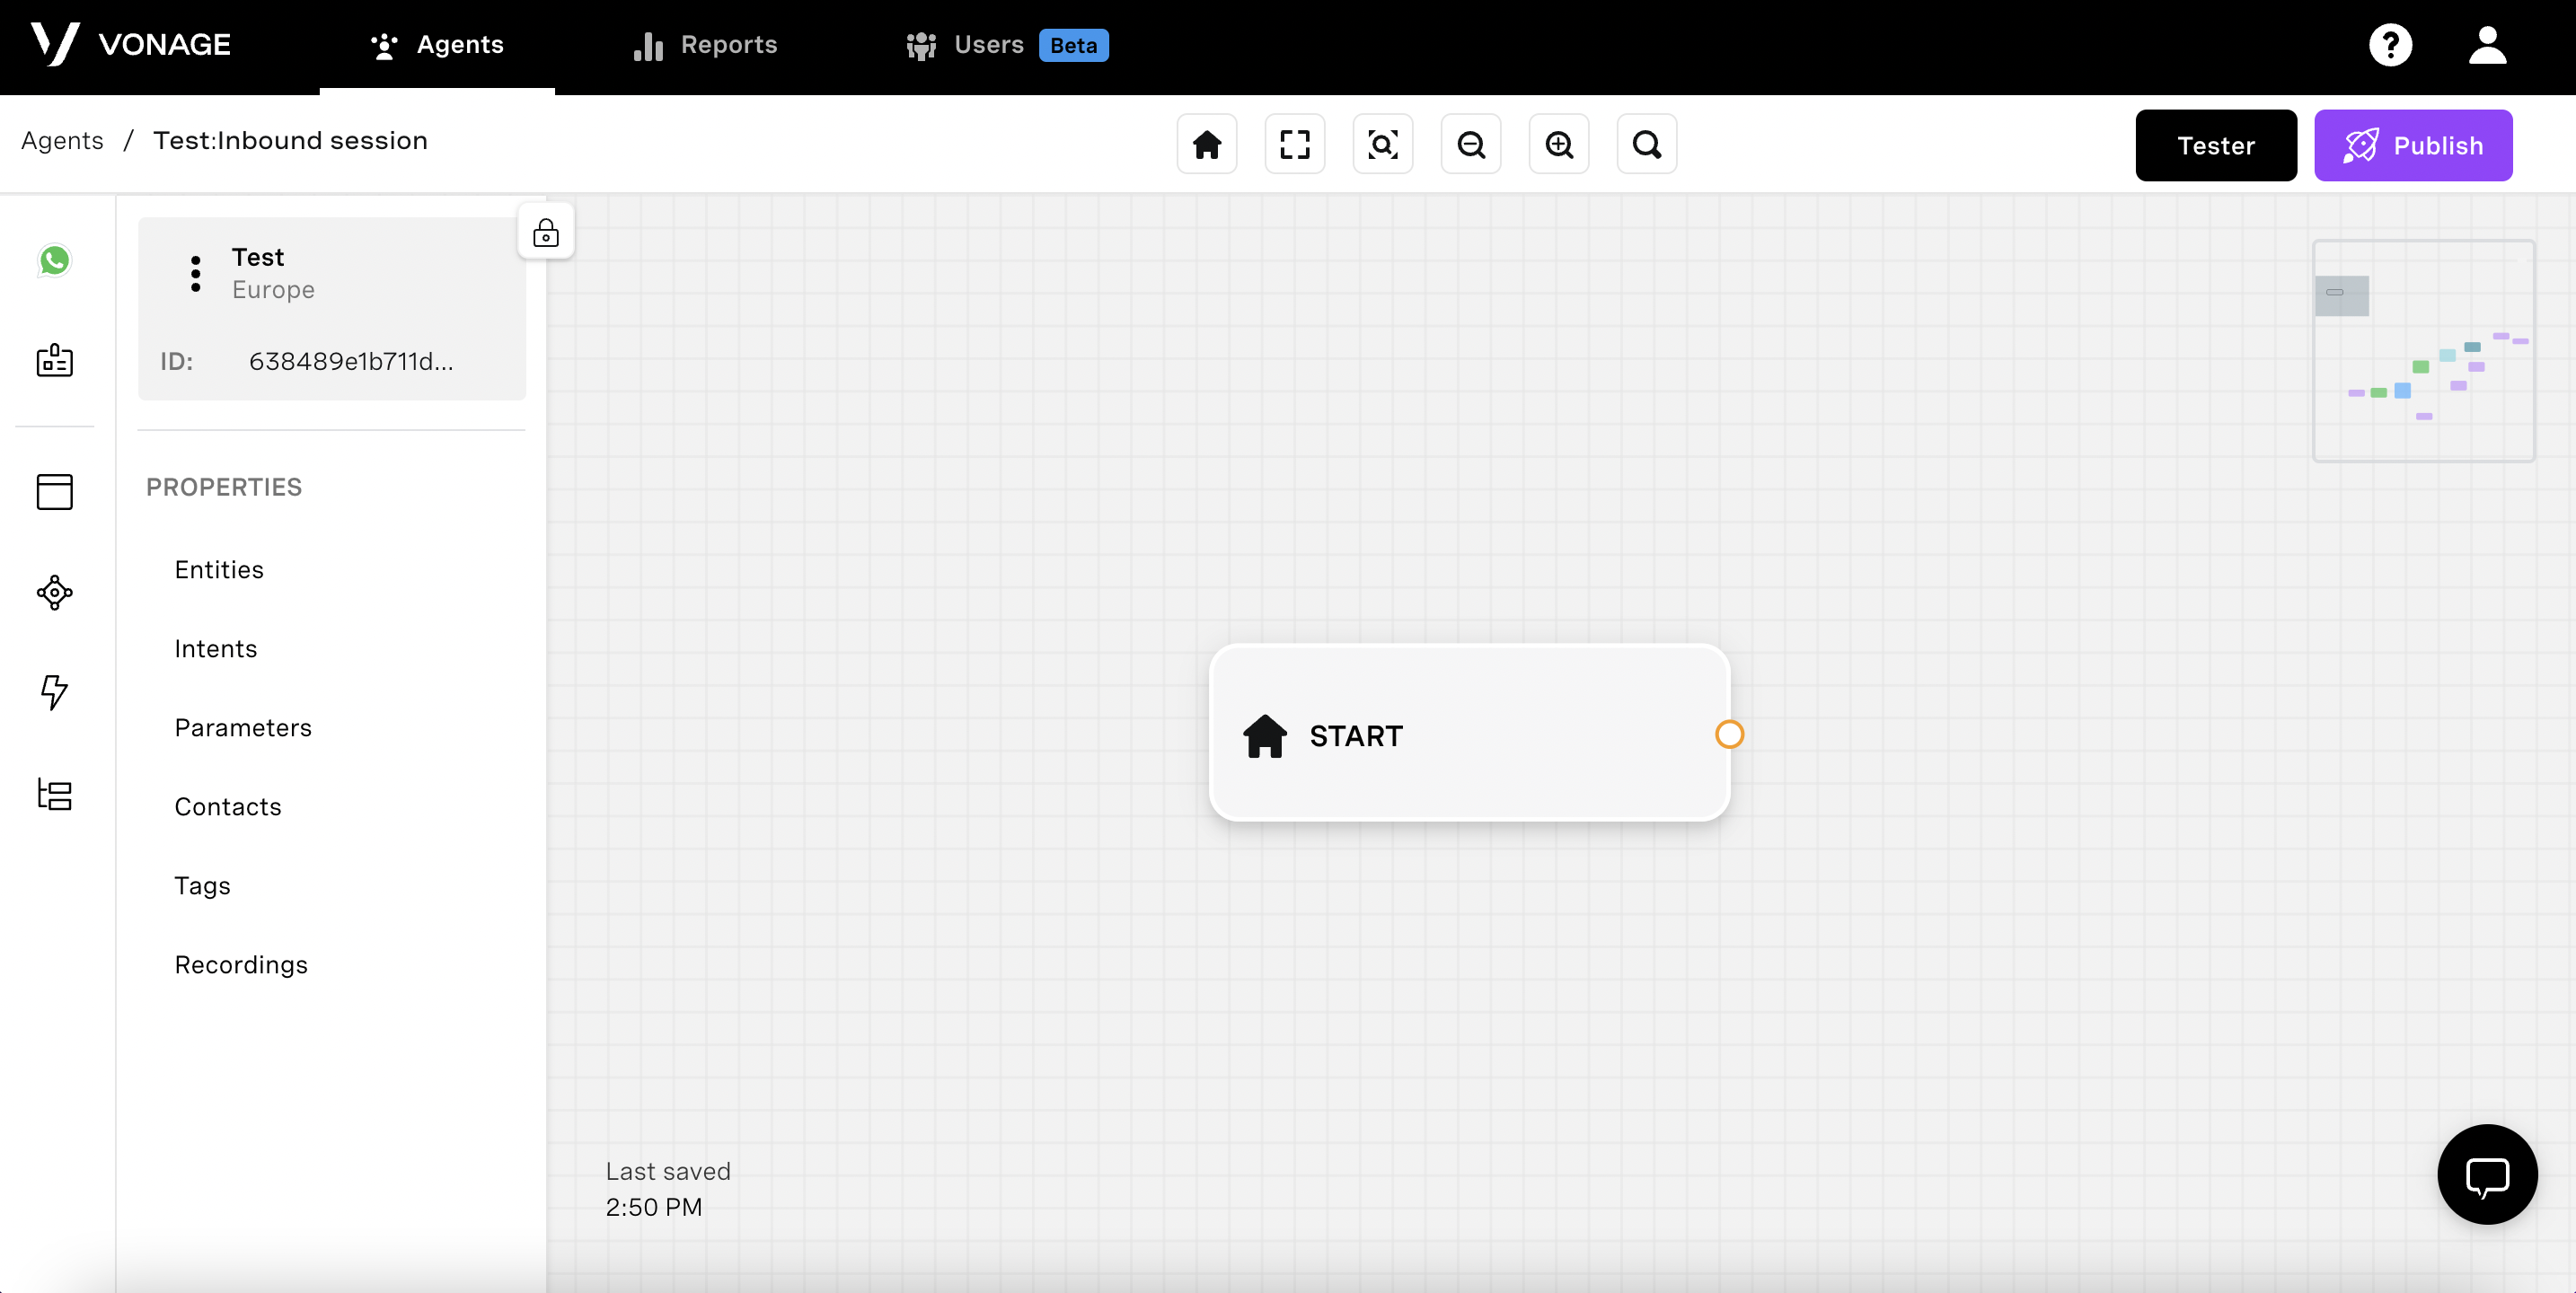
The **Agents tab** allows you to create, modify, customise, and deploy Vonage AI’s virtual agents. Agents are presented in a box view by default, allowing you to easily access the desired agent and get key information about it at a glance.
Each Vonage AI account can include an unlimited amount of agents, so you can create multiple experiences under one unified account.
To create your first virtual agent, click on the “**Create Agent**” button on the top right side of the screen.
{% hint style="info" %}
*If you have previously exported an agent to your device, you can also import an agent by clicking on "**Import Agent**" on the top right.*
{% endhint %}

## **Step 1 - Just one click!**
Once you have clicked the "**Create Agent**" button on the top right, you will be prompted to select the agent type. Our platform accommodates voice as well as text-based agents. Select [Telephony](https://studio.docs.ai.vonage.com/voice/get-started) for a voice-based flow, [WhatsApp](https://studio.docs.ai.vonage.com/whatsapp-chatbot/whatsapp-chatbot) for a text-based WhatsApp integrated bot, [SMS](https://studio.docs.ai.vonage.com/whatsapp-chatbot/sms-chatbot-coming-soon) for a chatbot you can interact with using your mobile, and [HTTP](https://studio.docs.ai.vonage.com/api-integration/working-with-http-agents) for a web-based chatbot.

### Step 2 - Add all relevant agent information
* **Region:** Choose whether your agent is being used in the US or in Europe. The region will ensure the agent's quick response time.
* **Agent Name:** You can give your agent a unique name that will reflect its purpose. The name can be changed at any point and is meant for your eyes only.
* **API Key**: This shows your Nexmo account or sub-account key. This is useful when you want to associate a phone number to your agent via the API dashboard.
* **Language:** Select the language of your agent. Once you choose a language, you won’t be able to change it for that specific agent. We currently support English, German, Hebrew, Spanish, Arabic, French, and Dutch in Alpha version - many more languages to come in the near future!
* **Select Voice** (*For voice agents only*): Select the Voice of your agent. Depending on the language you chose previously, you can pick from different voices and accents in that language. You can add a test sentence you would like to hear the agent speak in a particular voice - click play to listen.
* **Time Zone:** Choose the time zone that your agent will operate in. For example, if you build the agent in London, but it’s meant to be used in New York, it’s better to define the agent time zone as EST. All reports for the agent will be generated accordingly. You can change the time zone and the name of your agent at any time.

### Step 2 - Pre-created template or starting from scratch?
You can choose to either create an agent from scratch or add a ready-made template agent to your account. If you choose to work on a template, you can still make changes and customize it to fit your unique needs.

### Step 3 - And lastly, select if you want to start with an inbound or outbound agent
This can be **either an inbound call or outbound call event**, depending on whether you need your agent to make the calls or be called directly. You don’t have to settle on just one event type for your agent. Later on, if needed you can add other events.
For more information on events, click [here](https://studio.docs.ai.vonage.com/voice/events).

### Step 4 - Go wild!
Congratulations! You can now create your conversational flow - node by node.
If you need help, follow these easy steps for a [Voice](https://studio.docs.ai.vonage.com/voice/get-started/create-your-first-conversational-flow), [WA](https://studio.docs.ai.vonage.com/whatsapp/get-started/create-your-first-conversational-flow), [SMS](https://studio.docs.ai.vonage.com/sms/get-started/create-your-first-conversational-flow) or [HTTP](https://studio.docs.ai.vonage.com/http/working-with-http-agents/create-your-first-conversational-flow) agent. Happy exploring!

# NLU AI Engine - Traditional vs Hybrid
⚠️ This feature is in public beta. You're encouraged to explore and share feedback. It’s production-ready, but may change as we improve based on real-world use.
{% hint style="info" %}
#### What is an NLU AI Engine?
**Natural language understanding** (NLU) is a subtopic of natural language processing in artificial intelligence that deals with machine reading comprehension.
Language understanding is a fairly complicated task as it involves understanding the meaning of the sentence, extracting the entities, and making a decision regarding the action to be taken.
The NLU's ability to understand the user relies on **training in knowledge domains.** This means that we can expand NLU capability to understand new domains by adding a new knowledge domain for it to train on.
The main goal is to **understand user textual input and convert it into structured data** that holds, among other things, the extracted entities, an action to be taken, and a textual response for the user.
Learn more [here](https://studio.docs.ai.vonage.com/properties-1/intents/the-meaning-of-nlu).
{% endhint %}
## Introducing Hybrid NLU
AI Studio’s Hybrid NLU introduces a significant advancement in language understanding by combining rule-based logic with transformer-based models from Google Gemini.
This hybrid approach enhances both intent recognition and entity extraction by leveraging contextual understanding and semantic nuance, rather than relying solely on predefined patterns. The result is a more accurate and flexible NLU system with minimal configuration required.
{% hint style="info" %}
#### Benefits of Using Hybrid NLU
1. **Boosts Performance**: Up to 20% better intent detection and improved entity extraction (based on internal VAI testing), leading to higher Virtual Agent containment rates and fewer human escalations. That means smoother experiences and real cost savings.
2. **Reduces Manual Effort**: No more wrestling with giant synonym lists or rigid classification trees. Hybrid NLU handles nuance with minimal training.
3. **Accelerates Language Support**: Onboarding new languages is faster and more flexible, making it easier to adapt to evolving customer needs. You can find all available languages [here](https://studio.docs.ai.vonage.com/theres-more/languages-available#hybrid-nlu).
4. **Built to Scale**: Ideal for global rollouts, this model makes your VA more robust, responsive, and context-aware from day one.
{% endhint %}
***
## How to get started
This guide provides step-by-step instructions for **building**, **training**, and **optimizing** Virtual Agents using the Hybrid NLU model.
{% stepper %}
{% step %}
### Select the Right AI Engine
When creating or duplicating an agent, you will see an AI Engine dropdown with two options:
* Hybrid NLU 🚀
* Traditional NLU
{% hint style="danger" %}
**Once a Virtual Agent is created, the AI Engine cannot be changed later.** Choose carefully during setup. However, if you still need to change the AI engine, then you will have to duplicate/ import an existing VA and choose the appropriate AI engine.
{% endhint %}
{% endstep %}
{% step %}
### Create your Intents
With the Hybrid NLU, training just got a whole lot smarter! Keep these best practices in mind to get the most out of your intents.
| Do | Don't |
| ----------------------------------------------------------------------------------------------------------------------------------------------------------------------------------------------------------------------------------------------------- | ------------------------------------------------------------------------------------------------------------------------------------------- |
|
Use full, rich sentences for training your intents to give better context.
Example:
✅ "I’d like to book a reservation for Saturday."
|
Don’t rely on single-word expressions unless absolutely necessary.
Example:
❌ "Reservation"
|
| ✅ Keep your user expressions meaningful but concise - quality over quantity. | ❌ 10 near-identical expressions - don’t flood intents with redundant data. |
|
Flatten your classification design - Hybrid NLU handles nuanced intent detection better without complex hierarchies.
Example: ✅ Use standalone intents like “Check account balance” instead of nested flows.
| ❌ "Banking > Balance > Checking" - don’t overcomplicate with rigid parent-child trees. |
| {% endstep %} | |
{% step %}
### Define Custom Entities
*The New Hybrid NLU allows these methods to define custom entities:*
**Description**
Write natural language rules about what the entity should capture. Use this when the entity has a clear structure but no predefined values.
*Example:*
> *“Order number consists of four letters, an underscore, and four digits.”*
**Both Description and Closed List**
Provide a list of acceptable values and optional synonyms - Ideal for well-bounded value sets.
*Example:*
> *Entity: communication\_type*
>
> *Description: "The method someone wants to use to communicate."*
>
> *Values and synonyms:*
>
> *Phone → "call", "phone call", "mobile"*
>
> *Fax → "facsimile", "fax message"*
>
> *Email → "e-mail", "mail"*
{% hint style="success" %}
#### **Pro Tip**
**Using Closed Lists?**
Toggle “*Enable fuzzy matching*” checkbox to leverage closed lists with low training data (i.e, synonyms for values in closed list). If this checkbox is not selected, Hybrid NLU will attempt to search for exact matches of the values or synonyms provided in the closed list.
{% endhint %}
### 💡 **Best Practices for Using Hybrid NLU Effectively for Entity Extraction**
Entities are crucial in organizing and managing information in your Virtual Agent effectively. [Here’s](https://studio.docs.ai.vonage.com/properties-1/entities) more information on how to create impactful entities.
{% hint style="success" %}
#### **Pro Tip**
Want to **boost your Hybrid NLU entity**? Explore our [**curated prompt library**](https://studio.docs.ai.vonage.com/properties-1/entities#prompt-library-for-commonly-used-entities-and-corrector-functions) for crafting the best prompts.
{% endhint %}
| Do | Don't |
| ---------------------------------------------------------------------------------------------------------------------------------------------------------------------------------------------------------------------------------------------------------------------------------------------------------------------------------------------------------------------------------------------------------------- | ---------------------------------------------------------------------------------------------- |
|
Define custom entities with a clear, natural-language Description (up to 500 characters). Think of it as writing a prompt for the AI - the more precise and detailed you are, the more accurate the extraction will be.
Example:
✅ entity name: delivery\_method
✅ description: “The way the item is sent, such as mail, email, or fax.”
| ❌ No description or vague labels like "method" - poor prompts = poor extraction. |
|
Use both Closed Lists and Descriptions for critical entities when maximum precision is needed.
Test your entities thoroughly using the VA Tester after each major update.
Example: ✅ Simulate user input like “Can I get a transcript from last semester?” to verify behavior.
| ❌ Don’t assume the VA behaves the same as Traditional NLU - always revalidate. |
| {% endstep %} | |
{% step %}
### Test and Iterate
Use the AI Studio Tester on the right of the canvas to:
1. #### Validate intent detection
2. #### Verify entity extraction
3. #### Identify any gaps or edge cases early
{% hint style="info" %}
*During testing, compare the new Hybrid NLU behavior against the legacy NLU expectations:*
*Expect better accuracy, but slightly slower response times (\~100ms extra), which are imperceptible to end users.*
{% endhint %}
{% endstep %}
{% endstepper %}
***
## Migration Tips for Existing VAs
*Not ready to start from scratch? Duplicate an old VA to the new Hybrid NLU.*
{% hint style="info" %}
Migrations should be tested thoroughly before going live.
{% endhint %}
{% stepper %}
{% step %}
Select "Hybrid NLU" AI Engine during duplication.
{% endstep %}
{% step %}
Review and possibly simplify your classification nodes.
*Flatten your classification design - Hybrid NLU handles nuanced intent detection better without complex hierarchies.*
{% endstep %}
{% step %}
Add richer user expressions if your old VA relied heavily on single-word triggers.
*Check out the above-mentioned best practices for intent classification with the new Hybrid NLU.*
{% endstep %}
{% step %}
Redefine custom entities using the new "Description" field for better performance.
*Traditional NLU to Hybrid NLU will show an error with custom entities, and this error will have to be resolved by adding a “Description” for custom entities.*
{% endstep %}
{% endstepper %}
***
{% hint style="success" %}
#### Pro Tips
* **Smarter AI needs smarter input**: think about context and clarity in your expressions and entities.
* **The New Hybrid NLU minimizes manual effort**, but a good initial design is still crucial.
* **Stay updated:** More improvements will be rolled out, including further documentation and best practices based on community feedback.
{% endhint %}
# Agentic NLU AI engine
## Introducing Agentic NLU: Vonage’s most advanced AI engine yet
Powered by cutting-edge NLU and autonomous agents, Vonage's Agentic NLU AI engine enables virtual assistants to understand context, make decisions, and take action, turning static scripts into intelligent, goal-driven conversations.
{% hint style="warning" %}
**Gated feature**
Agentic NLU is currently a gated feature. For more information, please contact Vonage Support or your Account Manager.
{% endhint %}
### How an AI Agent works
To fully leverage Agentic NLU, it is essential to understand that an AI Agent operates in a continuous loop of perception, planning, and execution.
{% stepper %}
{% step %} **Perception**
The agent observes the user’s input.
*Example input:* "I want to fly to London tomorrow."
{% endstep %}
{% step %} **Goal identification**
The agent identifies the user's specific objective based on the input received.
*Goal:* Book a flight to London for tomorrow.
{% endstep %}
{% step %} **State evaluation**
The agent assesses what it knows vs. what it needs.
*Current State:* Missing departure time.
{% endstep %}
{% step %} **Planning**
The agent generates a sequence of steps to reach the goal.
*Steps:* Ask for time → Search flights → Offer options → Confirm booking
{% endstep %}
{% step %} **Action selection**
The agent selects the next best move based on the plan (e.g., asking a question or calling an API).
*Action:* “What time would you like to depart tomorrow?”
{% endstep %}
{% step %} **Execution**
The agent acts and updates the state.
*User response:* “Evening.”
{% endstep %}
{% step %} **Goal check**
The agent checks if the goal is met.
* If the goal is met, the agent marks the goal as completed.
* If the goal is not met, the agent loops back to Step 4 to refine the plan.
{% endstep %}
{% endstepper %}
### **Why Agentic NLU is unique**
{% hint style="success" %}
**Pro Tip**
If your current flows rely heavily on complex NLU mapping and repetitive input nodes, switching to Agentic NLU can significantly reduce your maintenance burden.
{% endhint %}
Agentic NLU allows virtual agents (VAs) to engage in dynamic, natural interactions without relying on predefined flows. It is designed to provide human-like intelligence at every touchpoint while maintaining the reliability of deterministic actions.
For builders: Effortless configuration
For the VA builders, Agentic NLU represents a shift from explicit logic mapping to objective-oriented configuration:
* **De-cluttered flow design:** A single Agentic Capture node can replace multiple Collect Input nodes. Additionally, Agentic nodes have the entire communication layer (Speak & Listen) preconfigured and running in the backend.
* **Low training overhead:** Define intents with a simple description and a few examples rather than hundreds of user expressions.
* **Instant configuration:** Add or update intents and parameters instantly using natural language instructions (LLM prompts), drastically reducing manual training data requirements.
* **Robust voice handling:** Built-in fuzzy matching automatically corrects Automatic Speech Recognition (ASR) transcription errors, preventing unnecessary call failures.
* **Pre-configured governance:** Each Agentic node includes built-in system instructions, goals, safety guardrails, and memory configurations.
* **End-to-End Agentic Architecture:** The Agentic NLU Template enables you to route 100% of callers' conversations via AI Agents, providing human-like intelligence at every stage of the interaction.
For callers: An intuitive experience
Agentic NLU creates an authentic conversational experience where callers feel understood, not just processed.
* **Natural, free-flowing dialogue:** Callers speak naturally without needing to follow a script or specific keywords.
* **Multi-parameter capture:** An Agentic node can extract multiple pieces of information (e.g., date, destination, and time) from a single caller utterance.
* **Dynamic context switching:** If a caller shifts topics mid-flow, the Agentic node recognizes the change request and transitions smoothly to the new topic without restarting the conversation.
* **Automatic contextual responses:** The engine generates smart replies to handle ambiguity or invalid input, providing corrective guidance without manual scripting.
* **Proactive frustration detection:** Identifies escalation triggers based on repeated failures or unmet goals before a caller even asks for a human.
### Agentic NLU limitations
* Available for voice agents and English language only.
* An Agentic Response is automatically generated by LLMs and cannot be manually defined by Studio users.
* Retry behavior and reconfirmation behavior are predefined and cannot be altered manually.
* When using Agentic NLU, AI engine selection becomes fixed and cannot be changed.
* Agentic NLU uses a different set of components and architecture from Hybrid NLU or Traditional NLU, preventing cross-engine migration.
* Once an agent is created with Agentic NLU, it cannot be switched to another NLU engine.
* Agents built with the Hybrid NLU or Traditional NLU engines cannot be imported or duplicated into Agentic NLU.
* Similarly, agents built with Agentic NLU cannot be converted to Hybrid NLU or Traditional NLU.
* Agents built on the Agentic NLU engine are not supported by [Virtual Assistant Historical Analytics](https://docs-vcc.atlassian.net/wiki/spaces/DP/pages/5726535743/Virtual+Assistant+Historical+Analytics). To capture and report session data, use Traditional NLU or Hybrid NLU.
***
## Understanding the architecture: Agentic nodes
Agentic NLU relies on two specialized AI Agents implemented as Agentic nodes. These nodes structure how conversations are handled, ensuring that every caller's input is evaluated and routed appropriately through a continuous reasoning loop, enabling fluid, goal-driven interactions.
#### **Agentic Classification node (The Hub)**
As the Hub, this node serves as the assistant's central brain. It identifies the caller's intent or topic at each stage of the conversation and routes the flow accordingly. It includes key functionalities such as:
* **Intent recognition:** Classifies the caller's input against Agentic Intents to determine the most relevant intent or topic.
* **Global Intent support:** Recognizes and processes global intents (e.g., “Cancel,” “Talk to agent”) when configured.
* **LLM-powered matching:** Employs large language models (LLMs) for prompt-based classification, requiring minimal training data.
* **Outcome handling:** Delivers one of three outcomes, Success, Missed, or Failed, based on the classification result.
* **Intent storage & Agentic fallbacks:** Records the detected intent for downstream use. If no match is found, it automatically generates an informed response suggesting available intent options.
* **Isolated testing:** Features a Save and Test option for standalone classification performance testing during configuration.
#### **Agentic Capture node (The Branch)**
As a Branch, this node functions as the specialist. It is triggered by the Hub to gather the specific data points (parameters) needed to fulfill a chosen intent. It includes key functionalities such as:
* **Intent tracking:** Continuously monitors the active intent and recognizes context changes (e.g., switching to a new intent during a conversation).
* **Multi-parameter capture:** Acquires multiple parameters within a single process when required to complete an intent.
* **Retry handling:** Facilitates parameter retries to ensure accurate value capture in the desired format.
* **Reconfirmation support:** Validates captured parameter values with callers, particularly valuable in voice interactions where ASR errors occur frequently.
* **Agentic responses:** Automatically produces contextual replies to address incomplete or incorrect caller's inputs, maintaining conversation fluency.
* **Proactive escalation detection:** Detects potential escalation scenarios during interactions and pinpoints the specific parameter that triggers them. Escalation is managed automatically — no additional setup needed.
{% hint style="info" %}
**The hub-and-branch loop**
The conversation remains within the Agentic Capture node (the Branch) until the task is complete or an escalation is triggered. If the AI Agent detects a topic shift, it triggers an “Intent Change” scenario. This seamlessly routes the caller back to the Agentic Classification node (the Hub) to re-evaluate the request and re-orient the flow.
{% endhint %}
For instructions on creating and configuring an Agentic NLU agent, see:
{% content-ref url="/pages/c3xdhgHFXr9kHMVQeUyM" %}
[Building an Agentic NLU agent](/ai-studio/agentic-nlu-ai-engine/building-an-agentic-nlu-agent)
{% endcontent-ref %}
***
## Reports: Call logs
Every conversation is logged and visible under **Reports.** Call logs show input, detected intent, captured parameters, and, if capture failed, the reasons for escalation. You can use call logs to improve coverage and adjust flows.
The Call log modal consists of the following elements:
* **Session Information:** Summarizes essential call details: agent name, event type, caller and agent phone numbers, date and time, and session ID.
* **Transcript:** Contains the full agent-caller conversation transcript, clearly indicating who spoke and when.
* **Parameters**: Displays all parameters captured during the call, showing exactly how input was processed and where it succeeded or failed.
* **Flow Path**: Displays a complete trail of every node triggered during a call. Additionally, it exposes the underlying Communication Layer to ensure full transparency:
* It displays a count of the total number of nodes used from the Communication Layer across all conversation loops.
* Every node activated throughout the session is documented, showing the specific order of the "Perceive-Plan-Act" cycle.
* You can access the Input and Output details for each node within the loop by selecting the "Show More" option.
* It provides the status code for every triggered node, confirming successful execution at each step.
To access call logs, perform the following steps:
1. Navigate to **Reports** in the black ribbon at the top of the screen.
2. Select **Reports** from the dropdown menu.
3. In the Generate Report section, select **Call Log** as the Report type.
4. The session list updates automatically. Click the session ID of the session you wish to inspect.
***
## Migration and Compatibility
To duplicate your Agentic NLU agent, perform the following steps:
1. Find the agent you want to duplicate.
2. Click **More Actions** (⋮) and select **Duplicate**.
3. Edit the fields available in the Duplicate Agent modal.
4. Click **Duplicate Agent** to save your new VA.
To import an Agentic NLU agent, perform the following steps:
1. Click **Import Agent** on the right-hand side.
2. Upload or drag and drop the zip file with your agent.
3. The fields in the Import Agent modal autopopulate with the agent's information. You can check and edit them if required.
4. Click **Import Agent** to save your new VA.
# Building an Agentic NLU agent
Use this guide to create and configure a working Agentic NLU Virtual Assistant (VA), from initial agent setup to a fully designed conversation flow.
{% hint style="warning" %}
**Prerequisite**
Agentic NLU is a gated feature and must be enabled for your account. For more information, see the [Agnetic NLU AI engine](/ai-studio/agentic-nlu-ai-engine) page.
{% endhint %}
The process covers two phases:
1. **Create the agent.** Complete the setup wizard to configure your agent's basic settings. At the end of this phase, you have an empty agent with no active flow.
2. **Design the flow.** Define your intents and parameters, then configure your Agentic nodes to build a working conversation flow.
## Create the agent
{% stepper %}
{% step %}
### **Choose the right agent type**
Selecting the Telephony agent type to begin the creation process.
When creating an agent, you are prompted to select an agent type. To access the features described on this page, choose **Telephony** as your agent type.
{% hint style="warning" %}
**Limited availability**
Currently, Agentic NLU is only available for voice agents.
{% endhint %}
{% endstep %}
{% step %}
### **Choose the right AI engine**
Choosing the Agentic NLU engine to enable autonomous decision-making and context-based goals.
When prompted to select an AI engine, select **Agentic NLU**.
{% hint style="danger" %}
**No backward compatibility**
If you create an agent with the Agentic NLU AI engine, you cannot change it to Hybrid NLU/ Traditional NLU by editing or duplicating the agent, and vice versa.
{% endhint %}
{% endstep %}
{% step %}
### **Fill in the Details page**
The following fields are available for configuration:
Field
Options
Description
Region
List of available options
Select the geographical data center where your agent’s data and traffic will be processed. Available options are the United States and Europe.
Agent Name
Text
A unique internal label used to identify the agent within your dashboard.
Agent Description (Optional)
Text
A summary of the agent’s use case. Provides context to the AI engine to improve goal alignment and serves as an internal reference.
API Key
List of available options
Select the specific Vonage API Key that will be used to authenticate and bill the agent’s activity.
Language
List of available options
Define the primary language the agent will use to communicate and process NLU intents. Currently, only English (United States) is available
Voices
List of available options
Select the Text-to-Speech (TTS) voice profile and accent that best fit your brand's persona.
Time Zone
List of available options
Set the agent's local time zone, which dictates how time-based conditions and scheduling logic are executed.
You can view and edit these details later.
{% hint style="warning" %}
**Language**
Once selected, you cannot change the agent's language.
{% endhint %}
{% endstep %}
{% step %}
### **Choose the right VA template**
The Choose Template screen offers the option to start from a blank canvas or use a preconfigured Agentic NLU Template.
You can create an Agentic NLU agent using two different approaches:
* **Agentic NLU Template:** AI Studio provides a ready-made template that pre-configures the Agentic Classification and Agentic Capture nodes in an optimal "hub-and-branch" model. This is the fastest way to maximize the benefits of the Agentic NLU engine with a proven architectural structure.
* **Start from Scratch:** For full control over your conversation logic, you can start from a blank canvas and manually add Agentic nodes from the node canvas. This allows you to integrate Agentic reasoning into existing rule-based workflows or create unique hybrid architectures.
{% endstep %}
{% step %}
### **Choose the right type of Event**
To utilize Agentic NLU, you must select either Inbound Call or Outbound Call as your triggering event:
* **Inbound Call:** The most common trigger; the agent activates immediately when a user calls the assigned number.
* **Outbound Call:** Enables the agent to dial a user’s number to start a session proactively.
* **End Call:** A post-session trigger that allows the agent to continue specific background tasks or data processing after the main call has ended.
* **API Event:** Uses 3rd-party integrations to trigger a conversation based on external data or system prompts.
{% hint style="warning" %}
**Event Limitation**
**End Call** and **API Event** are currently unavailable for the Agentic NLU engine.
{% endhint %}
{% endstep %}
{% step %}
### **Click Create to finalize the setup**
Once you click **Create**, you are redirected to the Agent canvas. This is your primary workspace for building and managing the agent's logic.
{% endstep %}
{% endstepper %}
***
## Design the flow: Agentic intents, parameters, and nodes
Designing an Agentic NLU flow differs from Traditional or Hybrid NLU flows. Instead of mapping every possible scenario, you provide the agent with the "ingredients" (Agentic Intents and Parameters) and use Agentic nodes to manage the conversation autonomously.
In a typical Agentic flow, all conversation logic is driven by the interaction between these elements:
1. **Preparation:** Before placing nodes, define your Agentic Intents (to establish context) and Parameters (to identify the data that needs to be collected).
2. **Routing (Classification):** Start your flow with an Agentic Classification node. This acts as the "hub," evaluating user input against your defined intents to determine the next step.
3. **Fulfillment (Capture):** Link identified intents to Agentic Capture nodes. These "specialists" handle multi-turn collection and re-confirmation, ensuring all required parameters are accurately gathered.
4. **Path Management:** Configure all exit paths from these nodes. You must specifically account for Intent Changes (re-routing), Escalation (human handoff), and Failed outcomes.
{% hint style="success" %}
**Pro tip**
Always route the **Escalation** and **Failed** paths to a dedicated fallback flow. This should include a seamless human handoff or a clear explanation to the user to prevent a "dead-end" experience.
{% endhint %}
{% stepper %}
{% step %}
### **Add Agentic Intents**
**Agentic Intents** define the goals your assistant can recognize. Each intent includes:
* A name (short and descriptive)
* A natural-language description of the intent (similar to an LLM prompt)
You can define Agentic Intents in the **Properties** panel of your AI Studio agent. Once created, they can be reused across the agent’s flow.
Best practices: Description field
* **Separate intents from parameters:** Use intents to capture the primary action; use parameters to capture the specific details.
* Avoid: `Order_Pizza`, `Order_Burger`, `Order_Salad` as separate intents.
* Recommended: Single `Order_Food` intent + `$Food_Item` parameter.
* **Keep intents semantically distinct:** Overlapping intents cause misclassification.
* If two intents are too similar, merge them into one (e.g., `Reset_Password` + `Unlock_Account` → `Account_Access`).
* Use follow-up conversational turns to determine the specific action needed.
* **Account for natural language variation:** Intent descriptions should cover informal phrasing, abbreviations, and, for voice, common ASR transcription errors.
{% hint style="success" %}
**Pro tip**
Use an AI tool (Gemini, ChatGPT, Claude) to draft your Description. Paste these best practices in, describe your intent in plain English, and refine the output based on testing in AI Studio.
{% endhint %}
Example of the Agentic Intents, where names and descriptions are defined to guide the agent's classification logic.
{% hint style="success" %}
**Best practice**
Always add “End conversation” and “Talk to human agent” intents to your agents to improve the performance of the Agentic NLU AI engine.
{% endhint %}
{% endstep %}
{% step %}
### **Add Agentic Parameters**
**Agentic Parameters** describe the information your Virtual Assistant needs to collect. Because they do not rely on entities, you can use natural language instructions instead of maintaining complex entity lists.
You can define Agentic Parameters in the **Properties** panel of your AI Studio agent. Once created, they can be reused across the agent’s flow.
There are three types of these parameters: Custom, System, and User parameters.
Parameter Type
Description
Validity
Editable?
Examples
Custom
Manually created by builders to store session-specific data.
Session-only: Reset once the interaction ends.
Yes: Name and Value.
Booking_ID
System
Automatically generated for every Virtual Agent.
Session-only: Reset once the interaction ends.
No.
Agent_ID
User
Used for data that remains constant across multiple interactions.
Cross-Session: Follows the caller across different VAs in the same account.
Yes: Name and Value.
User_ID, User_Language_Preference
{% hint style="info" %}
**Conditions node: Parameter logic**
The Conditions node supports both Custom and User parameters, applying qualitative and quantitative logic across all data types.
Type compatibility:
* **Quantitative Logic:** Use `Number`, `Date`, `Time`, or `DateTime` for mathematical or chronological comparisons (e.g., *greater than* or *before*).
* **Qualitative Logic:** The `String` type is ideal for text-based matching but does not support quantitative operations.
{% endhint %}
**Setting up Custom parameters**
Name
Options
Description
Name
Text
A name for your parameter.
Type
List of available options
Defines the data format the system expects to store. Available options are String, Number , DateTime, Date, Time.
Description
Text
Explains the parameter's role to the AI. This provides general context so the agent understands the "job" of this parameter.
Format
Text
The strict logic the AI uses to extract and validate input. This is where you define exactly how the parameter value must be structured.
Value
Text
Allows you to specify a pre-defined value of the parameter.
{% hint style="info" %}
**`Date`, `Time`, and `DateTime` formats**
These parameter types are automatically stored in standardized ISO formats:
* `Date`: YYYY-MM-DDT00:00:00±HH:MM.
* `Time`: 1970-01-01THH:MM:SS±HH:MM.
* `DateTime`: YYYY-MM-DDTHH:MM:SS±HH:MM.
**Note:** When selecting `Date`, `Time`, `DateTime`, or `Number`, the Format field locks automatically because these types rely on fixed system logic. The Description field remains available for providing context to the AI.
{% endhint %}
Best practices: Description field
* **Focus on the Role:** Tell the AI what the information is, not how to get it.
* *Example:* "This is the caller's 8-digit bank account number used for identity verification."
* **Keep it Concise:** Limit this to 1–2 lines.
* **Avoid Logic:** Do not define extraction rules here; the AI will ignore them in this field. Use the Format field for rules.
Best practices: Format field
The AI relies strictly on this field to pull data from a caller's sentence. To ensure high accuracy, include the following in your instructions:
* **Length:** State exact, minimum, or maximum character counts.
* **Composition:** Define allowed characters (e.g., "digits only," "uppercase letters").
* **Structure:** Describe the sequence (e.g., "starts with two letters followed by four numbers").
* **Restrictions:** Explicitly state what is forbidden (e.g., "no spaces," "no decimals").
* **Examples:** Always provide 2–3 correct examples and 2–3 incorrect examples to "prime" the LLM.
{% hint style="success" %}
**Pro Tip**
Use an AI tool (Gemini, ChatGPT, Claude) to draft your Format field. Paste these best practices in, describe your intent in plain English, and refine the output based on testing in AI Studio.
{% endhint %}
Format field examples
The following examples cover common String-type Custom Parameters. Each includes a breakdown of the rules and a ready-to-copy text for the Format field.
**Date**
| **Format** | `YYYY-MM-DD` |
| ---------------- | ------------------------------------------------------------------------------------------------------------------------------------------------- |
| **Length** | Exactly 10 characters. |
| **Structure** | Four digits (year), hyphen, two digits (month), hyphen, two digits (day). |
| **Restrictions** |
No slashes.
No spelled-out month names.
Leading zeros required.
|
| **Correct** |
2024-05-14
1999-12-01
2025-01-31
|
| **Incorrect** |
05/14/2024 (slashes)
May 14th 2024 (spelled-out month)
2024-5-14 (missing leading zero)
|
:clipboard: **Example prompt**
{% code overflow="wrap" %}
```
The value must represent a date exactly in the YYYY-MM-DD format. It must be exactly 10 characters long. It must consist of four digits for the year, a hyphen, two digits for the month, a hyphen, and two digits for the day. Do not use slashes or spell out the month. Correct Examples: 2024-05-14, 1999-12-01, 2025-01-31 Incorrect Examples: 05/14/2024, May 14th 2024, 2024-5-14 (missing leading zero).
```
{% endcode %}
**Time (24-hour)**
| **Format** | `HH:MM` |
| ---------------- | --------------------------------------------------------------------------------------------------------------------------- |
| **Length** | Exactly 5 characters. |
| **Structure** | Two digits (00-23), colon, two digits (00-59). |
| **Restrictions** | No AM/PM designations. |
| **Correct** |
08:30
14:00
23:59
|
| **Incorrect** |
8:30 (missing leading zero)
02:00 PM (AM/PM)
24:00 (invalid hour)
|
:clipboard: **Example prompt**
{% code overflow="wrap" %}
```
The value must represent a time in the 24-hour format (HH:MM). It must be exactly 5 characters long. The first two characters must be digits between 00 and 23. This is followed by a colon ":". The last two characters must be digits between 00 and 59. No AM/PM designations are allowed. Correct Examples: 08:30, 14:00, 23:59. Incorrect Examples: 8:30 (missing leading zero), 02:00 PM (contains AM/PM), 24:00 (invalid hour).
```
{% endcode %}
**Currency (USD)**
| **Format** | `$X,XXX.XX` |
| ---------------- | ---------------------------------------------------------------------------------------------------------------------------------------- |
| **Structure** | `$` symbol, digits, thousands separated by commas, decimal point, exactly two cent digits. |
| **Restrictions** | No spaces. |
| **Correct** | `$1,250.00`, `$50.75`, `$1,000,000.99` |
| **Incorrect** |
1250 USD (missing symbol)
$50.7 (missing cent digit)
$1000.00 (missing comma)
|
:clipboard: **Example prompt**
{% code overflow="wrap" %}
```
The value must represent a monetary amount in US Dollars. It must start with a "$" symbol, followed by digits. Thousands must be separated by commas. It must end with a decimal point and exactly two digits for the cents. No spaces are allowed. Correct Examples: $1,250.00, $50.75, $1,000,000.99. Incorrect Examples: 1250 USD, $50.7, $1000.00 (missing comma).
```
{% endcode %}
**Email address**
| **Structure** | Local part, `@` symbol, domain name, valid top-level domain (e.g., `.com`, `.org`, `.co.uk`). |
| ---------------- | ----------------------------------------------------------------------------------------------------------------------------------------------------------------------------- |
| **Restrictions** | No spaces. |
| **Correct** |
|
| **Incorrect** |
user.name @ domain.com (spaces)
user\@domain (missing TLD)
[www.website.com](http://www.website.com) (not an email)
|
:clipboard: **Example prompt**
{% code overflow="wrap" %}
```
The value must be a valid email address structure. It must contain a local part, an "@" symbol, and a domain name. It must not contain any spaces. It must end with a valid top-level domain (e.g., .com, .org, .co.uk). Correct Examples: user.name@domain.com, info@company.co.uk, admin123@school.edu. Incorrect Examples: user.name @ domain.com (contains spaces), user@domain (missing top-level domain), www.website.com (not an email).
```
{% endcode %}
**Booking ID**
| **Length** | Exactly 6 characters. |
| ------------- | ---------------------------------------------------------------------- |
| **Structure** | First 3 characters: letters A–Z or a–z. Last 3 characters: digits 0–9. |
| **Correct** | `ABC123`, `MNO456`, `XYZ009`, `abc123`, `mno321` |
:clipboard: **Example prompt**
{% code overflow="wrap" %}
```
The value must be exactly six characters long. The first three characters must be letters between A to Z (uppercase) OR a to z (lowercase). The last three characters must be digits between 0 and 9. Correct Examples: ABC123, MNO456, XYZ009, abc123, mno321.
```
{% endcode %}
Example of a Booking ID configuration, differentiating the Description (context) from the Format (logic).
**System Parameters**
Below is the list of System parameters available in the Agentic NLU AI engine:
Name
Type
Description
CALLER_PHONE_NUMBER
String
The caller's telephone number.
CALL_START_DATE
DateTime
The date of the call.
CALL_START_TIME
DateTime
The time when the agent picked up the call.
CALL_DIRECTION
String
Categorizes the interaction as 'Inbound' or 'Outbound'. Used to enforce call-type restrictions and ensure the agent only executes tasks relevant to the current call direction.
CALL_TRANSCRIPTION
String
Stores the transcription of the interaction.
TRIGGERED_BY_SESSION_ID
String
Identifies the specific session that initiated or "triggered" the current interaction.
VAPI_CALL_ID
String
The Call ID from the Voice API in the dashboard. This allows you to match calls between the Studio log and the Voice API dashboard log.
SESSION_ID
String
A sequence of numbers and letters to identify the specific session.
AGENT_ID
String
The agent's ID.
CONVERSATION_ID
String
The Conversation ID/UUID sent from Vonage API.
AGENT_PHONE_NUMBER
String
The agent's virtual phone number.
CALL_START_DATETIME
DateTime
The date and time that the interaction started.
**User Parameters**
There are two preconfigured user parameters available in AI Studio:
* Account\_Name for storing the business account name related to the call.
* Phone\_Number for storing the caller's phone number.
{% hint style="warning" %}
**Limitation**
User parameters do not have Description and Format fields and cannot be used with the Agentic nodes. Instead, user parameters need to be set by using the “Set Parameter” node.
{% endhint %}
{% endstep %}
{% step %}
### **Add an Agentic Classification node**
The node drawer is divided into three functional sections:
* **Setup**: Define the inputs, the scope of intents, and escalation thresholds.
* **Configuration**: Fine-tune the Communication Layer and LLM response behavior.
* **Test**: Perform isolated testing of your classification logic.
#### Setup
Field
Options
Description
User Input
List of parameters
A parameter that stores the caller's response and serves as the primary input for the Agentic Classification node.
Agentic Intents
List of options
A list of intents in scope for this node. The node will only search for matches within this list.
Maximum Number of Attempts
1-6
The maximum number of attempts the node makes to identify an intent during a live conversation. If the number is exceeded, the node triggers the Escalation path. The default value is 3.
Detected Intent
List of parameters
A parameter that stores the intent identified by the engine.
Agentic Response
List of parameters
A parameter that stores the response generated by the engine, particularly useful when no intent is initially detected.
Escalation Reason
List of options
A parameter that stores why an escalation was triggered. The available reasons are:
A parameter that stores why an escalation was triggered. The available reasons are:
“ATTEMPTS_EXCEEDED”: the number of attempts exceeded the defined maximum.
“USER_DENIAL”: a caller refused to provide a valid response.
“USER_INFORMATION_GAP”: a caller either did not have the required information, cannot find it, or needs clarification about what is being asked.
“HUMAN_HANDOFF”: a caller explicitly requests a human, support agent, or other channel.
“USER_INITIATED_TERMINATION”: a caller expresses emotional frustration, dissatisfaction, or explicitly indicates a desire to stop or end the conversation.
#### Configuration
{% hint style="info" %}
**Communication Layer**
The Communication Layer is a permanent background flow of Speak and Listen nodes that manages the autonomous conversation loop. It automatically delivers the agent's responses and captures user input at each stage of the interaction.
* **Always Active:** To ensure consistent interaction, the Communication Layer cannot be disabled.
* **Fixed Audio Settings:** The Speak node settings within this layer are pre-configured and cannot be modified.
{% endhint %}
Within the Agentic Classification node configuration, you can adjust the following Listen node settings for this layer:
**Communication Layer**
Field
Options
Description
Detect Silence
0.4-5 seconds
The amount of time the agent waits after the user stops speaking to determine whether the parameter is filled and to continue the flow. The default value is 0.4 seconds.
No input
1-60 seconds
The amount of time the agent waits for a caller's input. If the time limit is exceeded, the agent triggers the Retry logic until it reaches the last retry, then moves to the No Input flow. The default value is 10 seconds.
Context keywords
Text
Context keywords improve recognition quality if certain words are expected from the user.
Enable Node Noise Sensitivity
On/Off 10-100
When no value is provided here, the agent-level sensitivity settings will apply to the node as well. When a value is provided for the Node noise sensitivity, these settings will override the agent-level sensitivity settings. The default value is 40.
**Other configuration settings**
Field
Options
Description
Waiting Time
3-10 seconds
The maximum time to wait for the NLU engine response. If the time is exceeded, the Failed exit path is triggered. The default value is 5 seconds.
Agentic Response Guidelines
Text
An optional field for providing natural language instructions (LLM prompting) that give limited control over how the node phrases its responses.
Empty by default.
{% hint style="success" %}
**Best practices: Agentic Response Guidelines**
* Only use this field after optimizing the **Description** field of your Agentic Intents and the **Format** field of your Agentic Parameters. Those have a far greater impact on accuracy.
* Use it only to define tone, brand terminology, and Text-to-Speech nuances.
* Do not use this field to override logic that is pre-configured by the platform:
* Redefine the node's role, e.g., "You are a virtual agent for XYZ handling ABC."
* Script exit path responses, e.g., "In case of escalation, say XYZ."
* Set exit path conditions, e.g., "If the caller asks for ABC, trigger escalation."
* Start with no guidelines and add them only when testing reveals a specific gap. Keep to a maximum of 4.
* Where possible, include correct and incorrect response examples to improve accuracy, for example:
* Correct: support at a-b-c dot org.
* Incorrect: .
{% endhint %}
#### Test
You can click **Test** to test your configured Agentic Classification node without linking it to other nodes. In this section, you can:
1. Provide a value for “User Input”.
2. Check the generated “Detected Intent” and “Agentic Response”.
If you are unhappy with the results, you can update:
* the Intent Description field from the **Agentic Intents** tab
* the Agentic Response Guidelines field for a given Agentic Classification node
Using the Test console to verify how the Agentic Classification node responds to user inputs that fall outside the defined intents.
**Agentic Classification node exit paths**
* **Intent:** This path is triggered when the Agentic Classification node successfully detects an intent. Every intent selected under the **Agentic Intents** of an Agentic Classification node will have a unique exit path.
* **Escalation:** This path is triggered when an escalation scenario is detected based on the caller's response.
* **Failed:** This path is triggered when the node fails to run due to an internal error.
{% hint style="success" %}
**Pro tip**
If the **Failed** exit path is triggered frequently, it likely indicates an Agentic NLU timeout. To resolve this, increase the Waiting time from the default 5 seconds up to a maximum of 10 seconds.
{% endhint %}
{% endstep %}
{% step %}
### **Add Agentic Capture nodes**
The node drawer is divided into two functional sections:
* **Setup**: Define the inputs, parameter scope, and escalation thresholds.
* **Configuration**: Fine-tune the "Communication Layer" and Agentic response behavior.
#### Setup
Field
Options
Descriptions
User Input
List of parameters
A parameter that stores the caller's response and serves as the primary input for the Agentic Capture node.
Current Intent
List of options
The active goal for the node; critical for detecting if a caller switches topics mid-flow.
Agentic Parameters
List of options
The list of specific parameters this node is tasked with filling.
Maximum Number of Attempts
1-3
The maximum number of attempts the node makes to capture a parameter during a live conversation. If the number is exceeded, the node triggers the Escalation path. Every parameter has its own Maximum Number of Attempts. The default value is 3.
Reconfirm the captured parameter value with the end user
Selected/ unselected
Whether the agent should repeat the captured value back to the caller. You can use this option to ensure accuracy against potential ASR (Automatic Speech Recognition) transcription errors.
Agentic Response
List of parameters
This parameter stores the response from Agentic Capture and is useful when the parameter capture task is ongoing or an escalation scenario is detected.
Escalation Parameter
List of parameters
This stores the parameter name which caused the escalation path to be triggered in Agentic Capture node.
Escalation Reason
List of options
A parameter that stores why an escalation was triggered. The available reasons are:
“ATTEMPTS_EXCEEDED”: the number of attempts exceeded the defined maximum
“USER_DENIAL”: a caller denied to provide a valid response
“USER_INFORMATION_GAP”: a caller either did not have the required information, cannot find it, or needs clarification about what is being asked
“HUMAN_HANDOFF”: a caller explicitly requests a human, support agent, or other channel
“USER_INITIATED_TERMINATION”: a caller expresses emotional frustration, dissatisfaction, or explicitly indicates a desire to stop or end the conversation
#### Configuration
{% hint style="info" %}
**Communication Layer**
The Communication Layer is a permanent background flow of Speak and Listen nodes that manages the autonomous conversation loop. It automatically delivers the agent's responses and captures user input at each stage of the interaction.
* **Always Active:** To ensure consistent interaction, the Communication Layer cannot be disabled.
* **Fixed Audio Settings:** The Speak node settings within this layer are pre-configured and cannot be modified.
{% endhint %}
Within the Agentic Capture node configuration, you can adjust the following Listen node settings for this layer:
**Communication Layer**
Field
Options
Description
Detect Silence
0.4-5 seconds
The amount of time the system waits after the caller stops speaking to determine whether the parameter is filled and to continue the flow. The default value is 0.4 seconds.
No input
1-60 seconds
The amount of time the agent waits for a caller's input. If the time limit is exceeded, the agent triggers the retry logic until it reaches the last retry, then moves to the No Input flow. The default value is 10 seconds.
Context keywords
Text
Context keywords improve recognition quality if certain words are expected from the caller.
Enable Node Noise Sensitivity
On/Off 10-100
If no value is provided here, the agent-level sensitivity settings will also apply to the node. When a value is provided for the Node noise sensitivity, these settings will override the agent-level sensitivity settings The default value is 40.
**Other Configurations**
Field
Options
Description
Waiting Time
3-10 seconds
The maximum time to wait for the NLU engine. The default value is 5 seconds.
Agentic Response Guidelines
Text
An optional field for providing natural language instructions (LLM prompting) that give limited control over how the node phrases its responses.
Empty by default.
**Agentic Capture node exit paths**
* **User input:** This path is triggered once all assigned parameters within the node have been successfully captured.
* **Intent Change:** This is triggered when an intent change is detected within the caller's response.
* **Escalation:** This is triggered when an escalation scenario is detected based on the caller's response.
* **Failed:** This is triggered when the node fails to run due to an internal error.
{% endstep %}
{% endstepper %}
# Agent Building Features
Here are a few nifty features within the AI Studio platform
## Change agent details
You can change your agent's details at any point by clicking on the three dots on the top left. This includes:-
**Agent Details** - Displays your agent name, agent type, agent ID, chosen language, region, time zone, voice, volume and integration details. This also includes the the option to share your recordings to make them public.
**Noise Sensitivity** *(For Voice only)* - Users calling in with a lot of background disturbance? You can now customize the sensitivity of your agent to noise from the telephony settings in the agent details.
Setting the noise sensitivity appropriately is imperative especially if you have the barge-in feature enabled in your agent. Be sure to test in live environments to accurately imitate the environments that user will be calling in from.
{% hint style="info" %}
*By default the Noise sensitivity is set to 40, we recommend testing your agent out with 20 to suit most background noise levels.*
{% endhint %}
**Phone Settings** - Access settings to change or remove your agent's phone number.
**Versions** - This button can be used to access your past version history. More on versions and publishing [here](https://studio.docs.ai.vonage.com/agents-1/editor-mode-and-publish).
**Duplicate** - Use this feature if you want to duplicate your agent.
**Export Agent** - This feature allows you to export and import an agent to a different account.
**Delete** - Option to delete your agent.

### JWT Endpoint
You can now send your X-Vgai-key to an endpoint in order to get the JWT token. This works well in cases where you require the token to access private recordings for voice agents or secure inbound media for WhatsApp agents.
Additionally the endpoint will also allow you to return agent data including: agent language, voice (if it's a telephony agent), timezone, name, status of the recording (private or public), region and the date of publishing the agent.
Here's how to go about it:-
## JWT Endpoint
`GET` `https://studio-api-eu.ai.vonage.com/agents/:agentid`
#### Headers
| Name | Type | Description |
| -------------------------------------------- | ------ | ----------- |
| X-Vgai-Key\* | String | |
{% hint style="warning" %}
*Please keep in mind that this endpoint will return the JWT token only for SMS, WhatsApp and Telephony agents. **HTTP agents do not have JWT t*****okens.**
{% endhint %}
## Canvas Toolbar
With this tool you can organise the agent and it help will you find your way around the canvas.

{% hint style="info" %}
*From left to right -*
* ***Home** - Go to the START node*
* ***Zen Mode** - Removes the left and right tab with the building blocks from the screen and centralises on the canvas*
* ***Zoom to fit** - Zoom out to view the entire agent*
* ***Zoom in and out** - focus on certain parts of the agent or look at the big picture*
* ***Search bar -** Type in the name of your node, a specific parameter or user expression, and have the agent guide you to the right place.*
{% endhint %}
## Canvas search bar
You can open the search bar by clicking on the top left magnifying glass icon. Search for a node, parameter, contact, location, intent, and more with a single click.

## Missing features colour codes
If there is a problem with a node, it will be indicated in either yellow or red.
**Yellow** - More information needs to be entered, nodes are not connected
**Red** - Invalid data (missing parameter, validation error on the form itself), connected in an illogical manner e.g. *Speak* node after *End Call* node. This can also happen for example when you delete a parameter that's being used in the flow.

## Move & duplicate multiple nodes
You can **move multiple nodes** by clicking and holding Shift and using your cursor to select and mark the cluster of nodes you want to move around the canvas. The selected nodes will appear with a purple outline. Click and hold any of the selected nodes and drag your cursor to move the cluster.
{% hint style="info" %}
*For Windows users hold Crtl + Shift whilst you select your nodes.*
{% endhint %}
If you choose to **duplicate multiple nodes**, again click Shift, hold and mark the desired nodes. Then, click Command C, Command V for Mac, and Ctrl C, Ctrl V for Windows.

## Jump to node
When doing a right-click on the exit point of a node, you have the ability to either **jump to** or **connect to** another node.
**Jump to** - Go to the following node in the flow that this node is connected to. Very helpful in large agents where nodes might not be in close proximity to one another.
**Connect to** - Using the node name in your search, you can now connect to another node without dragging the arrow. Simply select the node you'd like to connect to and the agent will connect them for you.

## Label your nodes
You can rename your nodes to understand the topic of each node from a quick glance.
Click on a node and change the name of the node by selecting it and adding your name of choice.

## Duplicating an agent
To duplicate an agent in your account, go to the main page, and click on the three little dots on the right at the end of the row of the agent. Select "Duplicate".
A new drawer will pop up to adjust the details of your agent copy. Once done, a duplicate of the original agent with your adjustments is going to be created at the top of the page.

## Export and Import Agents
Export and import virtual assistants from one account to another. On the main agent page, click on the three little dots right next to the agent you would like to export in the agent list. Once downloaded, you can click on "Import agent" to import the file. Simply add a phone number and you are good to go!

# Agent Templates
Templates that you can add as an easy base to your virtual agent.
If you want to create a new agent, you can either choose to create one from scratch or add a ready-made template agent to your account. If you choose to work on a template, you can make changes and customize it accordingly.

### You can choose from the following templates -
* **Take messages** *(available for Voice and Whatsapp)* - Be available for your customers 24/7. Not only won't you miss a single interaction, but your agent will support your contact centre by taking the caller's message or performing human-like self-service.
* **Change Details** *(available for Voice and Whatsapp)* - Elegant self-service for ever-recurring caller requests such as updating account details. Callers will be able to update their details using only the Virtual Assistant.
* **Collect details** *(available for Whatsapp agents)* - Use this template in order to collect basic information from your users.
* **Survey** *(available for Voice and Whatsapp)* - Keep track of your agent's performance and customer Satisfaction by adding a post-call survey to your repertoire. The data you receive from the survey can help you gain valuable insights and be used to optimize your call centre's performance.
* **Caller Identification** *(available on Voice agents)* - Verify your callers to give optimal personal self-service. Use this template when you want to add an additional layer of security to your agent with the identification and verification of the caller.
* **FAQ** *(available for Voice and Whatsapp)* - Relieve your Contact Center from constantly recurring questions and queries. Use this template when you want to enable your virtual agent to answer simple FAQs.
* **Package Tracking** *(available for Voice and Whatsapp)* - Order Tracking with the help of a Virtual Assistant. Enable your callers to retrieve their package delivery date based on their order number.
* **Step by Step** *(available for Whatsapp agents only)* - Take your user through instructions to set up a product. This is also helpful for resolving errors, initialization instructions etc.
* **Appointment Reminder** *(available for Whatsapp agents only)* - Use this agent to send out automated reminders to your users about upcoming appointments and sessions.
* **Schedule Appointment** *(available for Whatsapp agents only)* - Use this agent template to create a scheduling agent for all kinds of virtual or in-person appointments.
* **Customer Service** *(available for WhatsApp agents only)* - Tackle frequently asked questions relating to product shipping and escalate to a human representative over chat!
* **Hotels** *(available for WhatsApp agents only)* - Handle quick actions including reservations, amenity and rewards enquiries. Escalate to a human representative over chat if required.
* **Appointment Management** *(available for WhatsApp agents only)* - Authenticate your users and help them out with appointment scheduling, management and location enquiries.
# Take Message
Be available for your customers 24/7
{% hint style="info" %}
*Use this template when you want to **make sure your business is available for your customers 24/7**. Not only won't you miss a single call, but your agent will support your contact center by taking the caller's message or performing human-like self-service.*
{% endhint %}
To use this template, simply choose it from the templates page when you create a new agent. You can then make changes to customize it based on your business needs.

### Flow Overview
#### Step 1 - Starting the conversation
We start with a *Speak* node introducing the company to the caller and letting them know that they are calling after hours. The *Speak* node does not collect any input from the user.
**Step 2 - Collect a message**
We then ask the caller if they'd like to leave a message using the *Collect Input* node to relay the prompt and gather information at the same time.
In case we can't collect the caller's input, the agent will notify the caller the agent wasn't able to help and terminate the call, with e.g. "I'm sorry, I can't seem to help you. I will make sure my human colleagues will give you a callback as soon as possible." This means the *No input* and *Missed* tabs of the Collect Input node are connected to a *Speak* node and *End Call* node.
In the following Conditions node, we are classifying the caller's response. If the caller confirms, we continue to another Collect Input node that collects the message. If the caller doesn't want to leave a message, we connect to a Speak node letting the caller know that the call is going to be terminated.
**Step 3 - Save the message**
In order to save the message and send it over to a CRM for review, we utilize a *Webhook* node. If the API request to the third party service fails, we use the *Speak* node again to inform the caller that an agent will call them back and terminate the call.
To terminate the call after having successfully sent the message over to the third party service, we use a *Speak* node ("Thank you. I have taken your message. You can expect a callback shortly from one of my human colleagues. Have a good day!") and End Call node.
# Updating Details
Elegant self-service for ever recurring caller requests
{% hint style="info" %}
*Use this template when you want to **enable seamless self-service for your customers** to deliver a quick and time-sensitive customer experience.*
{% endhint %}
To use this template, simply choose it from the templates page when you create a new agent. You can then make changes to customize it based on your business needs.

### Flow Overview
#### Step 1 - Starting the conversation
We start with a *Speak* node introducing the company to the caller. The *Speak* node only serves to relay a prompt to the user.
**Step 2 - Collect the Caller's Query**
After the greeting we want to figure out why the user has initiated a conversation with the agent. With the help of the *Collect Input* node, we can ask the user what the agent can do to help them as well as collect their response.
In case we can't collect the caller's input, the agent will route the call to a live representative. Therefore, the *No Input* and *Missed* tabs are connected to a *Speak* node, notifying the caller that in this case the call is being routed, followed by the *Route Call* action node.
#### Step 3 - Match the Caller's Input
The *Classification* node will classify the users input into the appropriate intent. In this use case, the caller requests to change his phone number that they registered in the account.
In case the user provides an invalid or irrelevant input, the *Missed* tab can be used to connect these responses to a prompt (via *Speak* node) and then to a *Route Call* node that transfers the call to an agent.
#### Step 4 - Collect the Caller's New Details
In a new *Collect Input* Node, we are going to ask the caller for their new phone number.
In case we can't collect the new phone number, the agent will route the call to a live representative. Therefore, the *No Input* and *Missed* tabs are connected to a *Speak* node, notifying the caller that in this case the call is being routed, followed by the *Route Call* action node.
#### Step 5 - Confirm the Caller's New Details
Following the collection of the new phone number, we want to verify that the agent understood the correct phone number. We are using another *Collect Input* node with the prompt "I understood $NEW\_PHONE\_NUMBER . Is that correct?" to do that.
Same as before, in case we can't collect the caller's input, the agent will route the call to a live representative. Therefore, the *No Input* and *Missed* tabs are connected to a *Speak* node, notifying the caller that in this case the call is being routed, followed by the *Route Call* action node.
The user's confirmation (or lack thereof) is segregated by the conditions node. If the user approves of the new number, the agent will send over the change to the CRM via *Webhook* node. Else, the agent will ask for an alternative phone number. The endpoint of the *Default* tab in the *Conditions* node that indicates the caller's negative response ("no") is connected to the entry point of the first *Collect Input* Node.
If the *Webhook* fails to send over the new number, the conversation is routed. Therefore, the exit point of the *Failed* tab in the *Webhook* node is connected to the entry point of the *Speak* node indicating that the call is going to be transferred.
Once the details have been updated, the conversation will be terminated after letting the user know that the conversation will be disconnected followed by an *End Call* action node.
# Survey
Keep track of your Call Center Agents' Performance and your Customer Satisfaction
{% hint style="info" %}
*Use this template when you want to **keep track of your call center agents' performance and your customer satisfaction**. The data you receive from the survey can help you gain valuable insights and be used to optimise your call center's performance.*
{% endhint %}
To use this template, simply choose it from the templates page when you create a new agent. You can then make changes to customize it based on your business needs.

### Flow Overview
#### Step 1 - Starting the conversation
We start with a *Speak* node introducing the company to the caller. Using the *Speak* node we don't expect any input from the caller in this node.
#### Step 2 - Ask for Confirmation before Survey Questions
Continue with adding a *Collect Input* node with the first identification prompt. E.g. "May I ask you a few questions about your experience today?"
Now we need to utilize the confirmation value we will receive. We want the agent to give out a different response depending on whether the caller says yes or no - we are creating conditions. Therefore, we are adding a *Conditions* node in order to classify the answer of the caller.
#### Step 3 - Prompt Survey Questions
After receiving the confirmation of the caller to go ahead with the questions, we are adding another *Collect Input* node with another survey question. E.g. "Thank you. It will only take a few moments. Firstly, were we able to resolve your request?" or "Please rate the experience from 1 to 5. With 1 being the lowest and 5 being the highest score."
You can add as many prompts as possible. Simply keep adding *Collect Input* nodes.
**Step 4 - Use the Survey Data**
To utilize the values we collected in the survey, we need to add the *Webhook* node that sends them to a third-party service of your choice using a customizable API request.
#### Step 5 - End the call
To end the survey, we are adding a Speak node with a response saying e.g. "Thank you very much for your time. Have a nice day!" and the action node End Call terminating the conversation.
{% hint style="info" %}
You will notice that all *No Input* or *Missed* Tabs are still connected to the following node. In a post-call survey, we don't want to escalate the call to a live representative or prolong the conversation for the customer unnecessarily.
{% endhint %}
# FAQ
Relieve your Contact Center from constantly recurring questions and queries
{% hint style="info" %}
*Use this template when you want to enable your virtual agent to **answer simple FAQs**.*
{% endhint %}
To use this template, simply choose it from the templates page when you create a new agent. You can then make changes to customize it based on your business needs.

### Flow Overview
#### Step 1 - Starting the Conversation
We start with a *Speak* node introducing the company to the caller. Using the *Speak* node we don't expect any input from the caller in this node.
**Step 2 - Collect the Caller's Query**
After the greeting, we want to know why the caller is calling. This means that we are looking to collect a value from the user input - with the help of the *Collect Input* node.
In case we can't collect the caller's input, the agent will route the call to a live representative. Therefore, the *No Input* and *Missed* tabs are connected to a *Speak* node, notifying the caller that in this case the call is being routed, followed by the *Route Call* action node.
#### Step 3 - Match the Caller's Input
The classification node will match the caller's input to the right response in the right intent. If the agent can't match the input to the right intent, the *Missed* tab comes into place, which in this case is connected to the *Speak* and *Route Call* node that transfers the call to an agent.
In order to give out a response with the answer to the FAQs, we utilize *Speak* nodes.
#### Step 4 - Be prepared for all eventualities
Once the caller has received his response, we want to enable the caller to continue in the conversation in case they have more questions. With an additional *Collect Input* asking in the prompt, e.g. “Do you have any other questions?”.
Similar to the first *Collect Input* node we used, in case we can't collect the caller's input, the agent will route the call to a live representative. Therefore, the *No Input* and *Missed* tabs are connected to a *Speak* node, notifying the caller that in this case the call is being routed, followed by the *Route Call* action node
It is possible that a caller answers not directly with a new question, but with "yes" or "no". To cover all bases, we are adding a yes and no intent to the *Classification* node. If the caller answers "no", we will end the call using a speak node to let the caller know about the call termination followed by an *End Call* node. If the caller responds with "yes", we are connecting this tab to the original *Collect Input* asking the caller "How can I help you today?" which enables the caller to ask their question.
# Package Tracking
Order Tracking with the help of a Virtual Assistant
{% hint style="info" %}
*Use this template when you want to enable seamless self-service to **help your customers track their orders.***
{% endhint %}
To use this template, simply choose it from the templates page when you create a new agent. You can then make changes to customize it based on your business needs.

### Flow Overview
#### Step 1 - Starting the conversation
We start with a *Speak* node introducing the company to the caller. Using the *Speak* node we don't expect any input from the caller in this node.
**Step 2 - Collect the Caller's Query**
After the greeting, we want to understand why the caller is calling. This means that we are looking to collect a value from the user input - with the help of the *Collect Input* node.
In case we can't collect the caller's input, the agent will route the call to a live representative. Therefore, the *No Input* and *Missed* tabs are connected to a *Speak* node, notifying the caller that in this case the call is being routed, followed by the *Route Call* action node.
#### Step 3 - Match the Caller's Input
The *Classification* node will match the caller's input to the right response in the right intent. In this use case, the caller requests the whereabouts of his recently ordered package.
If the agent can't match the input to the right intent, the *Missed* tab is triggered, which in this case is connected to the *Speak* and *Route Call* node that transfers the call to an agent.
#### Step 4 - Check Package ID
In another *Collect Input* node, the agent collects the Order ID and then sends it over to the third-party service via the *Webhook* node to retrieve the order status.
In case we can't collect the caller's input, the agent will route the call to a live representative. Therefore, the *No Input* and *Missed* tabs are connected to a *Speak* node, notifying the caller that in this case the call is being routed, followed by the *Route Call* action node.
If the *Webhook* fails to retrieve the order number, we also want to route the call to a live representative. Therefore, the exit point of the *Failed* tab in the *Webhook* node is connected to the entry point of the *Speak* node indicating that the call is going to be transferred.
#### Step 5 - Inform Caller about Delivery Status
One we retrieved the delivery status, we are going to inform the caller about their ETA and ask them if they'd like to receive a text message with a tracking link for the future in a new *Collect Input* node ("Your estimated delivery date is scheduled for $ARRIVAL\_DATE . Do you want me to send you a tracking link via SMS?")
The confirmation of the caller is being collected in the *Conditions* node. If the Caller would like to receive a text message, the agent is going to send the message in a *Send SMS* action node and a *Speak* node indicating the arrival of the message. After sending the message, the agent will terminate the call.
If the caller denies, the agent will simply terminate the call. Therefore, the endpoint of the *Default* tab in the *Conditions* node that indicates the caller's "no" is connected to the entry point of the *Speak* node letting the caller know this call is going to be terminated.
# Caller Identification
Verify your callers to give optimal personal self-service
{% hint style="info" %}
*Use this template when you want to add an additional layer of security to your agent with the **identification and verification** of the caller.*
{% endhint %}
To use this template, simply choose it from the templates page when you create a new agent. You can then make changes to customize it based on your business needs.

### Flow Overview
#### Step 1 - Starting the Conversation
We start with a *Speak* node introducing the company to the caller. Using the *Speak* node we don't expect any input from the caller in this node.
#### Step 2 - Collect First Identification Parameter
The *Speak* node is followed by a *Collect Input* node collecting the first identification parameter, e.g. a caller-specific identification number.
In case we can't collect the ID, the agent will route the call to a live representative. Therefore, the *No Input* and *Missed* tabs are connected to a *Speak* node, notifying the caller that in this case the call is being routed, followed by the *Route Call* action node.
#### Step 3 - ID Confirmation & Verification
Once the ID is collected, the agent is going to read it out to the caller for confirmation in the following *Collect Input* node.
The *Conditions* node will classify based on the caller's response. If the ID is correct, the agent will send the ID via the *Webhook* node to the third-party service in order to verify the caller with the CRM. If incorrect, the agent will prompt the caller to give the ID number again.
# Customer Service
Answer queries and escalate to human representatives over chat
{% hint style="info" %}
*Use this template to quickly answer any questions your users may have about shipment inquiries, account management, warranties etc, and **escalate to a live agent without leaving the conversation**.*
{% endhint %}
To use this template, simply choose it from the templates page when you create a new agent. You can then make changes to customize it based on your business needs.
## Flow Overview
### **Collection and Classification of User Intent**
This template is pre-programmed to understand utterances related to **Order issues, Shipment Inquiries, Warranty Inquiries, Account Related information** and **Routing to a Live Agent.**
The flow starts with a check of working hours using a [Conditions](https://studio.docs.ai.vonage.com/whatsapp/nodes/conversation/conditions) node. By default, working hours are set to between Monday to Friday, 8 am to 8:30 pm.
Next using a text-based [Collect Input](https://studio.docs.ai.vonage.com/whatsapp/nodes/conversation/collect-input) node, the user is asked what they need help with. This then leads to a [Classification](https://studio.docs.ai.vonage.com/whatsapp/nodes/conversation/classification) node.
The [Classification](https://studio.docs.ai.vonage.com/whatsapp/nodes/conversation/classification) node classifies user intent into one of the five categories mentioned above, these are set up as [subflows](https://studio.docs.ai.vonage.com/whatsapp/nodes/flow-control/flows) in order for you to easily edit the individual flows to fit your business needs.
## **Flow Explanation**
### *Orders*
The Orders flow is prebuilt to handle a variety of actions related to Order Enquiry and Management.
The subflow begins with a [Collect Input](https://studio.docs.ai.vonage.com/whatsapp/nodes/conversation/collect-input) node providing users with the ability to select their preferred action using a comprehensive list message. This includes multiple actions under the **New Orders**, **Past and Current Orders**, **Returns** and **Payment FAQ**s. Additionally, there is also an option to return to the **Main Menu**.
The **New Orders** category allows the user to do the following:-
* **Place a New Order** - This flow allows the user to pick from a selection of products, the Virtual assistant then uses a [SalesForce Action](https://studio.docs.ai.vonage.com/whatsapp/nodes/integrations/salesforce-actions) Node to ascertain whether the product is available or not. If the product is unavailable, the flow directs the user to choose a different product. Once an in-stock product is chosen, the virtual assistant then sends a message to the user with the product link.
* **Product Availability** - This flow allows the user to know whether a product is available or not. It starts off by asking the user if they know which product they want to inquire about. If the user responds with no, the virtual assistant offers them a catalogue link. If the user is aware of the specific product they want information on, the flow continues down the Place a New Order flow.
* **Discounts FAQ** - This flow is set up to answer frequently asked questions about Discounts including discount validity, multiway discounts and how to purchase a discount.
**Past and Current Orders** option allows you to access the following:-
* **Order Status:** This flow checks to see if the order was simply placed, shipped or delivered and helps the user down categorised paths based on this status.
* **Order History:** This flow is set up to simply let the user know when each item was ordered.
* **Cancel order:** This flow uses the [SalesForce Action](https://studio.docs.ai.vonage.com/whatsapp/nodes/integrations/salesforce-actions) nodes to look up past orders, then collects user input on which order needs to be cancelled, finishing up with a cancellation request in SalesForce.
**Returns** are set up to allow users to:-
* **Return Order:** This flow first checks the status of your order using a [SalesForce Action](https://studio.docs.ai.vonage.com/whatsapp/nodes/integrations/salesforce-actions) Node then if the item hasn't already been shipped out it confirms with the user regarding the cancellation finishing off with another actions node to log the request.
* **Refund Status:** This flow checks the status of the order (using SalesForce) and responds with a prebuilt set of verbiage for each status type.
**Payment FAQs** handle the following:-
* **General Payment FAQs:** This flow answers simple queries relating to gift cards, payment terms and conditions as well as means of payment.
### ***Shipment Enquiries***
This flow handles inquiries on the following topics - **Shipping Fees**, **International Shipments**, **Express Shipping** and **Delivery Updates**
The **Shipping Fees** flow allows you to collect order-specific information such as country of delivery, delivery type etc and checks into SalesFoce to see what shipping fee would apply for that particular delivery.
The **International Shipments** flow checks to see if the requested country is part of an eligible countries list. If the order can be shipped to the requested country users are given an option to transfer to place an order, this then leads to the Orders flow.
**Express Shipping** checks to see if the requested country is part of an eligible countries list for express shipping. The user is then provided with an option to either place an order or receive a quote.
The **Update Delivery** Flow allows the user to either update the delivery time and date (if the order to edit is found within the last three orders via SalesForce search) or transfer to a live agent using the [Live Agent Routing](https://studio.docs.ai.vonage.com/whatsapp/nodes/actions/live-agent-routing) node.
### ***Account Management***
This flow allows users to look into the following: Create an account, Membership updates, Address Management, Update personal data
The **Create an Account** flow collects the user's name, date of birth, Email address, and phone number to log a request for a new account.
**Membership updates** checks to see if the user is a member and then helps them out with issues relating to membership fees, autorenewal, and cancellation of memberships, logging all of these requests into SalesForce. If the user is not verified the virtual assistant then takes them down a verification flow before completing any of these actions.
**Address Management** allows the user to see what their current address is stored as and offers them the opportunity to update it and logs the request into SalesForce. This done after user verification
The **Update personal data** flow verifies the user and allows them to update their phone number and email.
{% hint style="info" %}
*The Verification flow collects the user's phone number and email and checks it against SalesForce to authenticate the user*
{% endhint %}
### *Warranty*
The warranty flow answers questions about Coverage, Eligible period and Claims
**Warranty Coverage** provides general information regarding coverage and also allows users to check to see if their product is covered under warranty after verifying them
**Warranty Period** verifies the user and then checks to see if the warranty of the product is still valid.
**Warranty Claims** verifies the user and lets them know if they can still place a claim based on the status of the product.
### *Routing to a Live Representative*
This flow allows you to take advantage of the[ Live agent routing](https://studio.docs.ai.vonage.com/whatsapp/nodes/actions/live-agent-routing) node or send an email to customer service regarding a customers query.
# Hotels
Hospitality Provider? Here's your all-in-one solution!
{% hint style="info" %}
*Use this template to quickly deploy a virtual assistant that can handle **bookings and reservations**, **rewards and package inquiries**, and even e**scalate to a live agent over chat**.*
{% endhint %}
To use this template, simply choose it from the templates page when you create a new agent. You can then make changes to customize it based on your business needs.
## Flow Overview
### **Collection and Classification of User Intent**
This template includes flows for the following topics: **Hotel Bookings**, **Rewards Programs**, **Transport Services, Hotel Packages, Dining Enquiries, Hotel Amenity Inquiries**, and **Live Agent Routing.**
The flow starts with a check of working hours using a [Conditions](https://studio.docs.ai.vonage.com/whatsapp/nodes/conversation/conditions) node. By default, working hours are set to between Monday to Friday, 8 am to 8:30 pm.
Next using a [Collect Input](https://studio.docs.ai.vonage.com/whatsapp/nodes/conversation/collect-input) node, the user is asked what they need help with. This then leads to a [Classification](https://studio.docs.ai.vonage.com/whatsapp/nodes/conversation/classification) node.
The [Classification](https://studio.docs.ai.vonage.com/whatsapp/nodes/conversation/classification) node classifies user intent into one of the seven categories mentioned above, these are set up as [subflows](https://studio.docs.ai.vonage.com/whatsapp/nodes/flow-control/flows) in order for you to easily edit the individual flows to fit your business needs.
## **Flow Explanation**
### ***Hotel Booking***
This flow begins with the Virtual Assistant (VA) asking the user whether they want to **make a new booking**, **deal with an existing booking** or if they simply have **questions regarding bookings**.
The **Existing Bookings** flow first asks the user if they want more information on their existing booking, or if they want to update or cancel their booking before verifying them.
{% hint style="info" %}
***Verification Flow:** This flow verifies users using their order number and preferred phone number. This request is then verified using a* [*SalesForce Action Node*](https://studio.docs.ai.vonage.com/whatsapp/nodes/integrations/salesforce-actions)*. If the response from SalesForce states that a booking ID exists, the user is then marked as verified, else the flow escalates to a live agent using the* [*Live Agent Routing Node*](https://studio.docs.ai.vonage.com/whatsapp/nodes/actions/live-agent-routing)*.*
{% endhint %}
Once verified, depending on the user's previous response, the flow splits into three:-
* If the user wants **more information on their booking**, the VA checks SalesForce for the booking status and relays it to the user.
* For **updating bookings**, the VA first confirms all the booking details with the user then asks the user if they want to update the number of guests or arrival/departure dates. Once this information is ascertained the VA logs the request into SalesForce and provides a confirmation message to the user.
* To **Cancel bookings**, the VA confirms with the user if they want to cancel their booking, if the answer is affirmative, a request is lodged into SalesForce and the VA provides a confirmation of cancellation to the user. If the user decides not to cancel, the VA confirms that the booking was not cancelled and moves on to ask the user if they require help with anything else.
To make a **New booking**, the VA collects information regarding the user's preferred arrival date, departure date and number of guests before checking for availability and logging the request using a [SalesForce Action Node](https://studio.docs.ai.vonage.com/whatsapp/nodes/integrations/salesforce-actions).
The **Booking FAQ** flow handles queries regarding **Rewards Discounts**, **Discount eligibility**, and **Gift Card Use.** These are currently prebuilt with verbiage that you can easily swap out as per your business needs.
### ***Rewards Program***
This flow contains the following topics: **Creating a new rewards account, Updating Personal data, Rewards points balance** and **Rewards FAQ.**
**Creating a new account** entails the collection of the user's full name, email, preferred phone number and date of birth. This information is then logged using SalesForce.
The **Updating Personal data** flow requires verification before the user is able to either update their phone number or email. this request is then logged using SalesForce.
{% hint style="info" %}
***Personal Data Verification Flow:** This flow verifies the user using their email and phone number. This request is then verified using a* [*SalesForce Action Node*](https://studio.docs.ai.vonage.com/whatsapp/nodes/integrations/salesforce-actions)*. If the response from SalesForce states that this user exists within the database, the user is then marked as verified, else the flow escalates to a live agent using the* [*Live Agent Routing Node*](https://studio.docs.ai.vonage.com/whatsapp/nodes/actions/live-agent-routing)*.*
{% endhint %}
**Rewards points balance** also requires verification before the VA does a lookup using SalesForce and reads out the rewards points to the user.
The **Rewards FAQ flow** answers pre-filled verbiage on questions regarding earning and redeeming points as well as logistics and support.
### ***Transport Services***
This flow has two main subtopics: **Airport Transfers** and **Cab Rentals.**
The Airport Transfers Flow allows for a few further options: **Make a New booking**, **Manage an existing booking** and **Transfer FAQ**s.
* **Making a new booking** involves the collection of the date to be picked up, airport name, and flight number from the user. This is then logged into SalesForce.
* **Managing an existing booking** requires user verification before the user is able to either update or cancel their booking.
* Updating a booking allows the user to change either the pick-up or drop-off booking, followed by a confirmation of the airport name and flight number, this is then logged using SalesForce.
* To cancel a booking, the VA confirms with the user if they want to cancel their booking, if the answer is affirmative, a request is lodged into SalesForce and the VA provides a confirmation of cancellation to the user. If the user decides not to cancel, the VA confirms that the booking was not cancelled and moves on to ask the user if they require help with anything else.
* **Transfer FAQ**s include prefilled answers to questions regarding bookings and payments, details and logistics and safety and security.
{% hint style="info" %}
***Transport Order Verification:** This flow verifies users using their order number and preferred phone number. This request is then verified using a* [*SalesForce Action Node*](https://studio.docs.ai.vonage.com/whatsapp/nodes/integrations/salesforce-actions)*. If the response from SalesForce states that a booking ID exists, the user is then marked as verified, else the flow escalates to a live agent using the* [*Live Agent Routing Node*](https://studio.docs.ai.vonage.com/whatsapp/nodes/actions/live-agent-routing)*.*
{% endhint %}
The Cab Rentals Flow has the same subtopics as the Airport Transfers flow except different booking information is collected from the user - **Make a New booking**, **Manage an existing booking** and **Transfer FAQ**s.
* **Making a new booking** involves the collection of the date to be picked up, pick-up time, and destination from the user. Additionally, the user can also schedule a return to the hotel. This is then logged into SalesForce.
* **Managing an existing booking** requires user verification before the user is able to either update or cancel their booking.
* Updating a booking allows the user to add a change using free text, followed by a confirmation, this is logged using SalesForce.
* To cancel a booking, the VA confirms with the user if they want to cancel their booking, if the answer is affirmative, a request is lodged into SalesForce and the VA provides a confirmation of cancellation to the user. If the user decides not to cancel, the VA confirms that the booking was not cancelled and moves on to ask the user if they require help with anything else.
* **Transfer FAQ**s include prefilled answers to questions regarding bookings and payments, details and logistics and safety.
### ***Hotel Packages***
This flow has 2 subtopics that have further classifications: **Personal Packages** and **Corporate Deals.**
**Personal Packages** can further be categorized into **Hotel and Flight Deals, Hotel and tourism deals** and **Personal Packages FAQs.**
* **Hotel and Flight Deals** and **Hotel and tourism deals** involve the collection of arriving airport, destination of travel, travel dates, number of guests, number of children and differently-abled people before the request is logged into SalesForce and a few package options are presented back to the user. The user can then choose from either one of the packages or repeat the search.
* **Personal Package FAQ**s include prefilled answers to questions regarding seasonal deals, last-minute deals and package deals.
Corporate Packages can be categorized into **Hotel and Flight Deals, Hotel and Event Hosting and Corporate Package FAQs.**
* **Hotel and Flight Deals** involves the collection of arriving airport, the destination of travel, travel dates, number of guests, and number of differently-abled people before the request is logged into SalesForce and a few package options are presented back to the user. the user can then choose from either one of the packages or repeat the search.
* **Hotel and Event Hosting** flow allows users to choose from the type of event (Conference, Seminar, or Team get-togethers), amount of guests (the flow is set not to accept more than 250 people), arriving and departing dates, room reservations and catering requirements before logging a request into SalesForce and relaying the available packages to the user.
* **Corporate Package FAQ**s include prefilled answers to questions regarding logistics and bookings, discounts and deals and events.
### *Hotel Amenities*
This flow is divided into two based on whether the user is asking about an existing booking.
For **Existing Bookings**, the user is first verified (using the order number and preferred phone number) before the VA retrieves the amenity booking. The user then has the ability to either update (reservation date or amenity type) or cancel the reservation, similar to previously detailed flows.
For **users without existing booking**, the VA provides information on the hotel's various amenities including its swimming pool, fitness centre and spa before allowing the user to make a reservation. To make a reservation the user must select an amenity and date before a request is logged on SalesForce.
### ***Dining Enquiries***
This flow is divided into two based on whether the user is asking about an existing booking.
For **Existing Bookings**, the user is first verified (using the order number and preferred phone number) before the VA retrieves the restaurant booking. The user then has the ability to either update (reservation date, time or number of guests), cancel the reservation, or send a note to the restaurant. All of these requests are logged into SalesForce.
For **users without existing an booking**, the VA provides more information on the available restaurants, the ability to make a booking and a few prefilled FAQs.
* The **Restaurants List** provides a list of three restaurants and allows the user to make a reservation if they require.
* If the user chooses to **make a new reservation**, the VA then collects the preferred date, time, number of guests (currently set to up to 10 guests) and any special requests (that can also be added as voice notes in addition to free text). The reservation is then confirmed with the user before logging a request into SalesForce.
* The **FAQ**s answer questions relating to the menu, payment and pricing, booking and logistics.
### ***Live Agent Routing***
Users can also choose to speak to a live agent from the main menu. This is accomplished using the [Live Agent Routing Node](https://studio.docs.ai.vonage.com/whatsapp/nodes/actions/live-agent-routing).
# Appointment Management
Manage user appointments and account changes
{% hint style="info" %}
*Use this template to efficiently **manage appointment and account-related queries** along with escalations to live agents without leaving the conversation in both **inbound and outbound** scenarios.*
{% endhint %}
To use this template, simply choose it from the templates page when you create a new agent. You can then make changes to customize it based on your business needs.
## Flow Overview
**Collection and Classification of User Intent**
This template covers various actions under the following topics: **Appointment management**, **Account management**, **Address information**, **Appointment Reminders** and **Live Agent Handover.**
Additionally, different flows are accessible depending on whether the conversation is Inbound or Outbound.
The Inbound flow starts with a check of working hours using a [Conditions](https://studio.docs.ai.vonage.com/whatsapp/nodes/conversation/conditions) node. By default, working hours are set to between Monday to Friday, 8 am to 8:30 pm.
Next using a text-based [Collect Input](https://studio.docs.ai.vonage.com/whatsapp/nodes/conversation/collect-input) node, the user is asked what they need help with. This then leads to a sub-flow with all four topics and their subtopics mentioned above
## **Flow Explanation**
The following flows are available for **Inbound Calls**:-
### ***Appointment Management***
This template is built to handle the following actions: **Scheduling, Rescheduling and Cancelling** appointments.
These flows first authenticate your user using the verification flow, before asking for further information.
{% hint style="info" %}
***Verification Flow:** This flow consists of an email and phone number check which integrates into SalesForce to see if a user is verified. In case of verification failure, the flow is then escalated to a live agent using the* [*Live Agent Routing Node*](https://studio.docs.ai.vonage.com/whatsapp/nodes/actions/live-agent-routing)*.*
{% endhint %}
**Scheduling Flow**: Depending on whether the user is verified or not, the flow is slightly altered.
* For **Verified users**, the Virtual Assistant (VA), first asks the user what service they require (which by default is displayed via [Reply Buttons](https://studio.docs.ai.vonage.com/whatsapp/nodes/conversation/collect-input#reply-buttons)), then asks them to select a Physician (which by default is set up using [List Messages](https://studio.docs.ai.vonage.com/whatsapp/nodes/conversation/collect-input#list-messages)).
* Next, using a [SalesForce Action Node](https://studio.docs.ai.vonage.com/whatsapp/nodes/integrations/salesforce-actions), the VA does a check of available dates.
* Depending on the response from Salesforce (which is categorized using a [Conditions Node](https://studio.docs.ai.vonage.com/whatsapp/nodes/conversation/conditions)), the flow then branches out into two smaller flows.
* If available dates are returned from SalesForce, the VA then presents these to the user and asks them to make a selection. This is then followed by another [SalesForce Action Node](https://studio.docs.ai.vonage.com/whatsapp/nodes/integrations/salesforce-actions) that retrieves available times. The available time list is then presented to the user, after which the user has the ability to either, change one of the previously selected parameters (Physician, date or time) or choose one of the available times.
* If the user chooses one of the available time slots, the VA logs their request into Salesforce and provides them with a confirmation number. If the user chooses to change any of the collected parameters, the flow then routes them back to the specified part in the flow that handles the parameter they want to edit.
* If there are no available dates returned, the VA asks the user to retry and re-enter a different service and physician to retry the query to receive available dates.
* For **Unverified users**, the VA lets the user know that they need to create an account to schedule an appointment and allows them to create a new account by collecting their name, email address, and phone number preference before logging a request on SalesForce.
**Rescheduling Flow:** Requires the user to be verified. If they are not verified, the VA falls back into the Verification Flow.
* The flow begins with a SalesForce check of the user's scheduled appointments. The VA then confirms the appointment time, date and physician with the user and asks them if they want to change the time or the date.
* The VA then looks for new times/dates as per the user's request and provides a list of available options, allowing the user to pick from them. Once this is done a request is logged into SalesForce and the user receives confirmation of the change.
**Cancellation Flow:** Requires the user to be verified. If they are notverified, the VA falls back into the Verification Flow.
* The flow begins with a SalesForce check of the user's scheduled appointments. The VA then confirms the appointment time, date and physician with the user.
* The VA then confirms with the user if they want to go ahead with the cancellation. If an affirmative response is received from the user, the VA logs the request on SalesForce and confirms the cancellation with the user. Otherwise, the flow moves on to ask the user what else they need help with.
### ***Account Management***
This flow consists of the following options: **Create an Account**, **Update Personal Data** and **Address Management**.
**Create an Account:** This flow interlinks with a few other flows on this template.
* This flow allows users to create a new account by collecting their name, email address, and phone number preferences before logging a request on SalesForce.
**Update Personal Data:** This flow requires mandatory verification before use.
* Post verification, this flow allows your users to update either their phone number or email and logs a request on SalesForce before providing a confirmation to the user of the updated detail.
**Address Management:** This flow requires mandatory verification before use.
* Post verification, this flow allows your users to choose from either editing an existing address or adding a new one.
* Both flows lead to the collection of the update which is then logged onto SalesForce before confirmation with the user.
### ***Appointment Address***
This flow only has one subfunction: **Appointment Location**
This flow requires mandatory verification before execution.
Post verification, a [SalesForce Action Node](https://studio.docs.ai.vonage.com/whatsapp/nodes/integrations/salesforce-actions) checks to see if the user has scheduled appointments.
If a booking ID was retrieved, the VA asks the customer to confirm the booking ID. The VA then checks to see if the booking ID provided by the user is the same as the one retrieved from SalesForce, if so it provides the location for the appointment, or else it provides the user with a retry.
If no booking ID was retrieved from SalesForce, the VA lets the user know that there aren't any scheduled appointments and takes the user down the Schedule appointment flow.
### ***Talk to someone***
Users can also choose to speak to a live agent from the main menu. This is accomplished using the [Live Agent Routing Node](https://studio.docs.ai.vonage.com/whatsapp/nodes/actions/live-agent-routing).
{% hint style="info" %}
*You have the ability to test all the different outcomes of the*[ *Live Agent Routing Node*](https://studio.docs.ai.vonage.com/whatsapp/nodes/actions/live-agent-routing) *before you set it up using the options in the Tester!*
{% endhint %}
All of these inbound flows also include a [Context Switch](https://studio.docs.ai.vonage.com/whatsapp/nodes/flow-control/context-switch) to either go back to the main menu or Route to a human.
**Outbound sessions** have access to the following flow:-
### *Appointment Reminders*
The flow begins with a check using a [SalesForce Action Node](https://studio.docs.ai.vonage.com/whatsapp/nodes/integrations/salesforce-actions) to retrieve information about an upcoming appointment. The first message that goes out to the user states the appointment information and asks the user to confirm the appointment.
If the user confirms, a request is logged in SalesForce and the agent thanks the user before checking to see if the user needs help with anything else (if the user requires more help, the inbound flows are then accessed).
If the user does not confirm the appointment, the VA asks the user if they want to either cancel or reschedule the appointment.
Rescheduling allows for either a date or time change which is logged into SalesForce.
Cancellation prompts the VA to confirm the cancellation from the user. If the user agrees a request is sent to SalesForce and the appointment is cancelled before the VA confirms the cancellation. If the user decides not to cancel, the VA then asks the user if it can help with anything else (if the user requires more help, the inbound flows are then accessed).
This flow includes a [Context Switch](https://studio.docs.ai.vonage.com/whatsapp/nodes/flow-control/context-switch) to Route to a human.
# Tester
Using the Tester you can test your conversational flow using chat or via phone call.
Click on *Tester* on the top right of the page to open, and select which [event](https://studio.docs.ai.vonage.com/voice/events) you'd like to test and whether you want to try the agent via chat or start a phone conversation with the agent.

### Testing via voice
{% hint style="warning" %}
*This option is only relevant for telephony-operated agents.*
{% endhint %}
The phone conversation will be triggered by an outbound call from the studio platform to your own device.
After you selected the event in your agent you'd like to test, select "Phone Call" and fill in the phone number you want to receive the call to. Once you pick up the call, the agent will greet you with the welcome message you added. Now, you can test your conversational flow via the phone.
{% hint style="info" %}
*If you click on the two circular arrows on the top right of the tester, a new call will be simulated and you can start over the conversation.*
{% endhint %}
### Testing via chat
{% hint style="info" %}
*If you added human voice recordings to the nodes, you will be able to play and listen to them in the tester.*
{% endhint %}
After you selected the event in your agent you'd like to test, select "Chat". Once you click "Start Test", it will show you the welcome message of your agent.
The tester will also show when actions have been performed successfully, e.g. when SMS and Emails were sent successfully.
{% hint style="info" %}
*If you click on the two circular arrows on the top right of the tester, a new call will be simulated and you can start over the conversation.*
{% endhint %}
## Mimic a conversation with the tester
Sometimes the flow can be influenced e.g. by the user's phone number, whether the agent was reached during or after hours, etc.
A list of all **Parameters** used in the agents will show when you click on the cog on the top right of the tester. It will be divided by custom parameters created by you and system parameters. Here you can fill in the parameter values that might have an effect on the outcome of the conversation.
Refresh the testing session by clicking on the two circular arrows on the top right and test your flow with the new values.

### Test "No Input"
You can test the "No Input" scenario for Collect Input or Listen nodes by simply typing "no input" into the tester. It will return the desired response for this scenario.

### Zoom in on node
When testing your conversational flow in the chatbot tester, you can easily locate each node used. Click on the "Go to node" icon next to the agent response or user input box and the canvas will zoom in on the relevant node.

### Check the performance of Webhooks
There are two ways to inspect the performance of a [Webhook](https://studio.docs.ai.vonage.com/voice/nodes/integrations/webhook) in the tester.
Firstly, the tester will notify you if the *Webhook* was executed successfully. If unsuccessful, the check would turn red and show an unsuccessful attempt message.

If your *Webhook* node returns a failure, you can get more information by clicking on the code sign on the top right of each text bubble, the JSON file of the conversation will open on the left of the tester. This can be a very helpful tool to debug.

# Editor Mode & Publish
When creating your agent on the canvas in the AI studio, you will do so in **Editor mode**.
Once you are ready to connect your agent to the live environment, where any external user can reach your agent, you will have to **publish** the agent.
{% hint style="info" %}
*This is applicable for all channels except for* [*HTTP*](https://studio.docs.ai.vonage.com/http/working-with-http-agents) *and WhatsApp agents. For HTTP agent types, you will publish without having to add a phone number. To learn how to publish a WhatsApp Agent please refer to* [*this page*](https://studio.docs.ai.vonage.com/whatsapp/get-started#add-a-phone-number-to-your-whatsapp-agent)*.*
{% endhint %}

## How to publish your Telephony and SMS agents
To publish your agent, click on the "**Publish**" button with the little rocket on the top right of the page. For all channels except HTTP, you will be prompted to add a phone number.
{% hint style="danger" %}
### **How to purchase a phone number**
*To add a phone number to your agent, you have to purchase a phone number on the API Dashboard. Sign up for a* [*Vonage API Account*](https://dashboard.nexmo.com/sign-up) *and once you have created an account, you are able to purchase one or more phone numbers.*
*The numbers you purchased will show in the studio when publishing your agent under "Phone Settings".*
***Please ONLY link your agent with a phone number on the Studio application, never from the API Dashboard.***
{% endhint %}
After having added a phone number, please click on "next". You will be prompted to give your version a name and a short description of the change.

{% hint style="warning" %}
#### ***Once published, you will have two versions of your agent:***
*The **published version** in the live environment that you and external users can interact with, and the **editors' version**, where you can make adjustments.*
***Every time you would like to publish a new version of your agent, please click "publish" again.***
{% endhint %}
## How to change to a previous version
In **Editor mode**, if you'd like to have a look at previously published versions, click on the three dots on the top of the page next to the name of the agent and select **"**versions".
The **published version** will open in the same window. On the right, you will see all versions you published until now. You can either open an old version in the editor, view the description, or un-publish a currently active version to revert back to a previous version.
If you want to revert to a previous version, you can click on the three dots next to a version and select "Open in editor".
Once you want to return to the editor mode, just click on "Back to Editor" on the top left.
{% hint style="warning" %}
*If you would like to test new changes made to your agent via telephony, please make sure to publish so your users can interact with the most updated version of your agent.*
{% endhint %}

# Reports
Vonage AI offers a variety of **general and custom reports** that will help you gain valuable insights regarding your virtual agent's performance and can be used as a **great tool for experience optimization**.
By default, when clicking on the "**Reports**" tab, you will see all agent-user interactions in this account.
### Generate new report
To generate a new report, fill in all the details under the “Generate Report” drawer on the right.
Choose the report type you’d like to generate, as well as the region, time frame, agent, and time zone you wish the information to be presented in.
Once you’re done, click on “Apply” and you’ll see the report open on your screen.
***
## Report types
### Call log Report
This report will reveal the basic data of the session log. It will show the user number, date & time, agent name, and session duration. Clicking on an individual call will allow you to view all the collected information regarding the call.
* **ID** - Shows you the user's phone number/identifying detail.
* **Agent Name** - allows you to view which one of your virtual assistants the call is related to.
* **Agent Type** - allows you to view the channel
* **Event & Flow** - details the flow that your user accessed along with the event that was triggered.
* **Date & Time** - provides information on date and time in day-month and 12-hour format respectively.
* **Call Duration** - specifies how long the user stayed in the conversation on the AI Studio platform
* **Flow Path** - indicates the statuses of the nodes in the triggered flow
{% hint style="info" %}
***Flow Path Statuses***\
*Error indicates that a node or a function with the agent failed to work. In this case, this error within the agent may have also caused it to go into fallback or for the entire flow to fail. This also means that the function took more than 5000 ms to execute and returned a status code greater than 400.*
\
*Warning refers to an error within the flow, however, when a call is marked with this status it means that the rest of the flow is executed as expected. This means that the function took somewhere between 2000 ms and 5000 ms to execute and returned a status code of less than 400.*
*Success refers to all the nodes within the flow executing as expected. The function likely executed in less than 2000ms and returned a 200 or less than 400 status code.*
{% endhint %}
* **Session Status** - Provides a Status for the call as a whole.
{% hint style="info" %}
***Session Status Types***
*Completed refers to the post-call status of a session that was executed.*
*No answer is caused due to the recipient's line being busy, the call being unanswered, picked up by a machine or timed out causing the call to fail. Reports of these calls are usually blank and missing information refers to a session where the user either didn't pick up or the call did not initiate correctly causing the call to fail. Reports of these calls are usually blank and missing information.*
*Cancelled Session was cancelled by a Studio user*
*In progress refers to calls that are currently in progress. In order to view information relating to these calls you can refresh your reports and view all the collected information post-call.*
*Failed can either mean a session was not connected (telephony agents only) or that the template did not execute or send (WhatsApp agents only)*
{% endhint %}
#### Report States
When your report type is set to Call Logs you will notice a category called Report States listed under the time.
Report state refers to the status of the user interaction, there are a few states that you can sort by:-
***All***
This report state allows you to view all interactions regardless of state.
***Success***
This report state allows you to view all calls that are considered successful according to the agent flow.
***Warning***
This report state allows you to see calls that may have had one or more nodes failed or missed within the agent
***Error***
This report state allows you to see calls that have failed.
#### *In Progress*
This report state refers to calls that are currently in progress. To view the real-time progress of these calls make sure to refresh the call within the open call drawer.
***
### Parameters Report
All parameters collected in the session will be shown in each individual call report right below the transcript.

***
### Tags Report
This report will show you all of the tags that were collected in the sessions. You will see for each tag the total amount of tagged sessions and the percentage of interactions.
For example, if you tagged a node as “Successful” and another as “Failed”, you will be able to see how many sessions were successful and how many failed. If you click on a tag it will open the raw log window of that tag and each row you will press will open the log of this specific interaction.
Click [here](https://studio.docs.ai.vonage.com/properties-1/tags) to learn how to add tags.
{% hint style="info" %}
***When to use this report***
*This report will be beneficial for you if you want to check how many users are inquiring about a specific topic. Therefore, giving us a good indication as to which the most prominent topics of interest are to your user.*
{% endhint %}

{% hint style="info" %}
*Use tags to understand what the common call flows and trending topics are and edit them according to fluctuating needs.*
{% endhint %}
***
### Parameter Report
This report will indicate all the parameters that were collected in the sessions, including the basic information such as agent type, date and time, call duration, state of the call (which is derived from the flow path report), the parameter name, the parameter session ID and the value that was collected. You can tailor this report to include any parameter relevant to your flow.
{% hint style="info" %}
***When to use this report***
*This report will be beneficial for you if you are collecting a lot of important data from your users that the agent will save in the parameters. For every interaction, this report will show the parameters collected.*
{% endhint %}

### Last Collected Tag Report
This report will arrange the last collected tag in a session. You will see for each tag the total amount of tagged sessions and the percentage of the interactions.
Click [here](https://studio.docs.ai.vonage.com/properties-1/tags) to learn how to add tags.
{% hint style="info" %}
***When to use this report***
*This report will be beneficial for you if you want to check where the conversation with your agent ended. The last collected tag will be the last tag that the user passes in the conversation with the agent. Therefore, giving us a good indication as to where a user ends the interaction.*
{% endhint %}

***
### Dynamic Reports (BETA)
You can create a custom report with only the information important to you. You can filter the reports to look for a specific value included in the transcription, phone number, time, etc.
{% hint style="info" %}
***When to use this report***
*This report will be beneficial for you if you want to create a flexible custom report fully based on your business needs. You can include any parameter of interest, including simple data about your users (name, phone number, etc.), data about the interaction (channel, time & date, etc.) as well as parameters captured in the conversation and the last collected tag.*
{% endhint %}

{% hint style="danger" %}
*All information provided by our* [*insights API*](https://studio.docs.ai.vonage.com/api-integration/vai-integration-guide) *(transcriptions, recordings, general info) is automatically wiped after 30 days (this will be increased to 90 days in the next few weeks), in order to maintain privacy and compliance with GDPR and other privacy regulations.*
{% endhint %}

***
## Audit Logs
The Audit Logs report shows all changes made to your AI Studio agents. For every logged action, you will see the agent name, agent ID, the type of change performed (such as edits, publications, or deletions), the timestamp, and the user who initiated the action.
For example, if a team member updated a flow, published a new version, or removed an agent, you will be able to review exactly who performed the action and when it occurred. Clicking on an entry will open the detailed log information for that specific event.
{% hint style="info" %}
***When to use this report***
*This report is beneficial when you need full traceability of agent updates - especially for teams managing shared environments or operating under compliance requirements. It helps you verify version control, identify the source of unexpected changes, support troubleshooting, and maintain governance over who made modifications to any agent within your workspace.*
{% endhint %}
***
## Analytics in Vonage Contact Center
When you use AI Studio with [Vonage Contact Center (VCC)](https://docs-vcc.atlassian.net/wiki/spaces/DP/overview?mode=global), analytics dashboards are available in [Historical Analytics](https://docs-vcc.atlassian.net/wiki/spaces/DP/pages/3609985025/Historical+Analytics) in the VCC Admin Portal (**Insights** > **Historical Analytics**). Some dashboards are available automatically once the prerequisites below are met; others require additional enablement (see [Virtual Assistant Historical Analytics](#virtual-assistant-historical-analytics)).
All dashboards in this section require the following:
* AI Studio and VCC with the Virtual Assistant add-on enabled on your account.
* Virtual Assistant applet is configured in your interaction plan to route interactions to your Virtual Assistant. For more information, see [Virtual Assistant](https://docs-vcc.atlassian.net/wiki/spaces/DP/pages/3986489352/Virtual+Assistant+applet).
* Historical Analytics license. Viewer to view dashboards, or Creator to create custom dashboards.
#### AI Studio and Historical Analytics
Once the prerequisites above are met, the Virtual Assistant summary and Virtual Assistant usage dashboards populate with data automatically and refresh approximately every 15 minutes.
Session volumes, total time spent in VA sessions, and usage trends over time, with session-level details for each interaction.
#### Virtual Assistant Historical Analytics
When Virtual Assistant Historical Analytics is enabled on your account, pre-built dashboards and a dedicated data subexplore are available in the VCC Admin Portal for root-cause analysis of VA performance. This feature provides historical analytics only. Data is uploaded in 4-hour batches.
{% hint style="info" %}
**Traditional NLU and Hybrid NLU support only**
Virtual Assistant Historical Analytics supports Traditional NLU and Hybrid NLU agents only. Agents built on the Agentic NLU engine are not supported, and session data is not captured or reported for those agents. For more information, see [Virtual Assistant Historical Analytics](https://docs-vcc.atlassian.net/wiki/spaces/DP/pages/5726535743/Virtual+Assistant+Historical+Analytics) in the Vonage Contact Center documentation.
{% endhint %}
Pre-built dashboards cover the following areas:
* Intent detection rates and classification node performance.
* Parameter capture rates and failure patterns.
* Q\&A node effectiveness.
* Custom outcome tracking through tags.
* Individual session forensics.
VA Historical Analytics also includes the **Virtual Agent (VA) subexplore**, a dedicated data model in Historical Analytics that you can use to build your own custom dashboards from raw VA session data.
For more information, see [Virtual Assistant Historical Analytics](https://docs-vcc.atlassian.net/wiki/spaces/DP/pages/5726535743/Virtual+Assistant+Historical+Analytics) in the Vonage Contact Center documentation.
# Users
The Users tab helps you keep track of the information your users provide in the conversational flow. If you choose to use this feature, data collected during the interaction between the virtual assistant and your user is stored automatically in order to improve customer experience.
You can save any kind of parameter *(given that it has a sys.any entity type)* - from the user's phone number and name to more specific information based on your specific use case e.g. user's postcode, preferred way of communication, etc.
In case the user contacts the virtual assistant later, this data can be used to customise and optimize their experience, across channels and conversation sessions.
For example, this can be the ability to greet the user by their name and use the saved data for identification. Or, if there are some questions that every user has to answer prior to receiving service and these have been already answered by the user prior, the agent won’t have to ask them again.
{% hint style="info" %}
*This feature is only available for voice, WhatsApp, or SMS channels.*
{% endhint %}
### Enabling Users Tab
The Users tab is available on the navigation bar next to reports once you have opened up Studio. Once clicked, the tab will display all user parameters along with the data that was collected under them as well as the API keys of your agent.
{% hint style="info" %}
*Data for the users tab is saved under API keys. This means you can have multiple agents under the same API key and use your user data across all of those agents.*
{% endhint %}
#### Here's how to enable your user parameters:-
Once you have entered the users tab, select the API key that your agent is on and click on the **Create User parameter** button. Once the drawer opens you can create the categories of user data you want to collect.
Return to your agent and make sure that these parameters will have information stored in them. You can do this by simply choosing your user parameter wherever you are collecting your input.
You can also use the set parameter node and equate the value of the appropriate collected parameter to the newly created user parameter towards the end of your conversation.
Alternatively, you can also create user parameters within your agent by going to Parameters and creating a parameter under User Parameters.
{% hint style="warning" %}
*To be able to view the extracted information on this page, your agent needs to have a phone number assigned to the $CALLER\_PHONE\_NUMBER parameter. You can do this by setting the value using a Set Parameter node.*
{% endhint %}
Once this is set up in the agent, every time your agent interacts with a user, the data collected will be automatically displayed under the users tab. It will look something like this:-
{% hint style="info" %}
*Make sure to tick “**Skip this node if the value is already collected**” in the respective Collect Input nodes you want to skip the prompt when the data has already been collected.*
{% endhint %}
### How is this useful?
Using this feature exponentially increases the opportunities for the customisation of your user’s journey. You can choose to greet a repeat customer by name, have their preferences already filled in and refrain from asking them repetitive questions.
If users have already filled in formation prior to accessing the agent, that data can also be used to dictate the flow within the agent.
### Limitations
Saving user data to enhance user experience is great but currently it comes with a few caveats. Some of the drawbacks at this point are:-
* **User Parameters have to be sys.any entity type:** This means that parameters created with any other system entity type (like sys.numbers, sys.email, etc) or custom entities will not work as a User Parameter
* **Only last collected values are saved:** If during the conversation multiple inputs override in a parameter, the last collected value will be stored on the users tab.
### How to test it
If you want to test this feature for your agent, make sure to add a phone number to the $CALLER\_PHONE\_NUMBER parameter. This way, you will open a new contact in the user data storage. Heres a quick video to demonstrate how this will work:-
{% embed url="" %}
# Knowledge AI
## Smarter, Brand-Safe Answers with Generative AI
#### Looking to build an intelligent Virtual Assistant powered by your own knowledge base?
Knowledge AI is a powerful feature within AI Studio that allows your Virtual Assistant (VA) to generate intelligent, accurate answers using your content. Rather than relying on predefined [intents](https://studio.docs.ai.vonage.com/properties-1/intents) and [entities](https://studio.docs.ai.vonage.com/properties-1/entities), Knowledge AI enables direct use of uploaded materials, known as Sources, to respond contextually to user questions.
Used in conjunction with the [Q\&A Node](https://studio.docs.ai.vonage.com/voice/nodes/basic/q-and-a-node), Knowledge AI taps into a streamlined system built on RAG (Retrieval-Augmented Generation), combining semantic search with [Google Gemini’s large language models (LLMs)](https://ai.google.dev/gemini-api/docs/models) to generate relevant responses.
#### Here’s how the system works:
* **Sources**: These are the files, URLs, or public cloud documents you upload. They provide the foundational knowledge your assistant draws from.
* **Indexes:** Logical groupings of Sources that organize data for specific types of user queries.
* **The Q\&A Node:** Used within your VA flow to access a chosen Index and return the right answer at the right time.
* **RAG (Retrieval-Augmented Generation):** The backend engine that searches through your Index and generates a response via the LLM.
* **Index Testing:** A built-in validation tool to simulate user input and check how well the Index responds before going live.
The combination of these elements creates a flexible and scalable framework that enables dynamic, rich conversations powered by your content. This architecture supports high-quality conversational AI without the need for manual intent training or scripting flows for each query.
***
## How to get started
This guide provides step-by-step instructions to **create**, and **optimize** Virtual Agents using the Knowledge AI feature.
{% stepper %}
{% step %}
### Optimize your Sources
The quality of Knowledge AI responses depends directly on the quality of your indexed content. Well-structured, relevant sources improve accuracy, speed, and reliability.
To optimize your documents before uploading, follow these best practices:
#### 1. Clean and Organize Content
* Remove navigation bars, headers, timestamps, and feedback forms.
* Use clear headings and subheadings for structure.
* Keep numbered lists in proper order.
#### 2. Make Content Easy to Read
* Add transitions between list items (“After completing step 2, do…”).
* Avoid tables. Convert them into flat-level syntax (simple sentences or lists) to help the AI process information linearly.
* Replace images with descriptive text.
#### 3. Improve Semantic Quality
* Add short summaries below each section heading.
* Add *session starters* for common questions (“If you want to order software, follow the steps below…”).
* Reduce ambiguity by replacing pronouns with specific nouns.
* Define abbreviations and internal terms to provide context.
#### 4. Structure for Performance
* Break long documents into smaller, focused files.
* Use clear, specific titles for each document.
* Ensure related content is properly tagged and indexed.
###
{% endstep %}
{% step %}
### Upload Your Sources
To begin, log in to AI Studio and head to the **Knowledge AI** tab at the top of the page.
#### What Can You Upload?
* **Local Files:** PDF, TXT, or HTML formats
* **URLs:** e.g., [www.vonage.com](https://www.vonage.com/)
* **Cloud Storage Links:** Public links without access permissions
{% hint style="warning" %}
**When uploading URLs:**
* Only the main/seed URL is scraped.
* Subpages are not automatically crawled.
* Each URL must be uploaded individually.
* Uploaded content is a snapshot of the current visible text (no dynamic updates).
* Authenticated or restricted content cannot be parsed – use HTML files instead.
{% endhint %}
#### File Size Limits
* **PDF**: 10MB max
* **HTML/TXT**: 5MB max
* **URL text content**: 5MB max
Once uploaded, all text (except table content or image-embedded text) is indexed and used as part of the knowledge base.
{% hint style="danger" %}
#### Need to Update Content?
**Since Sources are static:**
* Always re-upload after edits.
* Replace the old Source in the associated Index only after confirming the new Source uploaded successfully.
* Name your Sources clearly to maintain traceability.
{% endhint %}
### Access & Structure
* Sources are uploaded per API key.
* Indexes are created by grouping Sources.
* Indexes are accessible to VAs using the same API key.
{% hint style="warning" %}
You’ll know your Source is ready when the status displays a checkmark.
**Upload time** depends on the file size, ranging from a few seconds to 30 minutes. You can preview URLs, download uploaded files, or delete Sources directly from the tab.
{% endhint %}
{% endstep %}
{% step %}
### Group Your Sources to Create Indexes
An Index is a collection of Sources that your VA can use to generate responses in a specific context.
#### Example Use Cases
* **Multiple documents for troubleshooting CPU Model A?** Group them under one Index.
* **Only one Source for a product guide?** Still requires an Index to be used by the Q\&A node.
{% hint style="success" %}
#### Pro Tip
The same Source can belong to multiple Indexes. This boosts flexibility across flows.
{% endhint %}
Once created, you can assign the Index in a Q\&A node to determine what content your VA will draw from.
{% hint style="warning" %}
Indexes are API key-scoped but are intended for use by a single VA. If multiple VAs need the same Index:
* Use the Duplicate function in the Index tab.
* Duplicates inherit the same Sources and are auto-renamed as \[Original Name] \[Copy].
{% endhint %}
{% hint style="success" %}
#### Pro Tip
When **collaborating in teams**, ensure all relevant users have access to the correct API keys. Sources and Indexes are created at the account level and are only available to Virtual Assistants (VAs) under the same API key.
If a user doesn't have access to a specific API key, they won’t be able to view or use the associated Sources or Indexes in their VAs.
{% endhint %}
{% hint style="info" %}
#### Duplicating an Index
1. Go to the Index tab.
2. Click the three dots beside the Index name.
3. Select the Duplicate icon.
4. Your duplicate appears as a new row, ready for reuse.
💡 This helps streamline workflows without manually rebuilding each configuration.
{% endhint %}
{% endstep %}
{% step %}
### Test Your Indexes
The Index Testing tool allows you to validate whether your knowledge base responds accurately to real-world user input.
* Enter a user query.
* Get a response based on the selected Index.
* See which Source was used for the answer.
{% hint style="success" %}
#### Pro Tip
If Knowledge AI can’t find relevant information, it returns: "I don’t know". This helps prevent hallucinations and allows you to create a fallback path.
{% endhint %}
### Optimize as You Go
* Modify Sources or reorganize Indexes based on test results.
* Testing helps surface gaps and identify whether your content aligns with expected questions.
{% hint style="warning" %}
Any changes to Index content are reflected immediately in live flows – no need to republish the VA. We recommend duplicating an Index and testing changes there before modifying the live one.
{% endhint %}
{% hint style="danger" %}
**Each request made in the Index Tester incurs a separate charge**. Please consult your Account Manager for pricing.
{% endhint %}
{% endstep %}
{% step %}
### Set Up Your Q\&A Node
Once your Sources and Indexes are tested, you’re ready to integrate them into your VA using the Q\&A node!
➡️[ Continue to Step 4: Configure Q\&A Node](https://studio.docs.ai.vonage.com/voice/nodes/basic/q-and-a-node)
{% endstep %}
{% endstepper %}
***
### 🔍 Related Links
* [How to set up your Q\&A node](https://studio.docs.ai.vonage.com/voice/nodes/basic/q-and-a-node)
* [Get Started - Voice Channel](https://studio.docs.ai.vonage.com/voice/get-started)
* [Get Started - WhatsApp Channel](https://studio.docs.ai.vonage.com/whatsapp/get-started)
# Entities
An entity represents a **specific piece of data or variable in a user's input**. It often corresponds to nouns or values that help clarify or complete a user's request.
### Entity Example
Imagine you're interacting with a travel booking virtual assistant:
**User input:**
> *"Book a flight from New York to Paris on June 15."*
Here’s how the virtual agent breaks it down:
**Intent**: *Book a flight*
**Entities**:
`departure_city`: *New York*
`destination_city`: *Paris*
`date`: *June 15*
{% hint style="info" %}
These entities provide the **details** the agent needs to perform the task.
{% endhint %}
### The Importance of Entities in Virtual Assistants 💡
Entities are important components in your virtual agent architectures, enabling more effective interactions with users. They can be classified into two categories:
* **Custom Entities**: Defined by the AI Studio user, tailored to specific needs, such as `coffee_type` (e.g., latte, espresso) or `size` (small, medium, large).
* [**System Entities**](https://studio.docs.ai.vonage.com/properties-1/entities/system-entities): Predefined entities available in AI Studio, covering a wide range of standard data points.
{% hint style="info" %}
### Benefits of Using Entities 🚀
1. **Flexibility**: Entities allow the virtual assistant to adapt to various user input variations, improving interaction quality.
2. **Data Collection**: They help gather necessary information for specific actions, like booking or searching.
3. **Personalization**: Entities support customization by incorporating user names or preferences, enhancing the user experience.
Entities are essential for creating a responsive and personalized virtual assistant, making interactions smoother and more efficient.
{% endhint %}
{% hint style="success" %}
### Introducing the NEW Hybrid NLU 🚀
[AI Studio’s Hybrid NLU](https://studio.docs.ai.vonage.com/ai-studio/nlu-ai-engine-traditional-vs-hybrid) introduces a significant advancement in language understanding by combining rule-based logic with transformer-based models from Google Gemini.
This hybrid approach enhances both intent recognition and entity extraction by leveraging contextual understanding and semantic nuance, rather than relying solely on predefined patterns. The result is a more accurate and flexible NLU system with minimal configuration required.
*Learn more about our new Hybrid NLU engine* [*here*](https://studio.docs.ai.vonage.com/ai-studio/nlu-ai-engine-traditional-vs-hybrid)*.*
{% endhint %}
***
## Custom Entities for Hybrid NLU
The New Hybrid NLU allows these methods to define custom entities:
#### Description
Write natural language rules about what the entity should capture. Use this when the entity has a clear structure but no predefined values.
Example:
> “Order number consists of four letters, an underscore, and four digits.”
#### Both Description and Closed List
Provide a list of acceptable values and optional synonyms - Ideal for well-bounded value sets.
Example:
> *Entity: `communication_type`*
>
> \
> *Description: "The method someone wants to use to communicate."*
>
> \
> *Values and synonyms:*
>
> \
> *Phone → "call", "phone call", "mobile"*\
> *Fax → "facsimile", "fax message"*\
> *Email → "e-mail", "mail"*
{% hint style="warning" %}
**Using Closed Lists?**
Toggle “Enable fuzzy matching” checkbox to leverage closed lists with low training data (i.e, synonyms for values in closed list). If this checkbox is not selected, Hybrid NLU will attempt to search for exact matches of the values or synonyms provided in the closed list.
{% endhint %}
***
### 💡 **Prompt Library for Commonly Used Entities & Corrector Functions**
In some scenarios, you might want to tweak an existing system entity to improve the Virtual Agent's performance. Create your own Custom Entity by using the below recommended prompts as “Description” for the Custom Entity.
| Entity type | Recommended Prompt for Text Channels (eg: WA, SMS, HTTP) | Recommended Prompt for Voice Channel |
| ------------- | -------------------------------------------------------------------------------------------------------------------------------------------------------------------------------------- | ---------------------------------------------------------------------------------------------------------------------------------------------------------------------------------------------------------------------------------- |
| Phone Number | *Extract the phone number mentioned. Normalize it by removing all separators. Do not add a country code unless explicitly written. Output only digits.* | *Extract the phone number mentioned. Convert phrases like “triple seven” or “zero four” to digits. Remove all separators. Output only digits. Add country code only if clearly mentioned or inferable from timezone {{timezone}}.* |
| Web URL | *Extract the URL mentioned. It may contain spelled out components. Convert numbers in words to digits. Return a valid URL.* | *Extract the spoken URL. Convert phrases like “dot” → ., “slash” → /, and numbers in words to digits. Return a clean, valid URL.* |
| Email | *Extract the email address. Convert words like “at” → @, “dot” → .. Numbers in words should be converted to digits if inside the email. Ignore unrelated parts. Return a valid email.* | *Extract the spoken email. Handle ASR misinterpretations like “dot” → ., “at” → @, “one” → 1. Convert only relevant words. Do not invent or complete missing parts.* |
| Date/ Time | *Extract any date or time. If AM/PM is not stated, return two versions. Return in ISO 8601 format. Provide timezone and current time context.* | *Extract any date or time mentioned. Account for ASR errors in numbers and expressions. If AM/PM not stated, return two variants. Format in ISO 8601. Provide timezone and current time context.* |
| Name | *Extract the name or nickname. It may be partial. Return it capitalized.* | *Extract the spoken name or nickname. Account for possible ASR errors. Return it capitalized.* |
| Confirmation | *Identify if the user said yes, no, or maybe. Handle informal variations like “yeah” or “nah”. Return only one of: yes, no, maybe.* | *Detect confirmation intent in speech: “yes”, “no”, “maybe”. Handle casual phrases like “yep”, “nah”, or “mm-hmm”. Return one of: yes, no, or maybe.* |
| Number | *Extract the number. Convert written words like “one”, “nil” to digits. Return as an integer.* | *Extract the number from speech. Convert words like “o”, “zero”, “nil”, or “ten” to digits. Return a numeric value.* |
| Serial Number | *Extract a serial number. Preserve original separators and letter casing. Convert number-words to digits. Return uppercase with preserved separators.* | *Extract the serial number spoken. Convert phrases like “dash”, “slash”, “dot” to symbols. Convert number words to digits. Return uppercase with separators intact.* |
{% hint style="warning" %}
Alternatively, you might face **ASR transcription issues** in the voice channel, which could negatively impact your virtual assistant's performance.
{% endhint %}
### 💡 Best Practices for Corrector Functions
To address such issues, you could optionally add the below recommended prompts to the “Description” field of your Custom Entity.
| Corrector Function | Recommended Prompt |
| ---------------------------- | ---------------------------------------------------------------------------------------------------------------------------------------------------------------------------------------------------------------------------------------- |
| Resolve Phonetic Alphabet | *"Replace NATO phonetic words (e.g., 'alpha', 'bravo') with their corresponding letters (e.g., 'a', 'b'). For example, "alpha tango lima" → "a t l""* |
| Resolve Spelled Out Alphabet | *"Convert phrases like 'a for anton' or 'b as in bertram' to just the letters (e.g., 'a b')* |
| Resolve Phonetic Counters | *"Expand phrases like '3 times 2' or 'double 4' into repeated digits (e.g., '222', '44')* |
| Contract Single Characters | *"Join sequences of single letters separated by spaces into words, keeping the rest unchanged. For example "my name is r a c h e l" > "my name is rachel"."* |
| Resolve Spelled Out Numbers | *"Replace all number words in the text with their corresponding numerical digits. For example, convert 'five and three hundred nineteen' into '5 319'.* |
| Contract Number Groups | *"Detect sequences of numbers that are separated by spaces and join them into a single continuous number, while preserving the rest of the sentence. For example, convert 'his number is 333 43 22 44' into 'his number is 333432244'."* |
### Defining a Custom Entity with a Corrector Function
Recommended Format:
`` + ``
Example: If you are trying to build a custom entity `Names`, your “Description” field of your Custom Entity could be:
> *“Extract the spoken name or nickname. Account for possible ASR errors. Return it capitalized. Convert phrases like 'a for anton' or 'b as in bertram' to just the letters (e.g., 'a b')”*
***
## 💡Best Practices for Using Hybrid NLU Effectively for Entity Extraction
| Do | Don't |
| ---------------------------------------------------------------------------------------------------------------------------------------------------------------------------------------------------------------------------------------------------------------------------------------------------------------------------------------------------------------------------------------------------------------- | ------------------------------------------------------------------------------------------------------------------------ |
|
Define custom entities with a clear, natural-language Description (up to 500 characters). Think of it as writing a prompt for the AI - the more precise and detailed you are, the more accurate the extraction will be.
Example:
✅ entity name: delivery\_method
✅ description: “The way the item is sent, such as mail, email, or fax.”
| ❌ No description or vague labels like "method" - poor prompts = poor extraction. |
|
Use both Closed Lists and Descriptions for critical entities when maximum precision is needed.
Test your entities thoroughly using the VA Tester after each major update.
Example: ✅ Simulate user input like “Can I get a transcript from last semester?” to verify behavior.
|
❌ Don’t assume the VA behaves the same as Traditional NLU - always revalidate.
|
Example of a custom entity in Hybrid NLU
***
## Create Your Entity
1. In the left navigation, click on Properties > Entities.
2. A drawer is going to open on the right, click ‘**Create Entity**’ on the top right.
3. Name the entity - for example, “`size`” and click ‘Add new Entity Value’.
4. Add new entity values - for example, “small”, “medium”, and “large”, and if there are synonyms (see explanation below) add them to each value to help the agent identify more types of inputs (i.e. synonym for “large” can be “big”, "max", etc.).
5. To save a value, press anywhere on the screen to save.
6. Don't forget to hit "save" once you're done adding new values.

### Synonyms
Sometimes there is more than one or two words that have the same or nearly the same meaning. For example, if asked "What pizza size do you want?", you can answer “large” or “big” and even “huge”. To accommodate any possible user response, it’s important to add as many synonyms as you can.
### Entity Recordings
{% hint style="info" %}
*Only relevant for voice agents*.
{% endhint %}
If your agent is utilizing human voice recordings instead of the available robotic voices, it only makes sense to also add recordings to your entity values. Either add the recording on the spot or select it from the drop-down, which shows all recordings from the [Recordings Property](https://studio.docs.ai.vonage.com/coming-soon-recordings).
Afterwards, you will be able to use these recordings throughout the flow. E.g. in a *Speak* node.
The agent will ask the user, "Which pizza size is right for you today?" and the user might answer "large". If you wanted to confirm the user's choice with "I got that you want to order a large pizza, is that correct?", the agent will be able to use the entity value of "large" using the attached recording.

***
## Import an Entity
1. When in the entities window, click '**Import Entity'** on the top right.
2. The AI Studio will prompt you to select the relevant file from your device. The format of the file should be CSV. Make sure you format the file in a way that is compatible with the agent. Please see the correct format below. The name of your file will be the name of the entity.
3. If needed, you can always make changes to the entity later on. Don't forget to hit "save" once you're done adding new values.

***
## Export an Entity
You can export an entity by clicking on the little export symbol on the right of the entity. This will export a CSV file containing all values and synonyms of the entity.
Example of Entity with Hybrid NLU
***
## Custom Entities for Traditional NLU
Within Traditional NLU, a **Custom Entity** has to be defined by using the “Training Set” only, which is equivalent to the “Closed List” within Hybrid NLU. Under this Training Set, users could:
* Add **new entity values** - for example, “small”, “medium”, and “large”, and if there are synonyms (see explanation below) add them to each value to help the agent identify more types of inputs (i.e. synonym for “large” can be “big”, "max", etc.).
* Add **Entity Recordings** following the similar process as in Hybrid NLU.
* **Import Entity & Export Entity** following the similar process as in Hybrid NLU.
{% hint style="success" %}
For additional guidance on choosing the right AI engine, please refer to this comparison of [Hybrid NLU vs Traditional NLU](https://studio.docs.ai.vonage.com/ai-studio/nlu-ai-engine-traditional-vs-hybrid#define-custom-entities). 💡
{% endhint %}
\
# System Entities List
List of Current System Entities
| Name of system entity | Purpose | Use Case | Hybrid NLU | Traditional NLU |
| --------------------- | --------------------------------------------------------------------------------------------------------------------------------------------------------------------------------------------------------------------------------------------------------------------------------------------------------------------------------------------------------------------------- | ---------------------------------------------------------------------------------------------------------------------------------------------------------------------------------------------------------------------------------------------------------------------------------------------------------------------------------------------------------------------- | ---------- | --------------- |
| @sys.any | This entity can be filled with any value. There is no limitation to the type of input that can be classified using this entity. |
You can use this entity when you do not mind what kind of answer the caller is giving and do not need it to be saved by the agent.
Keep in mind, that because this entity is not attached to a list such as numbers or dates, the agent will not be able to read out the input in the response. $INPUT cannot be read out correctly if you use @sys.any.
| ✅ | ✅ |
| @sys.contacts |
This is a list of contact information, including name, email, phone number, etc.
In order to make an employee list, go to "Contacts" under Properties. For more information on Contacts, please click here.
|
If you want to route the call, you need to use this entity in the RECIPIENT\_NAME parameter.
(If the call should be routed to a particular contact, please include the name of the contact in the value.
If it is a required parameter waiting to be filled, you may leave the value empty.)
| ❌ | ✅ |
| @sys.date |
This entity includes weekdays, months, years as well as actual dates.
If the caller’s input is only a weekday without the actual date, the agent will calculate the date based on the current date.
|
“I want to schedule a meeting with James on Thursday.”
“My router stopped working on the 23rd of March, 2019.”
“The last time I spoke to Customer Service was yesterday.”
| ✅ | ✅ |
| @sys.time |
@sys.time includes hours, minutes and seconds. If the caller’s input will include the hour without AM or PM, the agent will not be able to understand whether it is meant to be AM or PM.
Keep in mind that the agent will assign a time for the following user input:
Morning - 6 am
Noon - 12 pm
Afternoon - 1 pm
Evening - 6 pm
|
“I would like to schedule for 12 pm.”
“I am available around noon.” (This will be 12 pm)
| ✅ | ✅ |
| @sys.names |
A list of names based on common names in English speaking countries.
If not being filled in the first prompt, the parameter will fill with any value, not just names. Some caller names might be very particular, so the agent will also accept those in the second prompt.
|
“My name is Betty.”
“I would like to be called John.”
| ✅ | ✅ |
| @sys.number |
This entity includes all numbers.
For phone numbers, it is recommended to use the @sys.phone-number entity. Be aware that the agent will read out the number as a whole and not as digits. Even if the caller gives the number in digits “5 - 0 - 0”, the agent will only be able to read it out as a whole number “Five hundred”.
|
“I need to order two tickets.”
“I live in Saint Anne Boulevard 31.”
| ✅ | ✅ |
| @sys.phone-number | You can collect a phone number using this entity. This requires the user to provide their phone number including the country code. If missing, the agent will prompt the caller again. After two failed attempts it will go to the fallback intent. |
“My phone number is
+972583372627.”
| ✅ | ✅ |
| @sys.web-url | This entity can collect a URL in the following format “[www.weburl.com”](http://www.weburl.com”). If the “www” or the “.com” is missing, the agent will prompt the caller again. After two failed attempts it will go to the fallback intent. | “My company’s website is [www.companyexamplesite.com.”](http://www.companyexamplesite.com.”) | ✅ | ✅ |
| @sys.email | You can collect an email address from your caller. The “@” sign is mandatory. | “My email address is .” | ✅ | ✅ |
| @sys.countries | A list of all countries in the world. | “I am from England.” | ❌ | ✅ |
| @sys.cities | A list of all main global cities. | “I am a resident of Berlin.” | ❌ | ✅ |
| @sys.digits | The agent will be able to read out the number collected as digits. If the caller gave the input “Five Hundred”, the agent will read it out as digits “5 - 0 - 0”. | | ❌ | ✅ |
| @sys.confirmation | If the agent prompts the caller a yes or no question, you can use this parameter to collect values such as yes, no, maybe, and related synonyms. |
“Do you regularly use your air conditioning unit?” - “Sure.”
“Did you ever experience trouble using the support chat on our website?” - “Not really.”
| ✅ | ✅ |
| @sys.serial-number | This enables the agent to accept a mix of English letters, numbers and special characters like - or / | “My serial number is 08C2LFM887” | ✅ | ✅ |
# Intents
The **intent** section is where you will create and include the knowledge and training for your agent, which will be used to classify the user's intent.
Your agent will use this **list of utterances to classify user inputs**.
Every example you will enter should represent a sentence callers may use to attain a specific answer or action. Add as many unique examples as possible to make sure your agent is efficiently trained and able to understand the different ways people are referring to one query.
{% hint style="info" %}
*You can either create a new intent-based on your use case or import an intent from an already existing agent.*
{% endhint %}
## Creating an Intent
**Here's how to create your own intent!**
1. In the ToolBar on the left, click on **Properties > Intents.**
2. In drawer that will open on the right, and select **‘Create Intent'** in the top right**.**
3. Name your intent - This should be something that tells you more about its content and purpose.
4. Insert all the relevant training in the **‘User Expressions’.** These user expressions or training phrases denote all the different ways a user can signify the intent.
{% hint style="info" %}
*You can also create a new intent in the* [*Classification node*](/voice/nodes/basic/classification) *by pressing **‘Add Intent’** clicking the drop-down, and then **‘Create Intent’.***
{% endhint %}
## How to train your agent
### **Train your agent primarily based on keywords**
You can add full sentences but it is not required and should be minimal. When adding user expressions, it is important to keep the essence of the intent and leave out all the meaningless parts of a sentence.
E.g. "I want to request a loan" - Add "Request loan" to the training set
### **Be creative**
****Some people refer to "scheduling with someone" as a "meeting", others might call it an "appointment". Try to use various different wording and phrasing to refer to the same thing.
E.g. Meeting: Appointment, Interview, Consultation, Date, Meet, etc.
{% hint style="info" %}
*Once the agent is live and interacts with users, it is helpful to add more training based on realtime conversations with the users.*
{% endhint %}
## How to use intents
Heres a visualisation of how you can create intents. The example use case used here is that of Credit card balance.
### Step 1
After the initial greeting, for example, **collect the input of the user** in a **Collect Input** or **Listen** node. Under the parameter to be collected, add a *TOPIC* parameter connected to a sys.any entity.
### Step 2
Next, add a **Classification** node and select the same *TOPIC* parameter under "Classification parameter".
Now it's time to add intents.
In the Toolbar on the left, go to Properties and select Intents. If you haven't already, click on "Create intent". For the sake of the example, name it "balance" and train it with the **keywords and synonyms** around that topic.
E.g. "What's my current account balance", "How much money do I have on my account", "Am I broke?", etc.
{% hint style="info" %}
*You can check in the search bar for a specific sentence you added prior. Just type in the sentence you are looking for and it will pop up in the user expressions.*
{% endhint %}

### Step 3
From here, you can either add more intents based on your use case or go ahead and build out your flow.
{% hint style="info" %}
*For more information on how to create your first conversational flow, click* [*here.*](https://studio.docs.ai.vonage.com/ai-studio/create-a-new-agent)
{% endhint %}

## Export an Intent
You can export an intent by clicking on the little export symbol on the right of the intent. This will export a CSV file containing all intent expressions.

## Import an Intent
1. When in the intent window, click '**Import Intent'** on the top right.
2. The AI Studio will prompt you to select the relevant file from your device. The file format should be CSV. The name of your file will be the name of the intent.
3. The format of the .csv file should be as follows:-
{% hint style="warning" %}
*Please include the "Name" and "User Expression" headers under which the name of your intent and the training phases are allocated respectively. Separate your training phases with no spaces and singular commas. **Please note you can only import one intent per .csv file.** Which means if you have multiple intents its better to store them as separate files.*
{% endhint %}
5\. If needed, you can always make changes to the intent. Don't forget to hit "save" once you're done adding new expressions.

{% hint style="info" %}
***Minimalism is key** - This applies to the flows you create, number of intents and training data. Keep your flows straightforward and short whilst also incorporating fallback options. We recommend having less than 20 intents in total to improve classification scores. The more intents you have the more ambiguity the agent has to deal with. Keep your training set for each intent up to ten unique synonyms for best results. Avoid including whole phrases like “ I want to rent a bike” rather stick to the topic and only include “rent a bike”. Try your best to not include the same word within the training sets of different intents.*
{% endhint %}
# How do we analyze user input?
Natural Language Understanding
**Natural language understanding** (NLU) is a subtopic of natural language processing in artificial intelligence that deals with machine reading comprehension.
Language understanding is a fairly complicated task as it involves understanding the meaning of the sentence, extracting the entities, and making a decision regarding the action to be taken.
The NLU's ability to understand the user relies on **training of knowledge domains.** This means that we can expand NLU capability to understand new domains by adding a new knowledge domain for it to train on.
The main goal is to **understand user textual input and convert it into structured data** that holds, among other things, the extracted entities, an action to be taken, and a textual response for the user.
## **How do we classify?**
The main tasks we perform in the classification node are Entity extraction and Intent classification:
1. **Entity extraction** - extract interesting parts of the text like names and locations.
2. **Intent classification** - understand the intention of the text and classify it into predefined classes (each intent represents a class).
Our classification pipeline consists of a few steps:
#### **Text Preprocessing**
Use advanced techniques to normalize the text: perform text lemmatization - tag the Part of Speech (noun, verb, adjective, etc.) to find the important parts of the text, remove stop-words (words such “a”, “an” “the”).
#### **Vectorization**
Represent the text by numbers. We use a semantic representation, meaning word synonyms have an identical representation.
#### **Classification**
Use a machine learning fine-tuned classification algorithm to get the final classification label.
# Generate Training Data
Generate user expressions automatically
This tool allows you to generate user expressions for an intent based on existing expressions.
Click on "**Add Suggested User Expressions**" and it will open a window with possible additional expressions you can use for your training set.
Add the ones that fit the intent by ticking the box on the left of the expression. Before adding the relevant expressions, you can adjust them by clicking on the phrase and making the change. Once you exit, it will save automatically.
{% hint style="info" %}
*To enable this feature, add **at least five user expressions** to the intent.*
{% endhint %}

# System Intents
System intents are pre-created intents with an already defined training set. You can simply select them in the **"Classification"** node and define their behavior by connecting the nodes.
### List of current system intents
| System Intent | Description | Usage |
| ---------------------- | ----------------------------------------------------------------------------------------------------------------------------------- | ------------------------------------------------------------------------------------------------------------------------------------- |
| sys.yes | List of values with synonyms around "yes", e.g. "yeah" or "affirmative" | If the agent asks "Is there anything else I can help you with?" and instead of the next inquiry the caller answers with "yes" or "no" |
| sys.no | List of values with synonyms around "no", e.g. "negative" or "nope" | " - " |
| sys.either | List of values with synonyms around "either", e.g. "both" or "all of them" | |
| sys.neither | List of values with synonyms around "neither", e.g. "none of these" or "both are wrong" | |
| sys.cancel | List of values with synonyms around "cancel", e.g. "start from the top" or "from the beginning again please" | Allow the agent to start over |
| sys.repeat | List of values with synonyms around "repeat", e.g. "repeat that please" or "say that again" | Allow the agent to repeat the parameter prompt |
| sys.route\_*to*\_human | List of values with synonyms around "I want to talk to a human", e.g. "I need a live person" or "Route my call to a representative" | |
# Intent Annotation
Marking entity values within a user expression
If you want to **extract or utilize a specific part of the caller’s input** you can do so by identifying a word or select part of the sentence.
Once you highlight a part of the utterance, you will be prompted to select a parameter you want to attribute it to. You can either select a parameter you have already added from the dropdown (@entity:PARAMETER) or create a new parameter on the spot.
### How to use intent annotation
Example use case: Call Routing
You can use Intent annotation for example for an intent that is supposed to route the call. You might have added utterances such as “I would like to speak to John” or “I need to have a chat with Betty”.
Then you would go into the utterances and mark "John" and "Betty" as the parts of the contacts entity. When a caller would utter a phrase like this, the agent will know who to route the call to
{% hint style="warning" %}
*Keep in mind that you will need at least 3 expressions and 3 annotations for intent annotation to work.*
{% endhint %}

# Parameters
Extract a part of the caller's input
**Parameters** help your agent to extract and utilize specific information from the user’s input.
In order to collect a user's information (i.e Pizza size), you need to define a parameter that will know to extract the specific information from the user's input and store it under this parameter.
Parameters are can be in many nodes, e.g. in the *Collect Input* node, the *Classification* node, as well as the *Conditions* node, as well as *Set Parameter*.
{% hint style="info" %}
***Custom parameters** are created by the user based on the flow, e.g. ORDER\_NO parameter to collect and store an order number.*
***User Parameters** are user specific information that is going to be saved under the* [*user data storage parameters*](https://studio.docs.ai.vonage.com/ai-studio/users-coming-soon)*.*
{% endhint %}

### Create a parameter
1. In the left navigation, click on **Properties -> Parameters.**
2. A new drawer will open up on the right side of the screen,
3. Add a parameter by clicking on the first row of the parameter table.
4. Name the parameter- Use capital letters and “\_” in between the words (i.e. CALLER\_NAME).
5. Select the relevant **@entity type.**
6. If you are looking for the caller to fill the value, leave the value empty.
7. To save the parameter click anywhere in the drawer.

You can use the parameters you created throughout the conversation in multiple places.
{% hint style="info" %}
*You can also create a new parameter on the spot in each node (e.g. Collect Input, Classification & Condition)* *by pressing* *the **Parameter** drop-down and then clicking **‘Create Parameter’.***
{% endhint %}
### Using Parameter Values during the conversation
The agent can read out a value that has been collected in the intent or throughout the conversation. You can add the name of the parameter preceded by a dollar sign (**$PARAM\_NAME**) to the response.
For example, “Thank you for your order. Your keyboard will arrive soon” suggests that the agent collected the type of product in the intent and completed the process by reading it out. In the response, you may write “Thank you for your order. Your **$PRODUCT\_TYPE** will arrive soon".

### System Parameters
These parameters are saved right from the start of the call throughout the entire conversation. Feel free to use them in the conversation, e.g. when you want to send a text message to the user with the call start date/ time.
#### For voice-based agents
CALLER\_PHONE\_NUMBER - Phone number of the caller
CALL\_START\_DATE - date of the call
CALL\_START\_TIME - time when the agent picked up the call
CALL\_DIRECTION - will hold either "Inbound" or "outbound" in the value depending on whether this is going to be an inbound or outbound agent. Useful when you want to restrict an agent only to be reached if it's an outbound or inbound call.
AGENT\_PHONE\_NUMBER - Virtual phone number of the agent.
SESSION\_ID - Sequence of numbers and letters to identify the specific call.
CONVERSATION\_ID - Contains the Conversation ID/UUID sent from Vonage API.
AGENT\_ID - Contains the Agent ID.
VAPI\_CALL\_ID - This parameter contains the Call ID from Voice API in the dashboard. This allows you to match calls between the Studio log and Voice API dashboard log.
#### For text-based agents
SENDER\_PHONE\_NUMBER - Phone number of the user.
CONVERSATION\_START\_TIME - time of the interaction.
CONVERSATION\_START\_DATE - date of the interaction.
AGENT\_PHONE\_NUMBER - Virtual phone number of the agent.
SESSION\_ID - Sequence of numbers and letters to identify the specific call.
INITIAL\_MESSAGE - The content of the first message to initialise the conversation.
AGENT\_ID - Contains the Agent ID.
### Multi-value Parameters
Enabling multi-value parameters allows the agent to catch more than one value.
E.g., a user is ordering a pizza and wants to add more than one topping. If the multi-value logic is enabled, the agent will be able to pick up all chosen toppings.

#### How does it work
1. When creating a new parameter, make sure to click on the three little dots on the right of the parameter and enable "multi-value". To check whether a parameter has this logic enabled, check the icon next to the parameter name. In the example above, we are using a manually created entity called "toppings" with the values we are then collecting in the example (pineapple, cheese, etc)
2. Add the parameter like you would do any other parameter to the *Collect Input* node.
3. If you want the agent to read the captured values back to the user, simply add $ and a drop-down will show you the list of your agent's parameters. When you're selecting the multi-value parameter you can choose whether you'd like the agent to separate the values with "and" or "or".
# Contacts
Use the “**Contacts**” tab to assign an extension to your virtual agent. Each contact can represent a department or a specific person, as long as they have a direct line or extension.
You can define each contact by clicking on its name, or create a new contact by clicking “**Add contact**”. Once you’ve created the first contact, you’ll be prompted to fill in their details.

### Full name / Department
You can use a full name of an employee, an extension number, or a department name. This name should be unique to a contact, as the virtual agent will read out this name to the caller.
In case there are two or more contacts with the same first or last name, or in case that two contacts share the same keyword (like “Marketing” and “Marketing Lead”), the agent will read out both possible options, and the user will choose between the two. Your agent will readout only the name under “Full name”, so keep it clean and user-friendly.
### Call Preferences
You can choose between adding a phone number or connecting via SIP.
If your agent is prompted to call or send a text message to this recipient, this is the phone number/ sip connection used.
If you choose to enter a phone number, make sure to include the country code without the "+" sign.
For each Contact, under "Call preference" there will be a SIP option.
Example for SIP: [123456789@sip.server.com](mailto:123456789@sip.server.com)

### Email Address
Add an email address to your contact. If your agent is prompted to send an Email to the Recipient, they will receive it at this email address.
### Synonyms
Similar to entities, you can add synonyms to each of your contacts. For example, if your contact’s full name is Anita Brown who leads the Marketing department, you can add the words “Marketing”, “Marketing team lead”, “Advertising” or any other phrase that callers may use when looking for Ms. Brown.
# Tags
**Tags** are a tool for users to define important milestones in the conversation.
It enables you to query for important insights (e.g. what are my most common call topics, how many calls were routed to a live agent, how many calls ended successfully, how many times the agent didn't understand the caller, etc.).
A Tag can be placed on any node on the graph. Each time a conversation reaches a tagged node, the attached tag will be collected (see below "tags collection").

### Tags Definition
A tag is a property on the agent level, each tag will have a **Tag** **name** and will be associated with a **Category**. The category will assist in reporting.
### How and where to place a tag
On each node, there is an option to attach one or more tags (category + tag name). Once you open a node, you will notice three dots on the top right next to the save button.
If you click on the dots, it will show you the option to add a tag. You can also remove or edit an existing tag from a node.

### Examples
| **Category** | **Tags** | **How to use it** | **Insight** |
| ------------------ | -------------------------------------------------------------------------------- | ------------------------------------------------------------------------------------------------------------------------ | ---------------------------------------------------------------------------------------------------------------------------------------- |
| **Fallback** |
Misclassification
Missed Parameter
| Misclassification: Place either on the Collect input "Missed" or the Classification "Default" | **Agent failed** to understand the caller |
| **Performance** |
Success
Fail
|
Place right before the End Call node /
Any other node that indicates success (e.g. route/SMS or any other)
| Shows calls that were **successful or failed** |
| **Action** |
Send Email
Send SMS
Route call
Webhook
| Place on the relevant action node | Shows calls that **included an action (e.g. Calls/Emails/SMS/Webhook)** |
| **Flow** | Label the tag based on its content | Place on the Conditions node | Indicates that a conversation went through a **specific flow** |
| **Classification** | Label the tag based on the topic of the intent | Place on the Classification node from one of the intents outputs |
Shows that a session included a specific intent
Can indicate the most common call topics
|
### Tags Collection
Tags will be collected per session in real-time. Each time a conversation reaches a node, the attached tag will be collected.
If the same Node was reached twice, the tag will be collected twice - and so on.

# Recordings
{% hint style="warning" %}
*The Recordings feature is only available for telephony agents. The supported file types are: wav, mp3, ogg. Maximum file size is 4MB.*
{% endhint %}
If you would like the agent to use human voice recordings instead of one of the predefined robotic languages, you can upload your recordings here. The format of the recordings should be wav or mp3.
Later on, when you're creating your agent, you can easily use it for any prompt, entity, etc.

# Get started
In order to create a **voice-based agent**, after you clicked on "[**Create Agent**](https://studio.docs.ai.vonage.com/agents-1/create-a-new-agent)" select the "Telephony" option. You can reach your voice agent using any telephony device.


## Add a phone number to your voice agent
Once you are ready to publish your agent and allow for it to interact with external users, you will be prompted to add a phone number. Only agents with a phone number have the possibility to be published.
To add a phone number, you require a [Vonage API Account](https://dashboard.nexmo.com/sign-up). Once you have created an account, you are able to purchase one or more phone numbers on the dashboard.
{% hint style="info" %}
*Once you have accessed the Vonage AI dashboard and can purchase the phone numbers for your agent. The numbers you purchased will show in the studio under "Phone Settings" - **please link your agent with a phone number from the studio application ONLY.***
{% endhint %}


Click on "**Publish**" and if you are doing this for the first time, you will be prompted to select one of the numbers you purchased. You can also change the number associated in the agent's settings on the left.
## How to set up your voice agent
You can create two different types of voice agents on the AI Studio.
### **Inbound**
Virtual Agent handles incoming customer support queries, e.g. FAQs (opening hours, location, etc). In this case, the user is initiating the conversation with the VA. Once you added a phone number and published your agent, your users are ready to interact with the agent outside the AI Studio.
### **Outbound**
Virtual Agent engages with your customers by sending notifications and updates, e.g. confirmation messages, appointment changes, special deals, etc. Here, the VA initiates the conversation with the user.
{% hint style="info" %}
*To create an **outbound call campaign**, you can use our API* [*here*](https://studio.docs.ai.vonage.com/voice/get-started/telephony)*.*
{% endhint %}
## Voices Offered
AI Studio offers a wide variety of synthetic voices to choose from. We support a variety of [Amazon Polly](https://docs.aws.amazon.com/polly/latest/dg/voicelist.html) voices for our [supported languages](https://studio.docs.ai.vonage.com/theres-more/languages-available) along with a selection of premium paid[ neural voices](https://docs.aws.amazon.com/polly/latest/dg/NTTS-main.html). Please be aware that some [SSML](https://developer.vonage.com/en/voice/voice-api/concepts/customizing-tts) may not be supported by certain Polly voices. Read more about[ Supported Polly tags here.](https://docs.aws.amazon.com/polly/latest/dg/supportedtags.html)
For Hebrew, AI Studio allows you to choose from a selection of voices provided by Microsoft Azure and Almagu. Learn how to use SSML with Azure voices [here](https://learn.microsoft.com/en-us/azure/ai-services/speech-service/speech-synthesis-markup-structure).
All Text to Speech voices on Studio are integrated with [Voice API](https://developer.vonage.com/voice/voice-api/guides/text-to-speech). To learn more about the pricing for the paid voices, please visit [this page.](https://www.vonage.com/communications-apis/voice/pricing/)
## Monitoring & Reporting
You are able to see the conversation of a WhatsApp agent in the [reports](https://studio.docs.ai.vonage.com/agents-1/reports). To track your agent's performance even more efficiently, make sure you add [tags](https://studio.docs.ai.vonage.com/properties-1/tags) to your agent.
# Create your first conversational flow!
This tutorial shows how to create a simple but effective telephony agent on the studio.
### **Your first conversation flow**
Here's a quick breakdown of Studio. Once you open the production canvas you will be greeted with the ToolBar and the Canvas:-
#### **The ToolBar**
On the left side of your canvas you will be able to see the ToolBar which contains everything you need to access, build and run your agent.

In the center of the canvas, you will notice a node labeled **START**.

This is the starting point of the conversational flow. This node has to be attached to the rest of the conversational flow.
{% hint style="warning" %}
***Note:** Without having the **START** node connected to the rest of the conversation, the virtual agent cannot be used and will not execute your flow!*
{% endhint %}
To start building, simply drag and drop the nodes from the ToolBar to the middle of the studio.
{% hint style="info" %}
***Tip:** You can rename nodes by clicking on the default name of the node!*
{% endhint %}
### **Step 1: Create a Greeting Message**
For your first agent, once you've figured out an easy use case, start by adding a greeting statement to introduce your virtual agent and what it can do.
To do this you need to add a **Speak** node.

{% hint style="warning" %}
***Note:** Make sure you connect all the nodes in your flow in the right order. The arrows indicate the direction of the flow, therefore, make sure the arrows are attached to the boxes correctly.*
{% endhint %}
{% hint style="info" %}
***Tip:** You can add a node by dragging and dropping from the toolbar or right clicking and selecting add a node.*
{% endhint %}
### **Step 2: Gather Input from your caller**
At this stage, you’ll want to collect the reason your caller is calling in. To do this you need to add the **Collect Input** node.
First, you’ll need to include a [*Parameter*](https://studio.docs.ai.vonage.com/properties-1/parameters) under which the input will be collected. Each *Parameter* needs to be attached to an [*Entity*](https://studio.docs.ai.vonage.com/properties-1/entities)*.* The *Entities* entail the various kinds of input your caller will provide.
There are different entity types for example “sys.names” - to capture proper names, “sys.phone numbers” - to capture the phone number with country code and “sys.any” - which captures any kind of input from words, to digits and serial numbers.
You can choose a pre-loaded system *Entity* or create your own. In this case we used “sys.any” which can collect any type of input.

{% hint style="success" %}
***Bonus Tip:** If you need to create a custom Entity, we recommend you go to Entities first, create your custom entity and then add the collect input node.*
{% endhint %}
You can then create prompts for the caller with a question to answer here. If you add multiple prompts like we did here, the agent will randomly choose from them every time it passes by the node.

{% hint style="warning" %}
***Note:** We recommend that you name your Parameters in capital letters separated by an underscore.*
{% endhint %}
{% hint style="info" %}
***Tip:** You can access the* [*system entities list*](https://studio.docs.ai.vonage.com/entities/system-entities) *to see which values are included. You can also include several prompts for the agent to choose from in case you want to use multiple prompts.*
{% endhint %}
### **Step 3: Understand your Caller**
To now give your caller an adequate answer, you need to match their input to the correct place within the flow and knowledge base that you have created.
After **Collect Input**, there are various follow-up options. You can either use the **Classification** or the **Conditions** node to classify the caller input depending on your use case.
The node that we are going to choose for this flow is called **Classification**. In this case we want to be able to differentiate between our desired caller intent.
By using the **Classification** node to categorize the different ways your caller can imply the same intent, the agent building process becomes more efficient.
To be able to use this node we will first have to create the different **Intents** our callers might be calling in for.
Under each specific **Intent**, we need to provide *training phrases*, i.e different ways a caller can ask for the same topic.

We can then add the Classification node to classify between the created Intents.

{% hint style="warning" %}
***Note:** Be sure to use the right Parameter which you used to collect input, choose the function or operation and appropriate value.*
{% endhint %}
### **Step 4: Decide the rest of the flow!**
The rest of the flow depends on the Use Case you are trying to create.

Make sure to connect all the nodes in order, end your conversation with the **End Call** node and have a plan for fallbacks.
When we refer to fallbacks we mean cases where there are:-
* **No Inputs** - Silence from the callers end
* **Missed Inputs** - Perhaps your caller said something that the agent wasn't able to catch?
* **Invalid Entries** - Cases where the wrong kind of input was provided by the caller, eg. the caller provides a name instead of a phone number.
* **Routing** - Cases where you are sure you want the agent to route a call, eg. when the caller specifically asks for an operator.
For each of these, we recommend completing the happy path (i.e ideal flow) of the agent first and then deciding the best course of action for the unfavourable entries or lack thereof.
### **Step 5: TEST TEST TEST!**
Once you finish building your agent, be sure to test the flow using the inbuilt tester!
You can pre-fill Parameters you want to the agent to work with (by clicking on the settings icon) and also choose the mode of testing.

Make sure you publish your agent with a phone number in order to be able to receive and make calls.
### **Step: Fin**
This was an example of a bare-bones agent. There's lots more you can accomplish with Studio!
If you need more information on the features available, the Studio Documentation dives deep into how to build a stellar agent. You can access it by clicking on the information symbol in any open node drawer.
Here's a video on how we built a quick agent for this channel:-
{% embed url="" %}
In case you think you're stuck or want more information than what's listed in the documentation, we are also available on [support@aistudio.vonage.com](mailto:support@aistudio.vonage.com)
Godspeed!!
# Triggering Outbound Call API
The make call API allows you to utilize your telephony virtual assistant to trigger an outgoing call to any PSTN number.
{% hint style="info" %}
*For the launch of the outbound call to work, make sure you have published your agent and that it has a phone number attached to it.*
{% endhint %}
{% hint style="danger" %}
**Are you using postman?**
*When using curly braces in the query parameters, make sure you encode the content of your curly braces. If sent without the encoding, your request will return empty.*
{% endhint %}
.png?alt=media\&token=03d6c8e0-6100-4082-b79b-fbf1e06e2ede)
{% hint style="warning" %}
**Are you within the limits?**
*Studio’s outbound call limits that is! We currently only allow one call/session per second however if your virtual agent needs to make more calls we can increase the limit up to 5 outbound calls per second.*
*If you require an increased limit, please email* [*support@aistudio.vonage.com*](mailto:support@aistudio.vonage.com) *with the following details:-*
* *API key*
* *Agent ID(/s)*
* *Increase request: You can choose to increase your limit to 3 or 5 calls per second*
*Once you receive confirmation from our teams that your request has been processed, please publish your agents and wait for about 5 minutes before you start triggering any new outbound calls.*
*Please note that if your agent is not approved for a higher limit, any call made over the 1 call per second limit will fail and return a 429 error!*
{% endhint %}
## How to prepare your Outbound Call Query
### Endpoint (mandatory)
For Agents deployed in **EU** region --> [`https://studio-api-eu.ai.vonage.com/telephony/make-call`](https://studio-api-eu.ai.vonage.com/telephony/make-call)
For Agents deployed in **US** region --> [`https://studio-api-us.ai.vonage.com/telephony/make-call` ]()
### Method (mandatory)
POST
### Headers (mandatory)
X-Vgai-Key (Don't forget to add the value of the Vgai key after you generated it)
{% hint style="info" %}
*You can find the X-Vgai-Key on the top right of your canvas. Click on the "user" icon, and then "Generate API Key".*
{% endhint %}

### Body (mandatory)
#### Destination Parameters (mandatory)
| Parameter | Value |
| :-------: | :---------------------------------: |
| to | Phone Number of Caller/SIP Endpoint |
| agent\_id | ID of the destination virtual agent |
To route to phone numbers make sure to enter the phone number with the country code without any special characters. In cases of SIP routing, the value must include the SIP address within the body as mentioned in this [example query](https://studio.docs.ai.vonage.com/voice/get-started/telephony#example-query).
```
{
"agent_id": "string",
"to": "string"
}
```
{% hint style="info" %}
*When you send the **`agent_id`**, it will initiate a session from the published number of the agent.*
*If the agent does not exist or hasn't been published , you will get an error stating either that "ID {{AGENT\_ID}} is not an ID to any agent or published version" or "published version for Agent {{AGENT\_ID}} was not found"*
{% endhint %}
#### status\_url (optional)
If the recipient cannot pick up the call for any reason, we will send a response to a designated callback URL
Add the relevant endpoint that a response is sent to in case the callee didn't manage to pick up the call.
Example Response payload:
```
{
"agent_id": "string",
"to": "972542233016",
"conversation_uuid": "CON-4ee2e523-4ee13-4e98-ae94-e6e3e1ab9ac6",
"status": "busy",
"timestamp": "2022-05-31T06:40:45.475Z"
}
```
Currently we support the following values to be attached to Status:-
* `cancelled` - Call cancelled by the originating source before it was answered.
* `rejected`- Call attempt was rejected by the destination.
* `busy` - Destination is on the line/busy with another caller.
* `timeout` - Call timed out before it was answered.
* `failed`- Call failed before reaching the destination
#### hangup\_on\_answer\_machine (optional) *\[BETA Testing Phase]*
We are able to recognize when an answering machine picks up the call and the call is going to be immediately disconnected.
Add the following parameters to your request:
| parameter | value |
| --------------------------- | ----- |
| hangup\_on\_answer\_machine | false |
#### session\_parameters (optional)
You can send parameters to the virtual agent prior to initiating the call, e.g. the name of the caller. The agent can then greet the caller with his name.
| Parameter | Value |
| :----------: | :----------: |
| CALLER\_NAME | Diane Miller |
```
"session_parameters": [
{
"name": "CALLER_NAME",
"value": "Diane Miller"
}
],
```
### Example Query
{% hint style="warning" %}
*Please make sure to change the body tag to JSON.*
{% endhint %}
```
{
"status_url": "string",
"hangup_on_answer_machine": false,
"session_parameters": [
{
"name": "string",
"value": "string"
}
]
"to": "sip:sipnumber@sipaddress",
"agent_id": "string"
}
```
## Successful Call Response
#### Curl Example Request
```
curl --location --request POST 'https://stairway.ai.vonage.com/telephony/make-call' \
--header 'X-Vgai-Key: Cuub4r22PXb0zYzJ2dt82KUZLKjo0z7' \
--header 'Content-Type: application/json' \
--data-raw '{
"agent_id": "60c09d70e6a68858f4220848",
"to": "9725411116037",
"hangup_on_answer_machine": false,
"session_parameters":[
{
"name": "PROPERTY_VALUE",
"value": "500"
}
]
}'
```
#### Response
```
{
"session_id": "5a61cc84-4c89-4ef9-a983-5349c7112fdb",
"session_start_time": "2020-10-14T09:42:07.151657"
}
```
## Potential Errors
#### Agent doesn't exist
```
{
"status": 404,
"message": "Version information for number AGENT_NUMBER doesn't exist"
}
```
#### Bad number format
```
{
"status": 400,
"message": "Bad destination number format"
}
```
#### **Not Authorised**
```
{
"status": 401,
"message": "Not Authorised"
}
```
#### **The preconfigured session doesn't exist**
```
{
"status": 500,
"message": "Failed to fetch preconfigured session information"
}
```
# Sending an Outbound Call Request via Postman
{% hint style="danger" %}
**Are you using postman?**
*When using curly braces in the query parameters, make sure you encode the content of your curly braces. If sent without the encoding, your request will return empty*.
{% endhint %}
.png?alt=media\&token=03d6c8e0-6100-4082-b79b-fbf1e06e2ede)
{% hint style="warning" %}
**Are you within the limits?**
*Studio’s outbound call limits that is! We currently only allow one call/session per second however if your virtual agent needs to make more calls we can increase the limit up to 5 outbound calls per second.*
*If you require an increased limit, please email* [*support@aistudio.vonage.com*](mailto:support@aistudio.vonage.com) *with the following details:-*
* *API key*
* *Agent ID(/s)*
* *Increase request: You can choose to increase your limit to 3 or 5 calls per second*
*Once you receive confirmation from our teams that your request has been processed, please publish your agents and wait for about 5 minutes before you start triggering any new outbound calls.*
*Please note that if your agent is not approved for a higher limit, any call made over the 1 call per second limit will fail and return a 429 error!*
{% endhint %}
## Step by Step
1. Start adding `POST` as the type of the API request.
2\. Add the endpoint based on agent region
**EU** region --> [`https://studio-api-eu.ai.vonage.com/telephony/make-call`](https://studio-api-eu.ai.vonage.com/telephony/make-call)
**US** region --> [`https://studio-api-us.ai.vonage.com/telephony/make-call` ]()
3\. Continue with the headers --> `X-Vgai Key` (Don't forget to add the value of the `Vgai key` after you generated it)

{% hint style="info" %}
*You can find the* `X-Vgai-Key` *on the top right of your canvas. Click on the "user" icon, and then "Generate API Key".*
{% endhint %}
4\. Then add the BODY of the request. Make sure your body tag is set as JSON. Learn more about syntax [here.](https://studio.docs.ai.vonage.com/voice/get-started/telephony#how-to-prepare-your-outbound-call-query)

# Integration via SIP for Telephony Agents
Route the call to the virtual agent's phone number by using SIP
SIP Guide: [https://developer.nexmo.com/voice/sip/overview](https://developer.nexmo.com/voice/sip/overview)
Invite requests using your own Nexmo credentials with the following syntax:- \@sip.nexmo.com
#### The following headers are accepted:
X-Vgai-Session-ID (optional): allows starting a conversation using a preconfigured session.
# Nodes
To build virtual agents on our platform you can utilize the boxes you see on the left side of the page.
The boxes are called **nodes** and are the building blocks of the conversation. Each of them has its own purpose, and together they create the conversational flow.
You can click on a box, drag it into the middle of the page, and can edit it accordingly by clicking on it again. It will open up on the right side of the page.
{% hint style="info" %}
*In order to create a flow, you have to connect the nodes to one another. Please connect them from the exit point of one module to the entry point of another.*
{% endhint %}

# Start
The **Start** node is essential for the functionality of every agent and is already automatically placed on the building canvas prior to creating the conversational flow.
This node indicates the beginning of the flow and has to be connected to the following nodes in order to initialize the flow. If not connected, the agent cannot be reached by the user.
***
### Record the call
You can decide whether you want to record all calls by clicking the "**Record Call**" box in the node. If chosen, you can listen to the call recording in the reports.

### Disconnected Call Support
Add a URL that an HTTP request will be sent to when the call is disconnected for any reason (either the agent disconnects the call, the call hangs up, etc.). The call disconnected *Webhook* will be a POST request.
{% hint style="danger" %}
*All information provided by our* [*insights API*](https://studio.docs.ai.vonage.com/api-integration/vai-integration-guide) *(transcriptions, recordings, general info) is automatically wiped after 30 days (this will be increased to 90 days in the next few weeks), to maintain privacy and compliance with GDPR and other privacy regulations.*
{% endhint %}
### Silence Overlay
This feature enables AI Studio's voice agents to play a background audio file during prolonged periods of silence.
{% hint style="info" %}
In voice interactions, high latency can occur when the Virtual Agent (VA) utilizes multiple services (such as ASR, TTS, NLU) or Generative AI services (like Intent Classification or Entity Extraction via LLM).
These processes may result in delays exceeding 1 second, causing "dead silence" on the call. This silence can be uncomfortable for end users, leaving them unsure if the call is still active or if the agent is processing their request.
The Silence Overlay addresses this by filling the silence with audio, indicating that the VA is actively processing the query.
{% endhint %}
#### How it works
When the Silence Overlay is enabled, the system automatically detects when the VA takes longer to respond.
* **Audio Behavior:** The feature plays a track simulating office sounds, such as a human agent typing on a keyboard or clicking a mouse.
* **Timing:** The audio starts automatically during prolonged silence and stops immediately the moment the VA is ready to respond.
{% hint style="warning" %}
#### Feature Details:
* **Channel:** This feature is available **exclusively for the Telephony channel.**
* **AI Engines:** It is **supported across all Vonage VA engines**: Traditional NLU, Hybrid NLU, and Agentic NLU.
* **Configuration:** The audio track is **set by default and cannot be customized**.
* **Call Recording**: If Call Recording is active, **the overlay audio will be included in the recording**.
{% endhint %}
***
{% hint style="info" %}
## In an Outbound Call Scenario, what if an answering machine takes the call?
AI Studio can recognise when an answering machine picks up the call, and the call is going to be immediately disconnected.
Consult with your Vonage Account Manager on the best practices.
{% endhint %}
# Conversation
To build virtual agents on our platform you can utilize the boxes you see on the left side of the page.
The boxes are called **nodes** and are the building blocks of the conversation. Each of them has its own purpose, and together they create the conversational flow.
You can click on a box, drag it into the middle of the page, and can edit it accordingly by clicking on it again. It will open up on the right side of the page.
Among the **Conversation nodes**, we have the nodes that guide the conversation like **Speak**, **Collect Input**, and **Classification**.
{% hint style="info" %}
*In order to create a flow, you have to connect the nodes to one another. Please connect them from the exit point of one module to the entry point of another.*
{% endhint %}

# Classification
You can use this node when your agent’s response is dependent on the user input. This node is similar to "**Conditions**", however, here we classify into intents.

In most cases, it will be the “**Classification**” node that follows “**Collect Input**”. Once you collect an input, it needs to be classified into the right intent. Click on the module and choose the parameter (the one you used in “**Collect Input**”) and the intent/s relevant for the classification.
“**Missed**” - This tab will be triggered if the agent is unable to classify the user input. You can define the default behavior by connecting “**Missed**” to any other node.
### Add Intents to the Classification node
The intent section is where you will **create the knowledge and training** for your agent, which later will be used to classify the user's intent.
You can either add from the predefined [system intents](https://studio.docs.ai.vonage.com/properties-1/intents/system-intents), or create your own intents on the spot.
Each intent will encompass one use case, e.g. "I want to change my password" will be one intent, and "My access got revoked" could be another. Your agent will use this list of utterances to **classify user inputs**. Every example you will enter should represent a sentence callers may use to attain a specific answer or action.
Add as many examples as possible to make sure your agent is trained and able to understand the different ways people are referring to one query.
{% hint style="info" %}
*You can add as many intents based on your use cases as needed.*
***More information on intents*** [***here***](https://studio.docs.ai.vonage.com/intents)***.***
{% endhint %}
## Train & Test
Aside from the Tester, you can test your agent's accuracy with the **"Train & Test" Feature**.
Enter a user query you want to test and the feature will return the intent(s) it would classify the phrase into.
The test query does not need to already be part of the user expressions in the intent, feel free to choose new phrases. You can add any test sentence you tried matching it with an intent to the training set by clicking the "+" sign on the side.
The probability percentage shows you how accurately this phrase would be classified into an intent.
{% hint style="info" %}
*Don't get discouraged if the correct intent doesn't show 100% probability. It might show a few intents that get a very small percentage of probability as well. All intents the agent finds relevant for this query will get 100% probability together.*
*For very ambiguous intents, the probability might be below 70% and show yellow. You might want to have a look here at* [*how to improve your training set*](https://studio.docs.ai.vonage.com/intents) *or* [*deal with ambiguous intents*](https://studio.docs.ai.vonage.com/actions/basic/classification/intent-ambiguity)*.*
{% endhint %}

{% hint style="info" %}
*In case, the AI cannot match your query to any intent, it will give the intent "**sys.default**" as the highest score. Sys.default means that if tested, this query would go to the **Missed** tab.*
{% endhint %}
{% hint style="info" %}
*Large classification nodes with a vast number of intents tends to lead to ambiguity between intents and therefore lots of misclassifications. Use the hierarchical system to classify when you have a large number of intents.*
*Here's how to do it:-*
*In the first classification node include all the general intents, after that add another classification node to further classify the action or sub intent related to that intent.*
*For example, the first node includes the general intents of Reservations and Facilities. In the next adjoining classifications node will include intents for change reservation, new reservation, cancel reservation connected to Reservations in the first node and gym, pool, club attached to Facilities from the first node.*
*Use classification node only when the entity type is sys.any, for other entity types, use the condition node.*
{% endhint %}
# Intent Ambiguity
If your intents have a very similar training set and potentially compete in classification, this is called "intent ambiguation". It is possible that the AI might not be able to differentiate between them as easily.

### How it works
Using the example of a music school, the VA (Virtual Assistant) is helping interested new students to sign up for a lesson for their preferred instrument.

The VA will ask the user what instrument they’d like to play and the answer will be most likely along the lines of “I’d like to play the flute”, “I want to play the piano”.
However, the training set is very similar and there is a possibility that the AI won’t be able to classify correctly.

Therefore, we are going to enable the **intent ambiguation feature**, that allows us to clarify with the user if they meant playing the piano or playing the flute.
The feature can be turned on and off in the **Classification node** right below the intents. Once enabled, we have to add a new parameter that will prompt the user for clarification.
{% hint style="info" %}
*Due to the ambiguation in the entity values, you will need to choose a **multi-value parameter**.*
*To do that, upon parameter creation, click on the three dots next to the value and select "Set as multi-value".*
{% endhint %}

We will add a **Speak node** or **Collect Input node** where we have to add a phrase prior to the parameter that gives our the intent names, such as “Do you want to” and then we add the parameter.
The parameter, in this case, $INSTRUMENT\_TYPE, will give out the names of the intents. The intents in this agent are named "play the flute" and the other "play the piano" - coming together in this **Speak node**'s prompt as "Do you want to play the flute or play the piano?".

To enable the user to clarify, we connect the **Speak node** with the prompt back to the **Listen node** to allow the user's input to be classified again.

{% hint style="info" %}
*Currently, the limit of ambiguation is between the closest two competing intents. Even if you have more than two intents with alike training set, it will only re-prompt the two intents that our algorithm defines as closest to the user's query.*
{% endhint %}
{% hint style="danger" %}
***For more information on how to prevent intent ambiguity, please click*** [***here***](https://studio.docs.ai.vonage.com/intents#intent-ambiguity)***.***
{% endhint %}
# Collect Input
The Collect Input node is designed to prompt the user with a question and capture a specific piece of information (parameter) from their response. Unlike the generic [Listen node](https://studio.docs.ai.vonage.com/voice/nodes/basic/listen), this node validates the user's input against a specific [Entity type](https://studio.docs.ai.vonage.com/properties-1/entities) to ensure the data matches the expected format before proceeding.
{% hint style="info" %}
*You can either use the robotic voice you selected upon agent creation to give out the response, or upload a human voice recording.*
*The supported recording file types are: wav, mp3, ogg. Maximum file size is 4MB.*
{% endhint %}
## When to Use This Node
This node is best used in scenarios where you need to validate the user's answer against a specific set of rules. Common use cases include:
* **Strict Data Entry:** Collecting specific formats like User IDs, Phone Numbers, Zip Codes, or Dates.
* **"How can I help you?" (Menu Selection):** Asking an open-ended question where the answer must match a specific list of services (e.g., Sales, Support, Billing). This acts as a "Natural Language Menu."
{% hint style="success" %}
#### Pro Tip
If you want to capture an open-ended response without validating it (e.g., recording a voicemail or a long complaint), use the [Listen node](https://studio.docs.ai.vonage.com/voice/nodes/basic/listen) instead.
{% endhint %}
***
## Setting Up the Collect Input Node
{% stepper %}
{% step %}
### Select Parameter
Select the [parameter](https://studio.docs.ai.vonage.com/properties-1/parameters) you want to fill. You may need to create a new parameter depending on your use case.
{% endstep %}
{% step %}
### Enter Agent Prompt
Enter the text or upload audio for the question the agent will ask (e.g., "How can I help you today?" or "Please enter your ID").
{% endstep %}
{% step %}
### Set retry attempts (optional)
The agent will re-prompt using the same or different text until the value is captured. Use retries strategically to give users multiple chances without frustrating them. Typically, 1-2 retries work best before routing to a fallback flow.
{% endstep %}
{% step %}
### Define Fallback behavior (optional).
What happens if the user stays silent or says the wrong thing? [Customize the "Missed" and "No Input" exit points.](https://studio.docs.ai.vonage.com/voice/nodes/basic/collect-input#no-input-and-missed)
{% endstep %}
{% endstepper %}
***
## Node Configuration
### No Input & Missed
You'll find two additional tabs next to the parameter configuration:
**No Input** - Triggered when the caller doesn't provide any response (stays silent). The agent repeats the prompt based on your retry settings before activating the "No Input" flow. Use this to define fallback behavior, such as routing to a live agent.
**Missed** - Triggered when the caller's input doesn't match the selected entity. The agent repeats the prompt based on your retry settings before activating the "Missed" flow. Define how the agent should handle invalid responses, such as asking a clarifying question or transferring the call.
### "Skip this node if value is already collected"
If the parameter value has been collected on a previous node (or even the same node in case the caller went back to the same node during the same conversation), you can choose to skip this Collect Input node and keep the original value collected. If you like to override the value, leave this box unchecked.
### Caller's Response Input - Speech vs. DTMF
The caller can decide to **respond either via speech or using the keypad (DTMF).** You can toggle on both speech and DTMF if you’d like to give the caller to respond via both inputs. At least one of these needs to be switched on.
### Speech
"**Detect Silence**" - You can also control how long the system will wait after the user stops speaking to decide whether the input was complete. The default value is one second. The range of possible values is between 0.4 and five seconds.
**"No Input"** - You can control how long the system will wait for the user's input by adding a number of seconds to the "No Input" field in the node. The range of possible values is between one second and sixty seconds. Once this time frame passes, the agent will trigger the retry logic until it reaches the last retry and moves to the "No Input" flow. You can add as many retries as you see fit.
**"Context Keywords"** - To improve recognition quality if certain words are expected from the user. The agent will look out for these words in the caller's input, and e.g., help classify them into the proper intent.
**"Should Record"** - Choose the "Should Record" option to record and generate a short audio file of the value collected in a parameter. Once the recorded parameter has been filled by a caller, the system will generate a unique URL including the voice-recorded value for later use.
### DTMF
The caller has the option to respond using the keypad. The following settings are related to the keypad:
**"Time Out"** - Set how many seconds the caller after the user completes the activity, the result is submitted. The default value is 10, max is 60. The "Time Out" value will be the same as the "No Input" value if both Speech and DTMF are toggled on.
**"Max Digits"** - The number of digits the user can press. The default is 20 digits, which is also the maximum.
**"Submit on Hash"** - Choose 'yes' if you'd like the caller's response to be submitted following the # key.
### Barge-In
AI Studio allows you to enable your users to interrupt your virtual assistant to provide their input, e.g., relevant for returning customers who may already know extension codes or the options within your agent, and are in a hurry.
{% hint style="info" %}
*To accommodate returning users and help create a customized experience for them, create* [*Users Parameters*](https://studio.docs.ai.vonage.com/ai-studio/users) *in order to skip collecting information they may have already provided.*
{% endhint %}
To enable barge-in, you must go into each Collect Input node that you want it to be enabled in, scroll to the bottom of the node, and toggle the switch.
Enabling barge-in switches on the ability to interrupt the virtual assistant with both speech and DTMF input.
{% hint style="success" %}
#### Pro Tip
Make sure to adjust the noise sensitivity to make sure that the virtual assistant is not “barged in” on by background noise.
{% endhint %}
### Node Noise Sensitivity
This feature improves transcription performance for short user prompts (e.g., "Yes", "No", or "Cancel") by allowing you to customize sensitivity for specific nodes.
Node Noise Sensitivity addresses potential performance issues regarding short user prompts, which can sometimes result in blank or incomplete transcriptions. For example, short responses like "Yes" or "No" might result in a blank transcription, or a word like "Cancel" might appear as "ancel".
By adjusting sensitivity at the node level, designers can optimize how the Virtual Agent listens for specific types of expected input.
* **When Switched OFF (Default):** The node uses the general agent-level sensitivity settings.
* **When Switched ON:** The node applies the specific sensitivity value set in this field, overriding the agent-level setting.
Enable this feature in your Collect Input node by scrolling down to the bottom and toggling "Enable Node Noise Sensitivity" to ON.
{% hint style="success" %}
#### **Pro Tip**
The value defaults to 40 when first enabled. You can adjust the slider between Low and High to match the specific requirements of that node.
{% endhint %}
{% hint style="info" %}
This feature is **available for the Telephony channel across all NLU engines** and **can be accessed within any Listen or Collect Input node**.
{% endhint %}
***
## Entity Ambiguation
Entity Ambiguation is a feature that helps your agent handle "ties" when a user's input matches more than one possible answer - for example, if a caller asks for "Ben" but your contact list has both "Ben Miller" and "Ben Brookes".
To fix this, you enable the Ambiguation setting in your Collect Input node and create a special multi-value parameter to catch these duplicates. This creates a dedicated path in your flow where the agent can politely ask the user to clarify exactly who or what they meant (e.g., "Did you mean Ben Miller or Ben Brookes?") before moving forward.
*Learn more about Entity Ambiguation* [*here*](https://studio.docs.ai.vonage.com/voice/nodes/basic/collect-input/entity-ambiguation)*.*
***
## Customize your Agent Prompts with SSML
[Speech Synthesis Markup Language (SSML)](https://developer.vonage.com/en/voice/voice-api/concepts/customizing-tts) is an XML-based markup language that allows you to fine-tune how the Vonage Text-to-Speech (TTS) engine reads your text. You can use it to vary the rate of speech, pitch, and say selected material as certain types of input, like digits, dates, numbers, etc. It helps to provide a human touch and not make the user journey robotic.
By wrapping your text in `` tags, you can insert specific commands to control the auditory experience, such as adding pauses with ``, adjusting the speed, pitch, and volume using ``, or ensuring specific formatting for numbers and dates via ``.
{% hint style="success" %}
#### Pro Tip
This capability helps you create a more natural, human-like voice interaction by providing pronunciation hints and emphasizing key words rather than relying on the default, flat robotic delivery.
{% endhint %}
# Entity Ambiguation
Once you define entities and their synonyms, sometimes you may encounter ambiguation.
For example, if a user wants to speak to someone named Ben, but there are multiple possible people named Ben, we refer to this scenario as "**Entity Ambiguation**".
To solve the disambiguation our agent will ask which of the entity values the user is referring to - “Which Ben did you mean? Ben Miller or Ben Brookes?” and the caller will need to choose between them by the last name.
{% hint style="info" %}
***The agent won't prompt the user automatically** in case of entity ambiguation. You will have to create the relevant flow to allow for the agent to identify this use case and act accordingly. See the steps below.*
{% endhint %}
## How to solve entity ambiguation
#### Step 1
Create or import your entity. This entity will contain ambiguous values. In our example, we want to solve the ambiguation for the possible user request "I want to speak to Ben". Therefore, our "Colleagues" entity will contain ambiguous values "Ben Miller" and "Ben Brookes".
{% hint style="info" %}
*Make sure that you include the **synonym** "Ben" that both names share and that will cause the ambiguation if requested "I want to speak to Ben". If you only add the entity values, the agent won't be able to identify the ambiguation.*
{% endhint %}

#### Step 2
Then, you will need to create a new parameter that will hold the values that might cause disambiguation. Select the entity you just created. Lastly, make sure to select "multi-value parameter" as it will hold the list of ambiguous aka similar values.

#### Step 3
In the **Collect Input** node that will ask the user who they'd like to speak to, add a parameter that will prompt something like "Who would you like to speak to today?". **This will NOT be the multi-value parameter just yet.** Here we are going to create a regular parameter we will call "COLLEAGUE\_NAME", with our previously created entity "Colleagues" attached.
Lastly, check the box of entity ambiguation and select the previously created multi-value parameter "COLLEAGUES".

#### Step 4
Once you leave the node, you will notice that there is a new tab below "Missed" that will be triggered in the event of entity ambiguation. You can connect it for instance to another Collect Input node, that will re-prompt the user "Do you mean Ben Miller or Ben Brookes?".
Add the "COLLEAGUE" parameter to allow the agent to save the correct name. In the prompt, you can enable the agent to read out the ambiguous values by adding a "$" to select the multi-value parameter from the drop-down. Lastly, choose, whether you want to separate between the values with "or", or "and".

#### Step 5
Once you connected all the lines, let's try the flow in the tester.

# Speak
The **Speak** node outputs text to the user via voice during a conversation. The node can deliver responses using text-to-speech or pre-recorded audio files.

## When to Use This Node
* Greet users at the start of a conversation and introduce the Virtual Agent's capabilities
* Deliver information without expecting user input (e.g., opening hours, policy details)
* Respond to classified intents where the conversation ends after the agent's response
* Provide small talk responses to create a more natural conversational experience
## Setting Up the Speak Node
{% stepper %}
{% step %}
### Add the Speak node to your flow
Drag the Speak node from the node panel onto the canvas and connect it to the previous node (typically the Start node for greetings or after a Classification node for intent-based responses).
{% endstep %}
{% step %}
### Enter your response text
Type the message the agent will speak to the user (e.g., "Welcome to customer support. How can I help you today?" or "Our office hours are Monday through Friday, 9 AM to 5 PM"). Keep the message clear and concise—users cannot re-read voice output.
{% endstep %}
{% step %}
### Add response variations (optional)
Create multiple versions of the same message. The agent will randomly select one each time the node triggers, making conversations feel more natural and less robotic.
{% endstep %}
{% step %}
### Choose output method (optional)
Toggle Use Recording to upload a human voice recording (.wav, .mp3, .ogg, max 4MB) or toggle Use Parameter to play a recording associated with a parameter value from an entity.
{% endstep %}
{% step %}
### Connect to the next node
Link the Speak node output to the next step in your flow (e.g., a Listen node to capture user response) or leave unconnected to end the conversation after the agent speaks.
{% endstep %}
{% endstepper %}
## Node Configurations
* **Response Text**: The message the agent will speak to the user. Enter text directly or use parameters to insert dynamic content.
* **Multiple Responses**: Add additional response variations. The agent randomly selects one per interaction to create conversational variety.
* **Use Recording**: Upload a human voice recording to replace text-to-speech output.
* Supported file types: .wav, .mp3, .ogg
* Maximum file size: 4MB
* Recordings can be uploaded directly in the node or selected from the **Recordings** property
* **Use Parameter**: Select a parameter associated with an entity that has recordings. The agent will play the recording linked to the parameter's value.
{% hint style="success" %}
#### **Pro Tip**
Use clear, concise language in your prompts. Users need to understand the agent's message quickly, especially in voice conversations where they cannot re-read text.
{% endhint %}
### When to Use Recording vs Parameter
If you want to include a recording in a Speak node you have two options:
**Use Recording** - Use a human voice recording that was either uploaded to the Recordings property or right there on the spot to be given out as the agent's response.
**Use Parameter** - If you have collected a parameter that is associated with an entity with recordings, you can select this parameter here. The agent will then give out the parameter value with the recording you have previously uploaded to the entity.

# Conditions
You can use this node when your agent’s response is dependent on the user input, similar to "**Classification**". However, here we classify based on entities. You can either use a manually created entity or use a predefined system entity (sys.number, sys.names, etc.).

## When to use Conditions
If you have a pizza delivery agent and the user chooses the size “large” he gets free drinks, you need a specific response for the parameter value “large”, and a different response for the values “small” and “medium”.
### How to use Conditions
Click on “Add New Condition''. You will be able to fill in a name of the condition you'd like to create. In our pizza example, you'd call on condition "large" and another one "medium". You don't have to create one for "small" as the "else" in the conditions takes care of the leftover value.
Now, you're prompted to add the parameter you'd like to perform a condition on. The parameter should be the same as the one you are using in the “**Collect Input**” module before the “**Conditions**”. Now you can decide on the type of condition (e.g. == equal, <= smaller than, etc.). Then fill in the entity value in the box on the right.
Once done, you will notice the “**Default**” box on the right side of the “**Conditions**” module. This is the “else” function, which means, whenever the caller says something that is not part of the entity values you specified in the conditions, it will go to the else/ “Default” box. You can specify the behavior of the “**Default**” by connecting it to another node.

{% hint style="info" %}
*When creating conditions for sys.confirmation entities, include one condition for “yes” and a different one for “no”. This should be done in order to differentiate the response of the virtual assistant to the “no” condition from the response of the virtual assistant to the default condition.*
{% endhint %}
### Creating Condition Groups
In case you want to create a condition that will take into account multiple different parameters and values in order to trigger a flow, you can do so by adding one or more sub-conditions.

{% hint style="info" %}
## Operator Types
***Operators** are used to perform operations on variables and values*
### **1.** Date operators
*We currently support these date operators:*
#### *Date is After, Date is Before*
*Expects value of type yyyy-mm-dd (ISO format).*
*For example: 2021-01-14*
#### *Day of the week is, Day of the week is not*
*Expects value of type day name with uppercase.*
*For example: Sunday*
### **2. Time Operators**
*As used in CALL\_START\_TIME and sys.time*
*Syntax: HH:MM:SS*
{% endhint %}
# Listen
The Listen node places the virtual agent into "Listening" mode and waits for user input (text, voice, or DTMF). The agent captures this input as a global parameter value, allowing you to record the user's response and isolate it for later use.
Unlike the [Collect Input](https://studio.docs.ai.vonage.com/voice/nodes/basic/collect-input) node, the Listen node does not hold a prompt. Use a [Speak](https://studio.docs.ai.vonage.com/voice/nodes/basic/speak) node to prompt the user.
### When to Use This Node
Use the Listen node when you want to catch everything the user is saying and perform different actions based on that input later, rather than limiting the caller to a specific format.
* **Handling Flexible Inputs:** Use this if you don't want to limit the caller to a specific data type (like a number).
* **Complex Scenarios:** It is ideal for situations where a user might give the requested data (e.g., "My order is 12345") or provide an unexpected response (e.g., "I don't have an order number" or "I want to speak to a human").
***
## Setting up the Listen node
Since the Listen node does not have a prompt, it is typically used in a specific flow sequence:
{% stepper %}
{% step %}
### Add a Speak Node
Start by adding a Speak node to prompt the user (e.g., "May I ask for your order number?").
{% endstep %}
{% step %}
### Add the Listen Node
Connect the Speak node to the Listen node and select the parameter to store the user's input.
{% endstep %}
{% step %}
### Follow with Classification
Connect the Listen node to a Classification node to analyze the input and route the call based on intents (e.g., "Order Tracking" vs. "Agent Request").
{% endstep %}
{% endstepper %}
***
## Node Configurations
### No Input
Triggered when the caller doesn't provide any response (stays silent). Use this to define fallback behavior, such as routing to a live agent.
### "Skip this node if value is already collected"
If the parameter value has been collected on a previous node (or even the same node in case the caller went back to the same node during the same conversation), you can choose to skip this Listen node and keep the original value collected. If you like to override the value, leave this box unchecked.
### Caller's Response Input - Speech vs. DTMF
The caller can decide to **respond either via speech or using the keypad (DTMF).** You can toggle on both speech and DTMF if you’d like to give the caller the option to respond via both inputs. At least one of these needs to be switched on.
#### Speech
"**Detect Silence**" - You can also control how long the system will wait after the user stops speaking to decide whether the input was complete. The default value is one second. The range of possible values is between 0.4 and five seconds.
**"No Input"** - You can control how long the system will wait for the user's input by adding a number of seconds to the "No Input" field in the node. The range of possible values is between one second and sixty seconds. Once this time frame passes, the agent will trigger the retry logic until it reaches the last retry and moves to the "No Input" flow. You can add as many retries as you see fit.
**"Context Keywords"** - To improve recognition quality if certain words are expected from the user. The agent will look out for these words in the caller's input, and e.g., help classify them into the proper intent.
**"Should Record"** - Choose the "Should Record" option to record and generate a short audio file of the value collected in a parameter. Once the recorded parameter has been filled by a caller, the system will generate a unique URL including the voice-recorded value for later use.
#### DTMF
The caller has the option to respond using the keypad. The following settings are related to the keypad:
**"Time Out"** - Set how many seconds the caller after the user completes the activity, the result is submitted. The default value is 10, max is 60. The "Time Out" value will be the same as the "No Input" value if both Speech and DTMF are toggled on.
**"Max Digits"** - The number of digits the user can press. The default is 20 digits, which is also the maximum.
**"Submit on Hash"** - Choose 'yes' if you'd like the caller's response to be submitted following the # key.
### Node Noise Sensitivity
This feature improves transcription performance for short user prompts (e.g., "Yes", "No", or "Cancel") by allowing you to customize sensitivity for specific nodes.
Node Noise Sensitivity addresses potential performance issues regarding short user prompts, which can sometimes result in blank or incomplete transcriptions. For example, short responses like "Yes" or "No" might result in a blank transcription, or a word like "Cancel" might appear as "ancel".
By adjusting sensitivity at the node level, designers can optimize how the Virtual Agent listens for specific types of expected input.
* **When Switched OFF (Default):** The node uses the general agent-level sensitivity settings.
* **When Switched ON:** The node applies the specific sensitivity value set in this field, overriding the agent-level setting.
Enable this feature in your Listen node by scrolling down to the bottom and toggling "Enable Node Noise Sensitivity" to ON.
{% hint style="success" %}
#### **Pro Tip**
The value defaults to 40 when first enabled. You can adjust the slider between Low and High to match the specific requirements of that node.
{% endhint %}
{% hint style="info" %}
This feature is **available for the Telephony channel across all NLU engines** and **can be accessed within any Listen or Collect Input node**.
{% endhint %}
***
# Q\&A Node
## Overview
The **Q\&A node** allows your Virtual Assistant (VA) to access the Indexes you have created in the [Knowledge AI](https://studio.docs.ai.vonage.com/ai-studio/knowledge-ai) tab and generate accurate, context-aware answers based on your content. Instead of relying on predefined intents and entities, it uses your uploaded materials, known as **Sources**, to dynamically respond to user inquiries. Responses are generated using the Knowledge AI RAG (Retrieval-Augmented Generation) pipeline, which combines Vonage's proprietary Semantic Search with Google Gemini's large language models (LLMs).
***
## Prerequisties
| Prerequisite | Details |
| --------------------------- | ----------------------------------------------------------------------------------------------------------------------------------------------------------------------------------------------------- |
| Knowledge AI tab configured | The Knowledge AI tab must be set up with at least one Index before you configure the Q\&A node. For setup instructions, see [Knowledge AI](https://studio.docs.ai.vonage.com/ai-studio/knowledge-ai). |
***
## Limitations
| Limitation | Details |
| ------------------------------- | -------------------------------------------------------------------------------------------------------------------------- |
| Single Index per node | Each Q\&A node is restricted to one Index. |
| Single VA per Index | Indexes are scoped to one VA per API key. |
| Single-turn processing | The Q\&A node processes one input and returns one output. It does not support back-and-forth conversation. |
| Non-deterministic answer length | Exact control over response length is not guaranteed due to the non-deterministic nature of the LLMs used by Knowledge AI. |
***
## Setting up the Q\&A Node
To configure the Q\&A node:
{% stepper %}
{% step %}
### Select an Index
Choose one Index to serve as the knowledge base for that node. Only Indexes created under the API key for the selected VA that are not already in use by another VA appear in the dropdown. Each Q\&A node supports one Index. To access different Sources across different parts of your flow, use multiple Q\&A nodes and assign a different Index to each.
For more information, see the [Group Your Sources to Create Indexes](https://studio.docs.ai.vonage.com/ai-studio/knowledge-ai#group-your-sources-to-create-indexes) section on the Knowledge AI page.
{% hint style="success" %}
**Managing Indexes across multiple Q\&A nodes and VAs**
* To handle different knowledge domains within the same VA, use multiple Q\&A nodes and assign a different Index to each.
* Indexes are restricted to one VA per API key. If you cannot find an Index in the dropdown, check whether it is already in use by another VA.
* To use the same content across multiple VAs under the same API key, duplicate the Index and assign it to the other VA. For instructions, see the [Duplicating an Index](https://studio.docs.ai.vonage.com/ai-studio/knowledge-ai#duplicating-an-index) section on the Knowledge AI page.
{% endhint %}
{% endstep %}
{% step %}
### Assign the user query parameter
Select the parameter from the **User Query** dropdown that captures the user input. Knowledge AI processes this value to generate a response.
{% endstep %}
{% step %}
### Capture the output
Under the **Output Parameter** dropdown, select the parameter to store the generated answer. Pass this parameter into a Speak/Send Message or Collect Input node to deliver the response to the end user.
{% hint style="warning" %}
**Expected processing delay**
There may be a 2- to 5-second delay while the system processes the query and generates the response.
{% endhint %}
{% endstep %}
{% endstepper %}
***
## Exit paths
The Q\&A node has four exit paths that determine how your VA flow continues after the node processes a user query.
| Exit path | Trigger condition |
| ---------------------- | --------------------------------------------------------------------------------------------------------------------------------------------------------------------------------------------------------------------------------------------------- |
| Knowledge AI response | Knowledge AI successfully retrieves and returns a relevant answer from the knowledge base. |
| Don't Know | Knowledge AI cannot find a suitable answer in the knowledge base. |
| Failed | A runtime error occurs, or the waiting time is exceeded. |
| Clarification Required | Knowledge AI identifies that the user query requires additional context or clarification before a response can be generated. This path is triggered when the input is too ambiguous, incomplete, or brief to retrieve a relevant answer accurately. |
### Handling the Clarification Required path
When Knowledge AI detects that a query is too ambiguous to process, it triggers the **Clarification Required** exit path. Use this path to route the user to a follow-up prompt that requests more context. Once the user provides a more complete query, route the flow back to the Q\&A node to process the refined input.
The following table shows examples of unclear or incomplete inputs and suggested VA follow-up questions:
| User input | Intended meaning | Suggested VA follow-up question |
| ----------------------- | ---------------------------------------------- | -------------------------------------------------------------------------- |
| "benefits" | "What is the company benefits policy?" | "What is your question about benefits?" |
| "work from home policy" | "What is the company's work-from-home policy?" | "Are you asking about eligibility, the application process, or equipment?" |
| "data privacy EU law" | "What does EU law say about data privacy?" | "Are you asking about GDPR requirements or data processing obligations?" |
{% hint style="info" %}
**Clarification Required and Intelligent query prep**
The **Intelligent query prep** switch affects how Knowledge AI interprets queries in the context of conversation history. The **Clarification Required** exit path is triggered independently by the RAG pipeline when it determines that the query itself is too ambiguous to retrieve a relevant answer, regardless of the switch state.
{% endhint %}
## Configurations
### Intelligent query prep (Optional)
The **Intelligent query prep** switch allows Knowledge AI to understand and respond to follow-up queries based on the ongoing conversation, without requiring the user to restate previous context. This setting is available in both the Q\&A node and the [Index Tester](https://studio.docs.ai.vonage.com/ai-studio/knowledge-ai#test-your-indexes). To access it in the Index Tester, select the gear icon at the top-right corner of the interface.
| Behavior | Intelligent prep query is ON | Intelligent prep query is OFF |
| ------------------------------------- | ----------------------------------------------------------------------------------------------------------------- | ------------------------------------------------------------ |
| Context handling | Enables contextual understanding for follow-up questions. Uses session conversation history to interpret meaning. | Each query is processed independently. |
| Latency | Adds 300 to 1000 ms as Knowledge AI retrieves and processes context. | No additional latency. |
| Responses when context is unavailable | N/A | May produce "I don't know" responses if context is required. |
Examples
The following tables show examples of how the toggle affects VA responses:
**Example 1: Cancellation charges**
| Speaking party | Intelligent query prep ON | Intelligent query prep OFF |
| -------------- | --------------------------------------- | --------------------------------------- |
| End User | What is the price of an economy ticket? | What is the price of an economy ticket? |
| VA | It is $1000. | It is $1000. |
| End User | What are its cancellation charges? | What are its cancellation charges? |
| VA | Cancellation charges are $250. | Sorry, I don't know. |
With Intelligent query prep ON, Knowledge AI uses the conversation history to link "its" to "economy ticket." With Intelligent query prep OFF, the VA treats each query as a new question and cannot infer context.
**Example 2: Animals on a plane**
| Speaking party | Intelligent query prep ON | Intelligent query prep OFF |
| -------------- | ---------------------------------------------------------------------------------------------------------------------------------------------------------------------- | -------------------------------------------------------------- |
| End User | What animals are allowed on a plane? | What animals are allowed on a plane? |
| VA | Passengers can bring up to two animals (dogs or cats) in approved containers, either in the cabin or cargo hold. | Passengers can bring up to two animals in approved containers. |
| End User | Give me more details! | Give me more details! |
| VA | Containers must not exceed 118 cm (55 × 40 × 23 cm) or 47 in (22 × 16 × 9 in), with a total weight of 8 kg. They must be leak-proof and lined with absorbent material. | Sorry, I don't know. |
With Intelligent query prep ON, Knowledge AI uses the conversation history to understand that "more details" refers to the previous answer about animals. With Intelligent query prep OFF, the VA cannot infer context and cannot provide additional information.
{% hint style="success" %}
**Recommended setting**
Keep this switch ON for smoother, more human-like interactions.
Turn it OFF if each query is unrelated or if lower latency is required.
Always test your VA flows to understand how context affects accuracy and response time.
{% endhint %}
### Answer length (Optional)
Use **Answer length** to control how detailed Knowledge AI's responses should be.
Choose whether the response should be:
* Shorter: suitable for simple answers.
* Longer: suitable for complex, context-heavy queries.
The minimum is 100 characters or 20 words, with no upper limit. This field is disabled when **Output mode** is set to [Search](https://studio.docs.ai.vonage.com/voice/nodes/basic/q-and-a-node#search).
| Setting | Behaviour |
| ----------- | --------------------------------------------------------------------------------------------------------------------------------- |
| Not defined | Knowledge AI automatically determines the best answer length based on the query and the knowledge base. |
| Defined | Knowledge AI treats the value as a soft constraint. The response will generally fall within a small range of the specified value. |
{% hint style="warning" %}
**Latency and accuracy trade-off**
Longer answers increase accuracy but also increase latency. Exact control over response length is not guaranteed due to the non-deterministic nature of the LLMs used by Knowledge AI. Treat the Answer length value as a soft constraint and test your flows to find the setting that works best for your use case.
{% endhint %}
#### Response guidelines (Optional)
{% hint style="warning" %}
**Response guidelines availability**
The **Response guidelines** field is disabled in both the Q\&A node and the Index Tester when **Output mode** is set to [Search](https://studio.docs.ai.vonage.com/voice/nodes/basic/q-and-a-node#search).
{% endhint %}
Use **Response guidelines** to set the tone, format, and scope of Knowledge AI responses with custom instructions.
* Tone: formal, friendly, concise, and similar options.
* Topic restrictions: prevent the assistant from responding to out-of-scope queries.
* Custom guardrails: rules for responses based on testing feedback.
* Company-specific terminology: ensure branding consistency. For example, use "Vonage" instead of "we".
These guidelines help align your assistant's voice with your brand and use case.
Best practices for Response guidelines
Use **Response guidelines** to define how Knowledge AI should respond, covering tone, structure, and topic scope. This helps ensure responses are clear, accurate, and aligned with your brand.
**1. Keep it simple**
Start with 3 to 4 key rules. Too many constraints can reduce model performance.
Do not repeat system logic:
* Do not define the "Don't Know" response. The logic for vague or missing answers is predefined in the backend. Avoid instructions such as: "If the input is vague, say 'I'm not sure'" or "Only provide a found response."
* Do not define the role. The Q\&A node's role is also predefined. Avoid instructions such as: "You are a virtual agent for XYZ handling ABC topic."
**2. What to include**
When writing custom instructions, focus on the following areas:
| Category | What to define | Example |
| ------------ | --------------------------------- | ------------------------------------------------------------------------- |
| Tone | The tone and style for responses. | Formal, friendly, empathetic, or instructional. |
| Topic scope | What is in or out of scope. | "Answer only questions about product and billing." |
| Terminology | Brand or company language. | Use "Vonage" instead of "we." |
| Custom rules | Guidance based on testing. | Adjust clarity, phrasing, or coverage. Do not include long lists of URLs. |
**3. Write clear instructions**
Provide examples of correct and incorrect responses so Knowledge AI can interpret your intent accurately.
{% code overflow="wrap" %}
```
Instruction: Summarize retrieved information in a clear, neutral, and concise tone.
Correct behavior: Studies show that moderate protein intake and reduced refined carbohydrates can lower diabetes risk.
Incorrect behavior: Wow, carbs are terrible! Everyone should stop eating rice immediately. (Subjective, emotional, and exaggerated tone.)
```
{% endcode %}
**4. Test and refine**
Review outputs and adjust your guidelines based on user testing or QA feedback.
{% hint style="warning" %}
**Single-turn processing**
Knowledge AI operates in single-turn mode:
* The Q\&A node processes one input and returns one output.
* After returning the response, the node is marked as completed.
* It does not support back-and-forth conversation. To reuse the same Q\&A node, add a loop in your VA flow.
* For setup instructions, see [Using the Q\&A node in your VA flow](https://studio.docs.ai.vonage.com/voice/nodes/basic/q-and-a-node#using-the-q-and-a-node-in-your-va).
{% endhint %}
### Waiting time
**Waiting time** determines how long the VA waits for a response from Knowledge AI.
* Default: 3 seconds
* Configurable range: 2 to 10 seconds
{% hint style="success" %}
**Choosing the right waiting time**
* Shorter wait times feel more natural in human conversation.
* Longer wait times reduce API timeout risk but may affect flow pacing, especially for voice channels.
{% endhint %}
***
## Managing Outputs
The **Output mode** setting defines how Knowledge AI processes and returns information from your Knowledge Base.
There are two modes available:
* **Search & Respond**.
* **Search**.
| Category | Search & Respond | Search |
| -------------------------------------------- | ------------------------------------------------------------ | -------------------------------------------------------- |
| What it returns | A single, refined text answer ready to send to the end user. | Raw text chunks retrieved from the knowledge base. |
| Typical output size | 100 to 500 characters. | 250 to 2500 characters per chunk. |
| Best for | Customer-facing conversational flows. | Passing retrieved content to another AI process or agent |
| Answer length and Response guidelines fields | Available | Disabled |
### **Search & Respond**
**Search & Respond** is the default output mode. Knowledge AI searches your knowledge base, passes the retrieved content to an LLM, and returns a single concise answer directly to the end user. Use this mode when you want Knowledge AI to handle both retrieval and response generation automatically.
Output characteristics:
* Responses are typically 100 to 500 characters long.
* Answers are short, structured, and optimized for clarity.
* Best suited for customer-facing conversational use cases.
### **Search**
**Search** mode retrieves the most relevant text chunks from your knowledge base without generating a summarized response. The raw content is returned for further processing by another AI process, workflow, or agent. Use this mode when Knowledge AI acts as a tool within an AI Agent, or when minimising latency is a priority.
Output characteristics:
* The output consists of multiple text chunks, typically ranging from 250 to 2500 characters each.
* The raw text may include long passages or multiple paragraphs.
* It is not recommended to send this output directly to end users.
{% hint style="warning" %}
**Disabled fields in Search mode**
When **Output mode** is set to **Search**, the **Answer length** and **Response guidelines** fields are disabled in both the Q\&A node and the Index Tester.
{% endhint %}
***
## Diagnosing Knowledge AI outputs
If Knowledge AI returns incomplete or incorrect answers, check its behavior manually using AI Studio Reports or the upcoming Knowledge AI Insights.
The following table describes common issues and recommended actions:
| Problem | Likely Cause | Recommended Action |
| ---------------------------- | ---------------------------------------------- | ------------------------------------------------------- |
| Ambiguous user question | Query is unclear or incomplete. | Ask the user to clarify or rephrase within the VA flow. |
| Outside Knowledge Base scope | The Index lacks relevant data. | Add new, relevant material to the Knowledge Base. |
| Search issue | Information exists but is not being retrieved. | Review and optimize source formatting. |
| Partial or inaccurate answer | Model retrieved but misunderstood content. | Improve Source structure or revise Response Guidelines. |
***
## Using the Q\&A Node in your VA
The Q\&A node is most effective when used as part of a broader conversational setup. The following are common patterns:
* Collect Input node, then Q\&A node, then return result.
* Use as a fallback if other nodes fail.
* Route back to the Q\&A node after collecting more context.
{% hint style="warning" %}
**Context not retained between uses**
The Q\&A node does not retain previous answers. Add context before sending the query if needed.
You can also use the [Context Switch node](https://studio.docs.ai.vonage.com/voice/nodes/flow-control/context-switch) to allow the VA to pivot between topics.
{% endhint %}
***
## Related Links
* [Knowledge AI Overview](https://studio.docs.ai.vonage.com/ai-studio/knowledge-ai#smarter-brand-safe-answers-with-generative-ai)
* [Index Tester](https://studio.docs.ai.vonage.com/ai-studio/knowledge-ai#create-indexes-group-your-sources)
# Advanced
To build virtual agents on the platform you can utilize the boxes you see on the left side of the page.
The boxes are called **nodes** and are the building blocks of the conversation. Each of them has its own purpose, and together they create the conversational flow.
You can click on a box, drag it into the middle of the page, and can edit it accordingly by clicking on it again. It will open up on the right side of the page.
{% hint style="info" %}
*In order to create a flow, you have to connect the nodes to one another. Please connect them from the exit point of one module to the entry point of another.*
{% endhint %}
# Reset Counter
Start the Counter from 0
{% hint style="info" %}
*When using one counter node for multiple nodes in the same agent, the counter will be filled very quickly as it does not reset or counts how many times the specific node was triggered.*
{% endhint %}
You can reset the counter by adding a Reset Counter node at any point in the flow. By the time the caller reaches the Reset Counter node in the flow, the previously triggered Counter node will be reset to 0.

# Counter
The Counter node will **count the number of times it was triggered**, and allow you to modify the flow according to that number. This will grant the agent the ability to create more complex conversation flows, and create dynamic effects on the flow.
Use this node if you want to enable different outcomes for each time the user passes a certain node. The counter node has to be placed right after the node you want to influence.

You can **specify the number of scenarios**, the minimum being one and the maximum being five. Connect the exit points of the tabs in the counter node with the entry points of the new nodes you chose for your flow.
### When to use the Counter node?
If the agent misclassified in a Collect Input node with a sys.any parameter and an attached Classification node, it will go straight to “Missed” in the Classification node.
In this scenario, because we are using sys.any, we collect virtually any input in the Collect Input node, it is not possible to reprompt the caller.
Therefore, add the Counter node after the Classification node, connecting the exit point of the Classification node’s “Missed” to the entry point of the Counter node.

{% hint style="info" %}
*Use the counters node to create context specific fallback. Try to let the user know why they failed or why they are being routed at that specific step so they either know what to fix or know what they did wrong so they are less likely to repeat the mistake the next time. General fallbacks like “I’m sorry that didn't work” do not provide any feedback for the user to improve their responses.*
{% endhint %}
# Set Parameter
Set a parameter value at any point in the conversation flow.
You can use the Set Parameter node when you are looking to have a set value for a parameter - and don’t want the caller to fill it in. We can either input the value manually or use a placeholder sign "$" and the name of the parameter you are referring to ("$PARAMETER\_NAME).

You can add multiple parameters to the node by clicking on "Add parameter".

## Best Practices - When to use Set Parameter?
### Influence the conversational flow
You can use the set param to tag that the user went through a specific part in the flow, and do a condition so he won’t go through it again.
For example, if the user is has got to the “missed” tab in the classification node, we can set a parameter that lets us know it was triggered once, and add a condition that has a different logic:
**Steps:**
1. Create a parameter and set a value in the set param node.

2\. Create a condition node that if the parameter has a value/is equal to the value you set in the set param node.

3\. Attach the “missed” in the classification node to the condition node.
4\. Attach the “default” to the logic you want the user to go first.
5\. Attach it to the set param node.
6\. Attach the set param node to the original classification node.
7\. Attach the condition you created to the logic you want the user to go to the second time.
### Set a specific parameter, not the user input
Another use case you can use the set param node is when you need to set a specific parameter after an intent (in the classification node) and not the user’s input. For example, when the parameter values need to be the same from all callers.
All you need to do is to attach the set param node after the intent and set the value you want.
Usually, we set the intent’s name as the value of the parameter.\
# Custom Code
This node gives you the ability to create **custom code in JavaScript** and launch it whenever this node is triggered. You can use it to manipulate and alter a selected parameter value.
For example, adding the country code to a selected phone number or a change the date of a conversation.
You can manipulate values collected by the agent during the conversation as well as information sent from a *Webhook*.
{% hint style="info" %}
*The AI Studio uses the* `JS-Interpreter` *package to run the JavaScript code. Find the documentation and its limitations* [*here*](https://neil.fraser.name/software/JS-Interpreter/docs.html)*.*
{% endhint %}


{% hint style="info" %}
*The returned value of the custom code is stored in the **Output Parameter**. The results should be only primitive types ( 'number', 'string', 'boolean'). You can use the same parameter as before, the value will be simply overridden.*
{% endhint %}
## How it works
{% hint style="info" %}
*In order to use the custom code node, you will need some knowledge of JavasScript. But don't worry, even if you don't, feel free to use some of the examples from our library below or consult with a JS developer.*
{% endhint %}
### Step by step example - Add 7 days to call start date
Take the example of an insurance company handling a mortgage request. Having collected all details, they want to tell their customers when they can expect to receive a response.
For the sake of our example, they usually respond after 7 days. In the custom code node, we are using JS code that will add 7 days to the original call start date.
**Step 1:** Get call start date parameter value. In our case, this will be a value populated in the $DATE parameter. This parameter can be either filled by receiving the value from a third-party service or by the user during the conversation.
```
var d = new Date($DATE);
```
**Step 2:** Increase the value of call\_start\_date days by 7
```
d.setDate(d.getDate() + 7);
```
**Step 3:** Return the value. The result of your JS code snippet will be stored in the output parameter. You can either choose a new parameter or the same one as before and override the previous value.
```
return d.toISOString();
```
{% hint style="info" %}
*If you want to go back in time and subtract some days from the given date in $DATE, just switch the + out for - .*
{% endhint %}

## Example Library
Feel free to copy-paste into your custom code node!
### >> Date & Time
### 1. Get the exact point of time when the custom code node was reached
```
var now = new Date().toISOString();
return now;
```
**Description:**
New Date = Date of right now (time you reach the node)
The custom code node will return '2022-03-15T14:50:22.520Z'
If you want to separate the date from the exact time, see below -
### 2. Eliminate the exact time from “new date”
```
var dateWithNoTime = $ARRIVAL_DATE.split(" ")[0]
return dateWithNoTime;
```
**Description:**
If you use “New Date” as indicated above, you will get '2022-03-15T14:50:22.520Z' returned as a value, if you want to only use the date, use this code snippet.
The custom code node will return '2022-03-15’
### 3. Change date format
```
return new Date($DATE_PARAM).toDateString();
```
**Description:**
Use this code if you want to change the way that the date is being presented.
From 2022-03-16 to Wed Mar 16 2022
### 4. Change time format
```
var hour = Number($MEETING_TIME.split(':')[0])
var minute = $MEETING_TIME.split(':')[1]
var second = $MEETING_TIME.split(':')[2]
var code = "AM"
if (hour > 12) {
hour = hour - 12
code = "PM"
}
return hour + ":" + minute + " " + code
```
#### Description:
Use this code snippet if you want to change the way the time is being presented.
From 14:00:00 to 2:00 PM
### >> Numbers
### 1. Eliminate special characters from a number sequence
```
var phone1Val = $phone1
phone1Val = phone1Val.split("-").join("");
phone1Val = '1' + phone1Val;
return phone1Val;
```
**Description:**
Alter the way we present a sequence of numbers (e.g. relevant for phone numbers)
Before > 972-58-650-3020 ($phone1)
The custom code node will return 19725865053020 ($phone1Val)
###
### >> Others
### 1. Combine separate values into one parameter
```
var street = $streetname;
var streetnumber = $streetnumber;
var city = $city; var state = $state;
address = streetname + streetnumber + ‘,’ + city + ‘,’ + state;
return address;Counts the number of items in an array
```
**Description:**
Combine separate street name, street number, city, and state as a whole address with a comma ‘,’ in between
Before > fully separate values, e.g. from an API request > Benson Road ($streetname) 15 ($streetnumber) New York ($city) United States ($state)
The custom code node will return Beson Road 15, New York, United States
###
### 2. Count the number of items in an array
```
var result = $orders.length;
return result;
```
**Description:**
The original request shows many different entries of the same category. In our example, “orders”, each holding more information like “order\_Number”, “order\_Status”, etc, and this custom code counts how many orders there are. Imagine the API response as follows -
```
{
"orders": [
{
"orderNumber": "34534534245",
"orderDate": "10-13-2020",
"orderStatus": "Shipped",
},
{
"orderNumber": "00291408",
"orderDate": "10-08-2021",
"orderStatus": "Waiting Allocation",
},
```
The custom code node will return "2" as the value of the output parameter.
# NCCO Node
The NCCO node is a means to communicate and use the features that Voice API hosts. NCCO or Nexmo Call Control Object is a generic JSON object that can be used in order to control voice based conversations.
{% hint style="info" %}
*Currently, the NCCO node is the only means of harnessing and communicating with Voice API.*
{% endhint %}
**How does it work?**
The NCCO node is similar to the *Webhook* node in the sense that during the conversation the NCCO JSON request will be sent to Voice API.
If parameters are included in the body, they will be used in the same way that the parameters included in *Webhooks* are.
The order of actions affects the flow of the call. Actions that are dependent on the completion of another action can be considered synchronous whilst independent ones are asynchronous, which means that unless they are stopped by a condition they will continue to execute.
Here's an example body of an asynchronous action - Record, used to record a part or the whole of a call.
```
{
"action": "connect",
"eventUrl": ["https://example.com/events"],
"from":"447700900000",
"endpoint": [
{
"type": "phone",
"number": "447700900001"
}
```
{% hint style="warning" %}
*NCCO nodes are built specifically for Voice API requests and thus are not included within WhatsApp, SMS and HTTP channels.*
{% endhint %}
**Things to look out for:-**
* Please note that unlike *Webhooks*, invalid NCCO commands will halt a conversation. There is no body validation for the JSON currently.
* **Arrays are currently unsupported.** Please do not use them to make sure your node works as planned.
* Telephony tests (normal calling as well as calling within the tester) are currently the only means of testing out this node.
* Certain actions such as the ‘**input**’ and ‘**pay**’ action **will not work** since the flow continues to run past the NCCO request. If you need to use the ‘input’ action, use the Collect Input node instead.
* Please note that when using the '**connect**' action, you will need to mention the eventURL in your request to make sure that your call duration accurately reflects the conversation with the virtual assistant
You can find your unique event URL by visiting the API dashboard -> selecting Application -> clicking Edit Application and copying your event URL.
If you require the call to be recorded post-routing please set the `should_record` value to equal "true"
To learn more about what is possible with the NCCO node please visit [this page](https://developer.vonage.com/voice/voice-api/ncco-reference).
# Actions
Behavioral building blocks of the conversation
To build virtual agents on our platform you can utilize the boxes you see on the left side of the page.
The boxes are called **nodes** and are the building blocks of the conversation. Each of them has its own purpose, and together they create the conversational flow.
You can click on a box, drag it into the middle of the page, and can edit it accordingly by clicking on it again. It will open up on the right side of the page.
The **action nodes** become relevant in case you want to send an SMS/ Email or Route the Call.
{% hint style="info" %}
*In order to create a flow, you have to connect the nodes to one another. Please connect them from the exit point of one module to the entry point of another.*
{% endhint %}
# Send Email
### Send an Email to a Recipient
Once you click on the box, you will be able to fully customize the email you would like to send.
You can choose either from a contact or add the email address of the recipient manually. Then you can add a subject, e.g. "Your order confirmation".
You can fully customize the email body, e.g. enlarge a sentence, define headings, etc.


### Sending values collected in the conversation
In the Email, you are able to use parameter values collected in the conversation, simply use $PARAM\_NAME in the Email body.
E.g.
*Dear $CUSTOMER\_FIRSTNAME,*
*I have updated account Number $ACCOUNT\_NUMBER with the renewal of your subscription.*
*Have a good day!*
### Sending Parameter Attachments via Email
If you want to send a recorded user input via email, you can simply add the recording parameter below the email body. It will send the recording in file format for ease of use.
Select the correct node and either add the recordings link from the call reports or leave it empty and it will automatically fill in the value after the conversation.

{% hint style="info" %}
*Take advantage of all the features available to you. Use* [*SSML*](https://developer.vonage.com/voice/voice-api/guides/customizing-tts) *in voice agents and prioritise certain call flows, do whatever it takes to make your user journey better!*
{% endhint %}
# Call Routing
{% hint style="info" %}
*This action node is only available to telephony-operated virtual agents.*
{% endhint %}
### Route the call to a Recipient
Choose between a contact from the Contacts, manually adding a phone number, or enter a previously collected parameter (such as $PHONE\_NO - if you have collected a phone number from the caller or the system param $CALLER\_PHONE\_NUMBER) that stores a phone number.
{% hint style="info" %}
*When using routing, make sure to include the country code without a “+” sign*.
{% endhint %}

**"Failed"** - This option will be triggered when the call did not connect with the destination for any reason. Even an answering machine picking up the call is considered connected. You can add any text-based nodes here, like *Custom Code*, *Webhook*, etc.
### Record Call
Follow up on the conversation after the caller has been routed to the recipient. Select "Record Call" and you'll be able to listen to the entire conversation in the Call Reports. The transcript of it will be saved in the parameter shown in the drawer.
### Send DTMF inputs to a routed call
Worried about having your users repeat their DTMF inputs after being routed? If the call is routed to a specified phone number, parameter or contact, you can send over DTMF inputs to the live representative or destination IVR as soon as the call is answered.
You can do this by toggling on the “Transfer DTMF answer” option within the Call routing and specifying the parameters or input you want to send in the text box.
{% hint style="info" %}
*The “\*” and “#” digits are supported. You create pauses using “p”. Each pause will last around 500ms.*
{% endhint %}
{% hint style="warning" %}
*Please note that the DTMF input must be numbers without spaces or special characters. Invalid input will not be transferred to the routed call, however it will still be visible in the call reports.*
{% endhint %}
{% hint style="danger" %}
*If SIP is selected as the endpoint for routing, transferring of DTMF input will be disabled.*
{% endhint %}
# End Call
### Terminate the call
If you add this action to the flow, the call will be terminated at this point. This action is only available to telephony-operated virtual agents.

{% hint style="info" %}
*You might notice that this node has an **exit point** which means that there is room for actions beyond the end of the conversation.*
*You can choose to add an action like Webhooks, send an email, etc., after your conversation has ended in order to send any relevant information to your user after their journey is complete.*
{% endhint %}
# Start Recording
### Start Recording
Want to choose when to start recording a voice conversation? Use the **Start Recording** node anywhere in your conversation.
This node is particularly helpful in cases where you don't want certain parts of your conversation to be part of the call recording. Additionally, you can use this node in cases where you want to dynamically start recording based on a webhook response. You can choose to begin your recording at any step in the flow until the end of the conversation or until you choose to stop recording via the Stop Recording node.
{% hint style="info" %}
*This feature works best when the Record Call option in the Start Node is left unselected.*
{% endhint %}
Here's how it works:-
#### Drag and Drop node to the desired location in the flow
Drag and drop the Start Recording node from the Toolbar onto the canvas. Connect it to wherever you want to start the call recording.
Please note that as of now, this node can only be used once in an agent i.e you cannot choose to start and stop recording in segments or multiple times in an agent.
# Stop Recording
The **Stop Recording** node can be used in conjunction with either the [Start node](https://studio.docs.ai.vonage.com/voice/nodes/start-node) or the [Start recording node](https://studio.docs.ai.vonage.com/voice/nodes/actions/start-recording). It enables you to strategically stop recording at any point of the conversation allowing you to keep user data private.
If you choose to use this node as part of your agent, the reports for the agent will feature only one type of recording i.e. from the beginning of the call (or Start recording node if you have it enabled)
{% hint style="info" %}
*Once you have selected a point in the flow where you want to stop recording please note that you cannot choose to start recording the call again. You will, however, be able to see the transcription of the full call. You can only use 1 Stop recording node within your virtual assistant.*
{% endhint %}
### Here’s how to use it:-
**Drag and Drop the node to the desired location in the flow**
Drag and drop the Stop Recording node from the Toolbar onto the canvas. Connect it to wherever you want to stop the call recording.

You can use this node multiple times in the flow including subflows.
# Send SMS
### Send an SMS to a Recipient
Choose the recipient number, the masked phone number receivers will see, and the text message body.
Choose between a contact from the Contacts, manually adding a phone number, or enter a previously collected parameter (such as $CALLER\_PHONE\_NUMBER, etc.) that stores a phone number.

{% hint style="info" %}
*You can also check to see if the caller wants to receive the SMS to the number they are calling from. If not, ask them to provide a new number and then do use the Set Parameter node to define $CALLER\_PHONE\_NUMBER = $NEW NUMBER.*
{% endhint %}
### Sending values collected in the conversation
In the SMS, you are able to use parameter values collected in the conversation, simply use $PARAM\_NAME in the SMS body.
E.g.
*Dear $CUSTOMER\_FIRSTNAME,*
*I have updated account Number $ACCOUNT\_NUMBER with the renewal of your subscription.*
*Have a good day!*
{% hint style="warning" %}
*In some countries like the US, it is not permitted to send and SMS without displaying the phone number and carriers will block these SMS.*
*Make sure to add the virtual assistant's phone number to the sender.*
{% endhint %}
### Sending an SMS to a collected phone number
If you want to send an SMS to a number that you collect in the conversation (instead of the caller ID) you will need to add the country code in a custom code node.
Place a Custom Code node after the Collect Input node, that collects the phone number from the user.
For US numbers, you will have to add this code to the custom code node.
```
var number = $PHONE_NUMBER
if (number) {
return ‘1’ + number.split(‘-’).join(‘’)
}
```
# Integrations
To build virtual agents on our platform you can utilize the boxes you see on the left side of the page.
The boxes are called **nodes** and are the building blocks of the conversation. Each of them has its own purpose, and together they create the conversational flow.
You can click on a box, drag it into the middle of the page, and can edit it accordingly by clicking on it again. It will open up on the right side of the page.
The **Integration nodes** become relevant when you want to connect with a third-party service to send and receive data.
{% hint style="info" %}
*In order to create a flow, you have to connect the nodes to one another. Please connect them from the exit point of one module to the entry point of another.*
{% endhint %}
# Webhook
This node enables you to seamlessly send and request data to and from third-party services.
{% hint style="info" %}
*You can click on the Webhook node and enter the name of the Webhook in the label field. This is not mandatory, but if you enter a label here, it should be something referring to the flow explaining what the API request is trying to achieve.*
{% endhint %}
**"Failed"** - In case there's an issue with the API request you are trying to send, e.g. the request didn't go through or the agent is waiting for a response for longer than 5 seconds or you didn't receive the correct parameters, you can use the "Failed" tab for error tracking. Simply decide on the behaviour you'd like to happen in such a case.
## How to use the Webhook Node
#### There are a few different ways to send an API request
* GET - Retrieve some data from the external codebase
* POST - Create some data for the external codebase
* PUT - Update some data to the external codebase
* DELETE - Delete data at the external codebase
* PATCH - Apply partial modifications to data at an external codebase
### Headers
Some third-party services might require you to add HTTP headers (HyperText Transfer Protocol) to the request. This is a data transmission standard that defines how servers and browsers send and interpret data. Additional information is transferred along with the HTTP request for purposes such as authorization and identification.
{% hint style="info" %}
*Use **Asynchronous Requests** if you want* *the execution of the code not to be blocked regardless of the response.*
{% endhint %}
### Body
Insert your JSON, HTML, text, X-WWW-FORM-URLENCODED, or XML file here if your request requires it. These code formats are commonly used to send information back and forth.
Not all API Requests will require a body. It is usually only relevant if you’d like to pass more parameters along, other than the query parameter in the Request Mapping.
### Query Parameters
In the Query Parameters section, enter the parameters you would like to send in your query.
You can either keep the value empty and have the caller fill it during the conversation or you can add the value if you want to predefine it. Use $PARAM\_NAME if you want to either take the value from the parameters that you pre-populated in the parameter section or if you want the user to fill the parameter during the conversation
### Response Mapping
Response Mapping defines the way you receive the third party’s response.
Define the Object Path and the right parameter you’d like to store the value in. We support XML as well as JSON as part of the response mapping.
The studio supports two response mapping types, xml and json.
#### > Example of xml
```
ToveJaniReminder
Don't forget me this weekend!
```
{% hint style="info" %}
*To get for example, the* `Tove(note.to)`*value from the xml response, the value of the object path needs to be **`"note.to"`** or **`note['to']`***
{% endhint %}
#### > Example of json
```
{
"data": {
"userId":1,
"id":2,
"completed":false
}
}
```
{% hint style="info" %}
*To get for example the* `1 (data.userId)` *value from the json response, the value of the object path needs to be **`"data.userId"`** or **`data['userId']`***
{% endhint %}
#### > Arrays
```
[
{
"userId": 1,
"completed": false
},
{
"userId": 2,
"completed": false
}
]
```
{% hint style="info" %}
*To get **`1`**, for example, the **`(first item userId property)`** value from the json response, the value of the object path needs to be **`"$[0].userId"`** or **`$[0]['userId']`***
{% endhint %}
### Asynchronous Requests
Need your webhook to run in the background whilst the rest of your flow continues? Simple, toggle the asynchronous request within your webhook to allow the flow to proceed without depending on the node.
### Managing Timeout
Now you have the ability to set the webhook time out to any amount of time between 10 to 25 seconds. As per default, the slider will be set to 10 seconds for each webhook node.
## How to test the webhook node
Once you have added all your request information, you can test if the webhook node is being executed correctly, by clicking on **Test Request** on the top right of the node settings.

{% hint style="warning" %}
In case your service requires **whitelisting of our IPs**, please use the following:
**For EU-based agents**
Frankfurt:
* 18.198.250.71
* 18.156.30.186
* 18.195.173.181
* 3.73.26.104
* 3.74.128.5
* 3.122.96.168
**For US-based agents**
Virginia:
* 54.90.42.141
* 54.88.7.65
* 52.44.45.61
* 50.17.224.159
* 18.204.242.10
* 52.2.131.195
* 3.227.70.216
* 100.29.86.76
* 3.219.120.27
{% endhint %}
### Webhook Signing
Webhook signing is a feature that allows your integrated application to verify that the request has been sent from Vonage and has not been tampered with in transit.
Whilst receiving a request, the Webhook will include a JWT token in the authorization header which is signed with your signature secret (which can be found under signed Webhooks in the API settings on the Nexmo dashboard).
**How to enable Webhook signing**
Webhook signing is enabled by default for voice agents built after June 2022. If your agent was built before this time period, follow the process listed below:-
* Log into your dashboard
* Go to the application settings
* Select the appropriate application
* Select “Edit”
* Scroll down to “Capabilities”
* Under the Voice capability select “Show Advanced Features”
* Select the “Use signed Webhooks” checkbox.
**How does the Webhook signing work?**
On the Vonage AI side, there is one part to the process - Validating the request to ensure that no tampering has occurred.
**Validation of Requests**
To verify the request, *Webhook* signing involves a JWT token in the authorization header. In order to identify which signature secret has been used to sign the request, check the API key which is included in the JWT claims.
To learn more about decoding *Webhook* signing, please visit [this page](https://developer.vonage.com/getting-started/concepts/webhooks#decoding-signed-webhooks).
### Response Status Code
You can now decide to change the course of your conversation based on the status of your Webhook! You can specify individual codes or code classes (e.g. 3xx to refer to codes from 300 to 399) to decide the turn of the conversation in each scenario.
Here's how to go about it:
The Response status code section is available within the Webhook node drawer.
{% hint style="success" %}
*The default output takes into account all successful 2xx responses (status code 200 to 299).*
{% endhint %}
You can specify either:-
* Individual codes: E.g. 301, 500, 400, etc.
* Code Classes: E.g. 4xx (which would mean all codes from 400 to 499), 5xx (all codes from 500 to 599), etc.
You can also save the resulting status code in a parameter for further use.
{% hint style="warning" %}
*Please make sure to create a parameter with the sys.any or sys.number entity type to save the response code.*
{% endhint %}
# Legacy SalesForce Authentication Node
This node is part of the **Salesforce Integration nodes** and handles the required **authentication to access your Salesforce domain**. For this node to work it is imperative to have a connected app within SalesForce. Learn more on how to create a supported connected app[ here.](https://studio.docs.ai.vonage.com/voice/nodes/integrations/salesforce-authentication/how-to-create-a-salesforce-connected-app)
The following details are unique to your Salesforce account and can be accessed via the UI of your domain.
All fields are mandatory and some can be hidden for privacy reasons.
| Field Name | Description |
| ------------------------ | -------------------------------------------------------------------------------------------------------- |
| Client ID | This is the "Consumer Key" of your SF domain. You will need to create a connected app prior. |
| Client Secret | This is the "Consumer Secret" of your SF domain. |
| User Name | Your Salesforce username. This user should have admin access permissions to the account. |
| Password | Your Salesforce password. |
|
Parameter
| This parameter will save the access token you will receive from Salesforce upon approved Authentication. |
{% hint style="warning" %}
**Check if your password contains special characters such as a #**
*If it does, please use URL encoding to change the format of your password. You can do this using postman.*
*E.g. instead of #42LBMDEH → %1242LBMDEH*
{% endhint %}
### **Test your node**
If you want to test your Salesforce Authentication node, you can do so by clicking on "Test Request" on the top right of the node.
It will open a new window that shows you Salesforce's response to your request in a raw JSON file. The previously defined parameter(s) you added in the Parameter tab will hold the access token under "Object Path" accessible when clicking on the "Test Results" tab.
In the example below, the Authentication was successful. Now, you can continue with the next action, e.g. requesting data from a Salesforce record with the [Actions node](https://studio.docs.ai.vonage.com/voice/nodes/integrations/salesforce-get-data).

{% hint style="info" %}
**Having trouble with your request?**
*For error tracking, please have a look at Salesforce's detailed documentation.*
*Authentication EP:*
[*https://help.salesforce.com/s/articleView?id=sf.remoteaccess\_oauth\_username\_password\_flow.htm\&type=5*](https://help.salesforce.com/s/articleView?id=sf.remoteaccess_oauth_username_password_flow.htm\&type=5)
*Creating Oauth connected app:*
[*https://developer.salesforce.com/docs/atlas.en-us.api\_rest.meta/api\_rest/intro\_oauth\_and\_connected\_apps.htm*](https://developer.salesforce.com/docs/atlas.en-us.api_rest.meta/api_rest/intro_oauth_and_connected_apps.htm)
{% endhint %}
# Salesforce Authentication
Salesforce integration is managed through the Vonage API Dashboard. Once configured, it becomes available directly in AI Studio via the **Salesforce node**.
To get started, you first need to create a Salesforce External Client App. See [How to create a Salesforce External Client App](https://studio.docs.ai.vonage.com/voice/nodes/integrations/legacy-salesforce-authentication-node/salesforce-authentication/how-to-create-a-salesforce-connected-app) for full instructions.
### Set up the integration in the API Dashboard
Once your external client app is created, complete the setup in the Vonage API Dashboard.
1. Log in to the [Vonage API Dashboard](https://dashboard.nexmo.com) and make sure you are in the correct client account.
2. Navigate to **Build** > **Tools and Solutions** > **Integrations** > **Credential Storage**.
3. Select **Connect with Salesforce via OAuth**.
4. Enter the following details:
Field
Description
Name
A label you select when using this integration in AI Studio. If you have multiple Salesforce environments, use a name that reflects the environment, for example, Salesforce Production or Salesforce QA.
Consumer Secret
The Consumer Secret from your Salesforce external client app.
Consumer Key
The Consumer Key from your Salesforce external client app.
Domain
Your Salesforce org's unique subdomain. Enter the domain only, without the https:// prefix. For example, yourcompany.my.salesforce.com.
{% hint style="info" %}
**DNS errors**
If you get DNS errors when trying to authorise, check that you are using the correct domain. For example, some orgs require `yourcompany.develop.my.salesforce.com` instead of `yourcompany.my.salesforce.com`.
{% endhint %}
5. Click **Connect with Salesforce OAuth**. You are redirected to Salesforce to approve access.
6. Click **Allow**. On success, a confirmation page states that the **OAuth connection has been completed**.
7. Your integration now appears in the list of available credentials in AI Studio.
### Use the Salesforce integration in AI Studio
Once the integration is set up in the API Dashboard, it is available in your virtual assistant flows via the **Salesforce node**.
1. In your virtual assistant, navigate to Integrations and add a **Salesforce** node.
2. The node automatically retrieves the integrations configured in the API Dashboard for the current account.
3. Select the integration you want to use from the dropdown.
4. Configure your query within the node and test the request.
The Salesforce node manages authentication internally. You do not need a separate authentication node or token parameter. You can switch between different Salesforce environments (for example, production and sandbox) by selecting the appropriate credential from the dropdown.
### Integrate with a Salesforce sandbox environment
{% hint style="info" %}
**Sandbox environments**
Currently, the recommended method for integrating with Salesforce sandbox environments is via Webhook.
{% endhint %}
Use the following configuration:
**Method**
`POST https://your-tenant-domain.my.salesforce.com/services/oauth2/token`
**Headers**
| HTTP Header | Value |
| ------------ | --------------------------------- |
| Content-Type | application/x-www-form-urlencoded |
**Query parameters**
| Parameter | Value |
| -------------- | ------------------------ |
| grant\_type | password |
| client\_id | Your Consumer Key |
| client\_secret | Your Consumer Secret |
| username | Your API username |
| password | Your API user's password |
**Response mapping**
| Object path | Parameter |
| ------------- | ----------------------------------------------------------------------- |
| access\_token | `$SF_ACCESS_TOKEN` (or the parameter where you want to store the token) |
{% hint style="warning" %}
**Special characters in passwords**
If your password contains special characters such as `#`, use URL encoding.
For example, `#42LBMDEH` becomes `%1242LBMDEH`. You can use Postman to encode your password before use.
{% endhint %}
### Troubleshooting
For error tracking, see the following Salesforce documentation:
* [Username-Password OAuth Authentication Flow](https://help.salesforce.com/s/articleView?id=sf.remoteaccess_oauth_username_password_flow.htm\&type=5)
* [Authorization Through External Client Apps and OAuth 2.0](https://developer.salesforce.com/docs/atlas.en-us.api_rest.meta/api_rest/intro_oauth_and_connected_apps.htm)
# How to create a Salesforce external client app
{% hint style="warning" %}
**Salesforce deprecation notice**
Salesforce deprecated connected apps as part of their Spring 2026 release. If you previously set up a connected app for this integration, you will need to create an external client app instead. The steps below reflect the current setup process.
{% endhint %}
To connect to Salesforce, you'll need to create [a Salesforce external client app](https://help.salesforce.com/s/articleView?id=xcloud.external_client_apps.htm\&type=5) and configure it to work with Vonage AI Studio. This can be done in your Salesforce production or sandbox org.
### Create the external client app
1. Click the gear icon in the upper-right corner of your Salesforce screen and select **Setup**.
2. In the left navigation bar, under Platform Tools, expand **Apps** and click **App Manager**.
3. Click **New External Client App** in the upper-right corner.
4. Under Basic Information, fill in the following fields:
Fied
Value
Name
Enter a recognisable name, such as Vonage AI Integration.
API Name
Auto-populates based on the name you enter. Leave it as is.
Contact Email
Enter the email address of the person or team responsible for setting this up. This does not need to be the email of the Salesforce user who will use the integration.
Distribution State
Select Local.
This means the app is used only within this specific Salesforce org. The Packaged option is for apps published to the Salesforce AppExchange, which is not applicable here.
5. Under API (Enable OAuth Settings), check the **Enable OAuth** box.
6. In the Callback URL field, enter: `https://api-eu.vonage.com/oauth/redirect`.
{% hint style="warning" %}
**EU callback URL**
Use the EU callback URL regardless of your region. This is the URL currently synced with the Vonage API Dashboard integrations. Using a different URL will cause authentication to fail.
{% endhint %}
7. Under OAuth Scopes, add the following three scopes to **Selected OAuth Scopes**:
* Manage user data via APIs (api).
* Full access (full).
* Perform requests at any time (refresh\_token, offline\_access).
8. Under Flow Enablement, leave all options unchecked.
9. Under Security, configure the checkboxes as follows:
| Setting | Value |
| ------------------------------------------ | ------------------------------------------------------------------------- |
| Require Secret for Web Server Flow | :white\_check\_mark: Checked |
| Require Secret for Refresh Token Flow | :white\_check\_mark: Checked |
| Require Proof Key for Code Exchange (PKCE) | ⬜ Unchecked. This must be disabled for the integration to work correctly. |
10. Click **Create**. A confirmation message appears to confirm that the external client app was created successfully.
### Configure OAuth policies
After creating the app, you need to update its OAuth policies.
1. On the External Client App page, click **Edit**.
2. Navigate to the Policies section and click **Edit**.
3. Set the following policies:
Section
Field
Value
Plugin Policies
Permitted Users
All users can self-authorize.
App Authorization
Refresh Token Policy
Refresh token is valid until revoked
App Authorization
IP Relaxation
Relax IP restrictions
### Retrieve your Consumer Key and Consumer Secret
Once your external client app is created and policies are saved, retrieve the credentials you'll need to complete the setup in the Vonage API Dashboard.
1. From the External Client App page, click **Settings**.
2. Under OAuth Settings, click **Consumer Key and Secret**.
3. Salesforce will send a verification code to your registered email address. Enter the code when prompted.
4. Copy the Consumer Key and Consumer Secret. You'll need both when setting up the Salesforce integration in the Vonage API Dashboard.
#### Retrieve credentials from an existing app
If you've already created an external client app and need to retrieve the credentials again:
1. Go to **Setup** and navigate to **App Manager**.
2. Find your external client app in the list and click **Settings** from its action dropdown.
3. Under OAuth Settings, click **Consumer Key and Secret**.
4. Complete the verification step if prompted. Your Consumer Key and Consumer Secret will then be displayed.
For further instructions on configuring external client apps, see:
* [Create and Configure an External Client App](https://trailhead.salesforce.com/content/learn/projects/build-integrations-with-external-client-apps/create-and-configure-an-external-client-app) on Salesforce Help.
* [Authorization Through External Client Apps and OAuth 2.0](https://developer.salesforce.com/docs/atlas.en-us.api_rest.meta/api_rest/intro_oauth_and_connected_apps.htm) in the Salesforce REST API documentation.
# SalesForce Actions
The **Salesforce Action** node allows you to **retrieve**, **create** and **update a record via SOQL query**.
{% hint style="info" %}
*SOQL stands for **Salesforce Object Query Language**. You can use SOQL to read information stored in your organization's database. SOQL is syntactically similar to SQL (Structured Query Language). You can find the best practices on building SOQL Queries* [*here.*](https://developer.salesforce.com/docs/atlas.en-us.soql_sosl.meta/soql_sosl/sforce_api_calls_soql_select_examples.htm)
{% endhint %}
{% hint style="warning" %}
*You can only initiate this query if you successfully authenticated using the* [*Salesforce Authentication node*](https://studio.docs.ai.vonage.com/voice/nodes/integrations/salesforce-authentication) *before triggering this node.*
{% endhint %}
#### **These two fields are mandatory for all action types -**
| Field Name | Description |
| --------------- | --------------------------------------------------------------------------------------------- |
| Tenant Domain | This is your account's unique org-specific subdomain for Salesforce login and application URL |
| Token Parameter | This parameter stores the access token you received previously in the Authentication node |
**Here's how to find your tenant domain:-**
This is your account's unique org-specific subdomain for Salesforce login and application URL. If you use Salesforce Lightning Experience, you can find it in the URL of your salesforce account (https\:// your-tenant-domain.lightning.force.com) or you can go to Settings → Company Settings → My Domain→ Current Domain.
{% hint style="warning" %}
*When you enter your tenant domain into the SalesForce Action Node be sure to add only the part before “my.salesforce” from the URL. For example if the whole URL reads* [*www.this-is-a-demo-for-you.user.my.salesforce.com*](http://www.this-is-a-demo-for-you.user.my.salesforce.com) *in the tenant domain enter only “this-is-a-demo-for-you.user”.*
{% endhint %}
## Get Record
Receive data from a Salesforce record via SOQL query.
The Object **Record ID** is an important field that you may need to retrieve. The Record ID is the unique identifier assigned to each record (under an object) in your Salesforce account. When using Get Record action, you will need to map in the response for the Record ID. This Record ID can be used at later stages while creating/updating a record which has a salesforce field with data type as “Lookup” (eg: Under “Case” object, field with label as “Contact name” and API name as “ContactId” has data type listed as “Lookup”).
| Field | Description |
| ---------------------------- | ------------------------------------------------------------------------------------------------------------------------------------------------------------------------------------------------------------------------------------------------------------------------------------------------------------------------ |
| SOQL query body | Use the [Salesforce Object Query Language (SOQL](https://developer.salesforce.com/docs/atlas.en-us.soql_sosl.meta/soql_sosl/sforce_api_calls_soql.htm)) to search your organization's Salesforce data for specific information. |
| Response Mapping - Record |
The exact parameter name of the Salesforce API property. Salesforce sends response to AI Studio as a json which can be used in two ways:-
Properties: Use properties inside the salesforce record as an array.
Metadata: Use metadata of the record.
|
| Response Mapping - Parameter | The parameter you’d like to store the "Record" value in. You can select either a multi-value or single-value parameter, depending on the number of possible values you are expecting. |
## Create Record
Create a new record in Salesforce.
{% hint style="warning" %}
***All fields are mandatory.** Please note that the Record ID needs to be utilized when you create a record.*
{% endhint %}
| Field Name | Description |
| -------------- | ---------------------------------------------------------------------------------------------------------------------------------------------------------------------------------------------------------------------------------------------------------------------------------------------------------------------------------------------------------------------- |
| Object Name | Object names are the primary reference visible in the Salesforce user interface, for example in this case it may be "Contact" |
| Field API Name | The name of the field, as used programmatically in Apex, or any of the APIs (REST, SOAP, Bulk, etc). Most standard fields use the same name as the label while custom fields will show '\_\_c' at the end for the API Name. To learn more please visit [this page.](https://help.salesforce.com/s/articleView?id=000385500\&type=1) |
| Value | The value can be either filled in dynamically (by entering $ followed by the parameter name) or be set. |
{% hint style="info" %}
*In SalesForce "Label" is used to display the field in the user interface in areas such as record detail pages, search results, and list views.*
{% endhint %}
**Saving created record IDs into parameters**
You can now save the IDs of the records you create during the course of a conversation directly into a parameter in Studio.
Here's how this works:-
Once you create a record you can choose to save the object ID in a parameter from the drop down list.
{% hint style="info" %}
*Please make sure that the parameter has sys.any as its entity type and is not a multi-value parameter.*
{% endhint %}
You can use this saved parameter anywhere within the conversation. It can work as both a regular custom parameter as well as a [User parameter](https://studio.docs.ai.vonage.com/ai-studio/users) that can be used to optimise future conversations.
## Update Record
Update a record data in Salesforce.
{% hint style="warning" %}
**All fields are mandatory.**
{% endhint %}
| Field Name | Description |
| ---------------- | ---------------------------------------------------------------------------------------------------------------------------------------------------------------------------------------------------------------------------------------------------------------------------------------------------------------------------------------------------------------------- |
| Object Name | Object names are the primary reference visible in the Salesforce user interface. |
| Object ID Record | The record ID is the unique identifier assigned to each record (under an object) in your Salesforce account |
| Field API Name | The name of the field, as used programmatically in Apex, or any of the APIs (REST, SOAP, Bulk, etc). Most standard fields use the same name as the label while custom fields will show '\_\_c' at the end for the API Name. To learn more please visit [this page.](https://help.salesforce.com/s/articleView?id=000385500\&type=1) |
| Value | The value can be either filled in dynamically (by entering $ followed by the parameter name) or be set. |
## Test the node
{% hint style="warning" %}
*Clicking on "Test Request" will also update the relevant record(s) on Salesforce.*
{% endhint %}
If you want to test your Salesforce Get Data node, you can do so by clicking on "**Test Request**" on the top right of the node.
It will open a new window that shows you Salesforce's response to your request in a raw JSON file. Under the "**Test Results**" tab, it will show whether or not the parameter you assigned in Response Mapping was attributed with a value. A request can be successful but the parameter under "Test Results" remains empty. The Cause for that might be a writing error in the parameter chosen in the Response Mapping, so the value might have not been attached to the parameter.
In the example below, the query was successful, and the relevant data was withdrawn from Salesforce.

{% hint style="warning" %}
**Having trouble with your request?**
*For error tracking, please have a look at Salesforce's detailed documentation.*
*SOQL Query:*\
[*https://developer.salesforce.com/docs/atlas.en-us.soql\_sosl.meta/soql\_sosl/sforce\_api\_calls\_soql\_sosl\_intro.htm*](https://developer.salesforce.com/docs/atlas.en-us.soql_sosl.meta/soql_sosl/sforce_api_calls_soql_sosl_intro.htm)
*Update Object:*\
[*https://developer.salesforce.com/docs/atlas.en-us.api\_rest.meta/api\_rest/dome\_update\_fields.htm*](https://developer.salesforce.com/docs/atlas.en-us.api_rest.meta/api_rest/dome_update_fields.htm)
*Create Object:*\
[*https://developer.salesforce.com/docs/atlas.en-us.api\_rest.meta/api\_rest/dome\_sobject\_create.htm*](https://developer.salesforce.com/docs/atlas.en-us.api_rest.meta/api_rest/dome_sobject_create.htm)
{% endhint %}
# Generative AI
AI Studio with the power of GPT!
{% hint style="warning" %}
*In order to use this node, you will need to set up a paid account directly with OpenAI.* [*Click here to learn more.*](https://studio.docs.ai.vonage.com/voice/nodes/integrations/generative-ai/setting-up-generative-ai-node-integration)
*This node is currently an add-on within AI Studio. To learn more about the pricing for this node,* [*click here.*](https://openai.com/pricing)
{% endhint %}
Want to build a comprehensive and smart conversational assistant that knows nearly everything that exists on the publically available web? Enter the Generative AI (GenAI) node!
Use the power of OpenAI’s Large Language Model to dynamize your virtual assistant to handle your user queries with the knowledge of context-specific nuance and the advantage of having the internet as its data source.
{% hint style="danger" %}
**Exercise care when employing this feature.**
*The Generative AI (GenAI) node is an experimental beta feature leveraging an open-source Large Language Model (LLM) and should be used in production with caution, due to its potential to generate misleading responses.*
[*All information provided in the node will be shared with the AI models (currently OpenAI only).*](https://openai.com/policies/privacy-policy)
{% endhint %}
Here’s how to set it up:-
1. **Gather your user utterance**
Use either the [Listen node](https://studio.docs.ai.vonage.com/voice/nodes/basic/listen) or the [Collect Input](https://studio.docs.ai.vonage.com/voice/nodes/basic/collect-input) node to gather your user's input as usual. This input will be fed through the Generative AI (GenAI) node to be analysed and acted upon.
{% hint style="success" %}
*Due to the unpredictable nature of the Large Language Model, we recommend using the Generative AI (GenAI) node as a fallback for your regular flow.*
*You can set this up by using a* [*Classification*](https://studio.docs.ai.vonage.com/voice/nodes/basic/classification) *or* [*Conditions*](https://studio.docs.ai.vonage.com/voice/nodes/basic/conditions) *Node as normal to segregate your flow after collecting your user input.*
*Next, connect the Generative AI (GenAI) node to the Default path of these nodes. This allows you the ability to have control of a majority of your flow using* [*Intents*](https://studio.docs.ai.vonage.com/properties-1/intents) *and* [*Entities*](https://studio.docs.ai.vonage.com/properties-1/entities) *as usual with the added benefit of handling all kinds of unexpected user input using the vast knowledge of OpenAI's dataset.*
*This also ensures that sensitive customer information is not sent out to third parties while taking advantage of a truly smart assistant whose knowledge is virtually boundless.*
{% endhint %}
2. **Add the Generative AI Node to your flow**.
From the toolbar on the left of your screen, under Nodes within the Integrations Category, select the Generative AI (GenAI) Node, drag and drop it onto the canvas at the appropriate point in your flow.
3. **Choose the Parameter that needs to be analysed.**
Once you have added the node, within the User Input Parameter textbox, choose the parameter where your desired user input is stored from a previous [Listen](https://studio.docs.ai.vonage.com/voice/nodes/basic/listen) or [Collect Input](https://studio.docs.ai.vonage.com/voice/nodes/basic/collect-input).
{% hint style="info" %}
*The OpenAI Integration that you may have set up earlier will be displayed in a dropdown list under the 'OpenAI Integration' list. Select the most appropriate one if you have multiple integrations set up for your account.*
{% endhint %}
4. **Enter your Company Name**
This step is not mandatory, however, we recommend that you add in your company name so that the LLM model can use it during the conversation if necessary. This ensures that if your organization has a tendency to be confused with another, similarly named organization, the AI model has a better chance of differentiating your company from the rest.
5. **Define the rules of what the Virtual Assistant should be able to reply to your users with**
What you enter in the Knowledge Base will define the boundaries that your Virtual Assistant (VA) will be able to perform within. You will need to provide a description of what you want the VA to be able to answer.
The following is an example of a Knowledge Base written for a resort provider:-
*"Vonage Resorts offers water park and amusement park fun for the whole family. Guest stays include access to our heated water park kept at a warm 30 degrees year-round. Other attractions offered include mini-golf, ziplining, paragliding, and camping activities. Guests can take advantage of resort deals and special offers, such as our dining packages, activity passes, spa packages, and more. Smoking is not allowed in any area of the resort or water park. This includes the use of electronic cigarettes and smokeless tobacco. A penalty will be applicable in case restrictions are not adhered to. The water park juniors area and certain rides within the amusement park are wheelchair accessible."*
This of course is incredibly detailed but it makes sure that the virtual assistant has access to strict information that it can use to reply to your user.
{% hint style="info" %}
*If you choose to include parameters in the description, the characters within the parameter name will also be counted as part of the total 6000-character limit.*
{% endhint %}
6. **Select the Output Parameter**
Once the virtual assistant has pulled the response from the LLM model, the output needs to be stored in a parameter.
{% hint style="info" %}
*Make sure that your output parameter has the sys.any entity type attached to it.*
{% endhint %}
Similar to mapping a response, the output stored in the parameter can then be used and manipulated through the conversation.
7. **Add in Actions**
Similar to [intents](https://studio.docs.ai.vonage.com/properties-1/intents), now the GenAI node allows you to add Actions for the LLM to recognize.
This gives you the ability to formulate further flows based on the Generative AI (GenAI) Node's response, particularly for the topics that you do not want the LLM to handle.
{% hint style="info" %}
*Each Action has a character limitation of 40 characters.*
{% endhint %}
Currently, you will be able to set up 10 actions for the node to recognize. Each action you create will create a new exit point in the node in order for you to create specified flows for all of the Actions.
8. **Configurations: Set the Creativity Level and Waiting Time**
The **Creativity Level** slider controls the randomness adherence of the VA’s responses to the description. The closer it is to the 'None' value, the model will stick to the description and the higher the slider is moved, the more freedom the model will assume it has to respond to the user. The default is set to 'None'. You will have the ability to set this value anywhere between 'None' to 'High'.
**Waiting Time** will control the amount of time the virtual assistant will wait for the API request to respond. Please note that the longer the waiting time, the greater the chance of your conversation flow being disturbed. The default value will be set to 15 seconds, you can choose to specify this value to anything between 10 - 25 seconds.
9. **Set up the rest of your flow**
Now that you have set up the Generative AI (GenAI) Node you can use the output parameter to determine the course of the conversation.
You can simply put the parameter in a speak node or even use it in a Conditions node to change the direction of the conversation based on deliberated conditions.
You also have the ability to designate the flow beyond the node using the node's three exit points.
The ‘**Successful**’ exit point (coloured in white), refers to a valid response returned from the model.
The ‘**Fallback**’ exit point, refers to a scenario where the model was not able to provide a response to the user's input.
The ‘**Failed**’ exit point refers to an API error or timeout.
The '**Conversation Ended**' exit point is triggered when the node recognizes that either the end-user or GPT has ended the conversation.
Before you go ahead and publish your agent however please keep in mind the following:-
* **Latency:** There may be a delay in response from the agent due to the data being processed by a third party. Make sure to account for this by either letting the user know (you can include multiple prompts along the lines of “Okay, let me process that for you” to allow the virtual assistant to randomly choose from during the conversation) or even by putting in elevator hold music!
* **Response control:** The responses provided by the agent will not be hard coded or static in this case. The major difference between using [Intents](https://studio.docs.ai.vonage.com/properties-1/intents) and [Speak](https://studio.docs.ai.vonage.com/voice/nodes/basic/speak) nodes in comparison to this node is that as a designer you will not be able to define the response of the agent. You can only provide guidelines for it to work within, hence please note that the responses may be unregulated.
# Setting up Generative AI Node Integration
Get ready to use the GenAI node within your Virtual assistant!
{% hint style="info" %}
*This feature requires access to the Integrations Page on the Vonage API Dashboard. If you don't see it on your account please contact your account admin*
{% endhint %}
AI Studio now offers you the ability to integrate with [OpenAIs](https://openai.com/research/overview)’ [Generative Pretrained Transformer (GPT)](https://openai.com/blog/gpt-3-apps).
Currently, AI Studio allows you to harness the capabilities of GPT-3.5 Turbo (particularly the Davinci 3.5 model) to take advantage of knowledge sourced from a dataset of 45 TB of text data (derived from across the web by OpenAI), to provide users with human-like answers to their questions.
What this means is that using the Generative AI (GenAI) Node within AI Studio allows to you set the boundaries which your virtual assistant (VA) can source its knowledge from and at the same time provide your users with a realistic and efficient experience mimicking the turn-taking process of natural human communication.
This is made possible due to the vast expanse of data that is available to use using the Large Language Model in conjunction with AI Studios’ pre-existing Natural Language Understanding Capabilities.
Before you use the Generative AI (GenAI) node, you will have to set up an account with OpenAI. Here’s how to go about it:-
#### Step 1: Sign Up!
Sign up with OpenAI using [this link](https://auth0.openai.com/u/login/identifier?state=hKFo2SBHYXZ4WkxIdWgxQWhMdTMybHNHTVJYWjJaZjRLbmlkYqFur3VuaXZlcnNhbC1sb2dpbqN0aWTZIGE5b0RUbFE2Skd4SDVGcUZoUUdoZDdfWVoxUzlqemx0o2NpZNkgRFJpdnNubTJNdTQyVDNLT3BxZHR3QjNOWXZpSFl6d0Q) and create an account. Once you have an account created, sign in and click on '**Dashboard'** on the top right of the page.
#### Step 2: Go to the API keys page
Once you have reached the Dashboard you should be able to see '**API keys**' on the left bar. Clicking on this will lead you to the Project Keys page.
Once navigated, you will be able to choose from copying an existing key or creating a new key to use with your Virtual agent by clicking on the ‘Create new secret key’ button.
If you decide to make a new secret key ensure that you create it under the right organization and project. **You must make a note of the secret key once you create a key.**
{% hint style="warning" %}
*If your AI Studio account doesn't have permission to manage third-party connections, please ask your account admin to set this integration up for you.*
{% endhint %}
#### Step 3: Gather Organisation ID
Once you have set up a new key, click on the '**Settings**' gear icon on the top right.
You can now copy your Organization ID and save it for integration. If you are part of multiple organisations please make sure you configure the right ID.
#### Step 4: Configuring the Vonage API dashboard
Once you have your API key and the Organization ID, you can head back to the API dashboard and look for the OpenAI integration under ‘Build & Manage’ -> **Integrations**
Next, select the OpenAI integration block, name your integration and enter the Secret key and Organization ID that you copied from the OpenAI account.
{% hint style="warning" %}
*If you want to set up multiple integrations to use on the same account, please make sure to name each integration appropriately. You will then be able to choose from these integrations once you use the node within an agent. Please also make sure **not to include spaces** when you name your integration.*
***Integration Name Syntax:-***
*demo*
*demo\_1*
{% endhint %}
Once done click on the ‘**Connect with OpenAI**’ button and your integration should be set up! You should now be able to find it within the Generative AI node in any of the virtual assistants under the API key you configured the integration in.
# Migrating from the GenAI node to Knowledge AI
We just released Knowledge AI!
A brand new integration featuring a seamless blend of RAG (Retrieval Augmented Generation) APIs with Semantic search and LLM (Large Language Model) technology that works in conjunction with a user-uploaded Knowledge Base to create nuanced conversational flows with minimal effort.
Given this feature release, the [Generative AI](https://studio.docs.ai.vonage.com/voice/nodes/integrations/generative-ai) (GenAI) node will slowly be deprecated over the course of the next few weeks, and if you are a current user of this node, here is what you need to know:-
### **What are the differences between GenAI and Knowledge AI?**
Although the core use of both these features may seem similar, the functionality greatly differs in terms of the control you have over your Virtual Assistants (VA) knowledge base, and static and generative responses.
| **Functionality** | **Q\&A node + Knowledge AI** |
| ------------------------------ | -------------------------------------------------------------------------------------------------------------------------------------------------- |
| **VA Knowledge Base Autonomy** | ✅✅✅*(this feature allows you to upload your own sources - text-based documents and URLs - allowing far more control on what serves as the VAs KB)* |
| **VA Response Control** | ✅✅✅*(there is far more control with this feature given that the entire Knowledge Base is dictated by the user)* |
| **Conversation Looping** | ✅✅*(Users can build seamless flows with little effort using a combination of traditional Conversation nodes and the Q\&A node)* |
| **LLM Accessible** | *Uses Google’s proprietary LLMs to generate responses based on end-user input referring to an uploaded Knowledge base* |
### **Is it worth moving to Knowledge AI?**
Aside from the fact that the Generative AI node will soon be removed from the platform, there are quite a few benefits to moving to Knowledge AI:-
1. **Increased flexibility & control over responses:** The Knowledge AI functionality allows you to provide your VA with a reliable Knowledge Base that you can upload in the form of text-based documents or live accessible URLs, enhancing control over the model's performance whilst allowing you the flexibility to create customized flows.
2. **Low effort builds:** Enhance cost efficiency by reducing the time and effort you spend on creating intents, entities, testing and optimizing classification by allowing Knowledge AI to do the heavy lifting and simply make minor refinements to your Index to ensure optimal performance.
3. **Easy maintenance**: Maintenance and updates are as easy as re-uploading a source and adding it to your existing Index to deliver immediate live results.
4. **Scalability:** Knowledge AI can manage and utilize vast amounts of information, making knowledge base management scalable for businesses with extensive, and often decentralised knowledge bases and documentation.
5. **Centralized Knowledge Management & Response Accuracy:** Knowledge AI is able to draw from the latest information you upload, ensuring that the VA provides streamlined, up-to-date responses that address a broad spectrum of customer inquiries effectively.
### **How does the feature work in the backend?**
Knowledge AI is based on internally developed RAG (Retrieval Augmented Generation) API’s, which combine Knowledge Base, Semantic Search and LLM response generation.
However, as a user of AI Studio, all you have to do is follow a few easy steps to get this feature up and running for your VA’s!
### **How do I migrate to this new feature?**
If you currently are a user of the Generative AI node, as long as you have Sources available, you should be able to set up the Knowledge AI feature in four quick steps:-
1. Upload or link your Sources
2. Create Indexes from the Sources
3. Test out the Indexes for optimal performance
4. Set up the Q\&A node within your agent.
Everything you need to know about the details of this process can be found here.
### **I need more help, where can I contact support?**
Our team is happy to help answer any further questions you may have. You can raise a request with “Knowledge AI Query” as the Subject on our [Support form](https://api.support.vonage.com/hc/en-us/requests/new?ticket_form_id=13812479566620) and we will do our best to lead you along the right path. You can also reach out to your account manager to resolve any queries.
### **I don't want to use this particular LLM, can I bring my own?**
The Q\&A node (along with the Knowledge AI tab) does not allow for third-party LLM plugins, however, AI Studio allows you to integrate into various systems using Webhooks. Stay tuned to learn how you can connect your virtual assistant with industry-standard LLMs.
Please keep in mind, however, like all API requests this is subject to latency.
Additionally, the onus of adding guardrails and preventing hallucinations lies on the VA designer and the third-party system.
### **Do I get billed separately for this?**
Nope, all part of the same Virtual Assistant bill! Learn more about our pricing [here](https://www.vonage.co.uk/communications-apis/ai-studio/pricing/) or reach out to your account manager. Please note that pricing for this feature is dependent on the text size of the Sources you upload and the total requests made using the feature
### **I’m worried about privacy, what are you doing to ensure my data remains secure?**
AI Studio has got you covered! The Knowledge AI feature is GDPR compliant (keeping in terms with the rest of AI Studios features that fall under this compliance), and maintains data residency by ensuring that the VAs created under the US and EU regions have their respective platform and LLM servers located in these regions.
Additionally, given that the LLMs used for this feature are sourced from Google, data sent to these models is neither stored nor used for training purposes.
# Flow Control
To build virtual agents on our platform you can utilize the boxes you see on the left side of the page.
The boxes are called **nodes** and are the building blocks of the conversation. Each of them has its own purpose, and together they create the conversational flow.
You can click on a box, drag it into the middle of the page, and can edit it accordingly by clicking on it again. It will open up on the right side of the page.
The **Flow Control nodes** become relevant in case you want to e.g. organise the flow into subflows using the **Flow** feature.
{% hint style="info" %}
*In order to create a flow, you have to connect the nodes to one another. Please connect them from the exit point of one module to the entry point of another.*
{% endhint %}
# Context Switch
Easily switch from one conversation path to another and allow for a flexible conversation
The *Context Switch* node enables the user to get out of context to jump to another intent while being prompted to fill a specific parameter. This means that the user can switch to the intents of the Context Switch node during the conversation. Imagine this node as a classification node without the entry point - accessible at any point during the flow.

{% hint style="warning" %}
*Please note the following:-*
* *the context switch node can only be used once in a flow.*
* *If in a collect input node the parameter collected is listed as a sys.any entity type, then chances are that the input will not be passed to the context switch. In these cases better to use classification node with the required intent.*
* *Context switch intents are currently not recognized in the Listen node.*
{% endhint %}
### When to use it?
The user is being prompted to give their order number to help track their package in a *Collect Input* node with *sys.serial number* as the attached entity.
Let's say, the user doesn't want to fill in this detail, but rather be transferred to a virtual assistant. Instead of giving the order number, the user can say "I want to speak to an agent" and they are being transferred accordingly.

{% hint style="info" %}
*Context switch is great to include important intents that you know your users may randomly pick up in the middle of the conversation. This includes things like agent requests and going back to the main menu. The context switch node helps you recognise when your user has said something like “main menu” and routes it back to where you want it to connect in the flow. Best practice is to let the user know that they have picked this flow and then lead them to it.*
{% endhint %}
# Flows
Branch out! Create different subflows to allow for easier navigation around the canvas.
Have a huge agent and want to organize efficiently? Use sub-flows to categorize and organize the individual function flows of your agent to enable a smoother building experience.
The main flow of your agent will be displayed on the canvas and can be found under the original event under events whilst the additional flows you create can be found under the flows tab in the toolbar
### Creating new flows
Creating a new flow is as simple as going to the Flows option in the ToolBar and adding a new flow. Once you create a new flow, proceed as you would with creating a regular flow.
Select the relevant nodes from the "**Nodes**" section and start building. Once done, also from the nodes section, select the "**Exit flow**" node and connect it to the end of your newly created flow.
{% hint style="info" %}
*To rename, delete or duplicate a sub-flow, simply right-click on the sub-flow in the toolbar and select your preferred option*
{% endhint %}
### Using Flows within your agent
Once you've created your required sub-flows, here's how you can connect them with the rest of your agent.
* Within the flow where you want to add your newly created sub-flow, go to the toolbar and under the Flow Control Nodes select the Flow Node. Drag and drop this onto your canvas and select the sub-flow you want the agent to access.
* Once selected connect the entry of this node to the exit point of the last preferred node in your main flow. This ensures that you have full control over when each flow is triggered.
{% hint style="info" %}
*The main flow will always be the flow with the START node. To allow users to interact with your new flows, make sure to connect them to the main flow.*
{% endhint %}
* In the Creating new flows section, you added an Exit Flow node at the end of your sub-flow. The exit point of the Flow node is directly connected to the Exit Flow node in your sub-flow. This means that when that sub-flow ends the agent will return to the Flow node and follow the flow that is connected to the exit point of the Flow node.
{% hint style="info" %}
*You can add multiple Flow nodes in a flow however only one Exit flow can be added per flow.*
{% endhint %}
### Where are flows helpful?
For example, your virtual assistant handles three use cases - order tracking, reporting a damaged package as well as answering FAQs. The three separate flows can be unified and displayed as one node in the canvas. When you click on "Enter flow" you will be moved to this flow and its nodes immediately.

# Events
**Events** are all conversation and workflows executed through the agent.
These can be individual sessions between either agent and user or actions performed by the agent (like sending a text message or email, or API request). Events can be triggered fully separate from one another.
There are currently four event types:
* Inbound
* Outbound
* End Call Event
* API Event

{% hint style="info" %}
*You can choose to add one event each from the event types. This means you can add one inbound session, one outbound session, one end call event and one API event all together in one agent!*
{% endhint %}
## Event Types
### Inbound Call Event
This event is triggered when the agent is being called directly.
**Use case Example:** Virtual Agent handles incoming customer support queries, e.g. FAQs (opening hours, location, etc). In this case, the user is initiating the conversation with the VA.

{% hint style="info" %}
*There are no node restrictions on nodes used in the flow.*
*Note, that you can only create one inbound event per agent.*
{% endhint %}
### Outbound Call Event
You can trigger this event by using our [Outbound Call API](https://studio.docs.ai.vonage.com/voice/get-started/telephony) which will initiate an outbound call to a recipient.
{% hint style="warning" %}
**Are you within the limits?**
*Studio’s outbound call limits that is! We currently only allow one call/session per second however if your virtual agent needs to make more calls we can increase the limit up to 5 outbound calls per second.*
*If you require an increased limit, please email* [*support@aistudio.vonage.com*](mailto:support@aistudio.vonage.com) *with the following details:-*
* *API key*
* *Agent ID(/s)*
* *Increase request: You can choose to increase your limit to 3 or 5 calls per second*
*Once you receive confirmation from our teams that your request has been processed, please publish your agents and wait for about 5 minutes before you start triggering new outbound calls.*
*Please note that if your agent is not approved for a higher limit, any call made over the 1 call per second limit will fail and return a 429 error!*
{% endhint %}
**Use Case Example:** Virtual Agent engages with your customers by sending notifications and updates, e.g. confirmation messages, appointment changes, special deals, etc. Here, the VA initiates the conversation with the user.

{% hint style="info" %}
*This event cannot be triggered without the* [*correct configuration of the Outbound Call API.* ](https://studio.docs.ai.vonage.com/voice/get-started/telephony)
*There are no node restrictions on nodes used in the flow.*
*Note, that you can only create **one Outbound event per agent**.*
{% endhint %}
###
### End Call Event
The **End Call** **event** will be triggered automatically as soon as the main flow session ended, either when the agent terminated the call with the **End Call** node or when the user ended the conversation by hanging up the call.
Using the **End Call** event you can continue the interaction with your customers after the initial conversation was terminated
**Use Case Example:** Sending out a post-call survey to your user once they leave the conversation.

{% hint style="info" %}
*You can only use action-based nodes for this event, e.g. Webhooks, custom code, etc.*
*Note, that you can only create **one End Call event per agent**.*
{% endhint %}
#### Sending the Call Recordings via SMS/ Email
It is important to note, that the main inbound call event and the end call event have two different session IDs. This becomes relevant when we want to retrieve the audio URL and send it via SMS or Email.
We'll query the [Insights API](https://studio.docs.ai.vonage.com/api-integration/vai-integration-guide) for the call recording and can then send the call recording parameter via SMS/ Email.
To do that, we will need the session ID of the main inbound call event that holds the conversation stored in the `TRIGGERED_BY_SESSION` parameter. Add this parameter to the query parameters in the *Webhook*. In the response parameter at the bottom, you can add a new parameter that will store the audio URL.
### API Event
The **API event** flow will be triggered by an incoming API call. This HTTP-event-based flow can be initialized at any time completely separate from the main flow from an API call platform such as Postman.
**Use Case Example:** A customer inquires about a certain product. The customer's database receives that information and uses this event to trigger an email with discount opportunities to the customer.
To initiate this event, click on the node, copy the endpoint and all other request parameters to your API platform of choice.

{% hint style="info" %}
*You can only use action-based nodes for this event, e.g. Webhooks, Custom Code, etc.*
*You can create multiple API events per agent.*
{% endhint %}
# Get started
In order to create a **WhatsApp agent**, after you clicked on "[**Create Agent**](https://studio.docs.ai.vonage.com/agents-1/create-a-new-agent)" select the WhatsApp option. The WhatsApp agent is a text-based agent you can effortlessly use on your WhatsApp application.

{% hint style="info" %}
*The nodes in a WhatsApp agent will be slightly different than in the voice-based agent. While some capabilities are not supported in text-based agents such as the "Listen" node, there are many more features for you to explore, e.g. replying to the virtual agent via voice note and transcribing it into text in order to match with the agent's knowledge base or sending and receiving images.*
{% endhint %}

{% hint style="info" %}
[*Click here*](https://studio.docs.ai.vonage.com/agents-1/create-a-new-agent) *to learn how to build your first virtual agent.*
{% endhint %}
## Add a phone number to your Whatsapp agent
To create any virtual agent on the Vonage AI studio, you require a [**Vonage API Account**](https://dashboard.nexmo.com/sign-up#_ga=2.161467253.978827859.1651051610-1380854260.1649770286).
The process to get a working WhatApp number is as follows:-
1. Purchase a phone number (which can support both SMS and Voice) on the Vonage API Dashboard.
2\. Once purchased, go to the "Your Numbers" page under Numbers, and click the pencil icon next to the number you just purchased to edit the number. Once the pop up opens, set the voice forward to a phone number of your choice. **Make sure you are able to receive calls on this number in real time since the number would be required to verify your WhatsApp Business Account.**
3\. Next select "**External Accounts**" on the left navigation panel, click on "Set up my WhatsApp business account". Follow the instructions to setup and create your **Meta Business Account** and your **WhatsApp Business Profile**.
4\. After you create your WhatsApp Business profile, you will be required to verify your number. Choose the Verification method to be "**Voice Call**" and verify the number.
5\. Post verification, you will be redirected back to the API dashboard where you will be prompted to "**Get your WhatsApp number ready**". *Please note that there may be some latency in the pop up appearing on your dashboard.*
6\. Once you have gotten your number ready it will then be accessible for use within AI Studio. You will be able to see it listed in your available numbers when you decide to publish your agent. It will also be visible in the API Dashboard External accounts page under "Your connected Social channels".
{% hint style="danger" %}
*Make sure to reverse the voice forwarding on the number to ensure your agent works as planned.*
{% endhint %}
To reuse a WhatsApp number, make sure to disconnect the number from the agent it is currently being used in by going to the phone settings and clicking "**Disconnect Agent**".
Upon completing this step, the number will then be available to connect to another agent within the same API key.
To learn more about WhatsApp onboarding, visit the [API documentation page](https://api.support.vonage.com/hc/en-us/articles/4404808667028-Getting-Started-with-WhatsApp-and-Vonage-Messages-API).
## How to set up your WhatsApp agent
You can create two different types of WhatsApp agents on the AI Studio.
1. **Inbound** -> Virtual Agent handles incoming customer support queries, e.g. FAQs (opening hours, location, etc). In this case, the user is initiating the conversation with the VA.
2. **Outbound** --> Virtual Agent engages with your customers by sending notifications and updates, e.g. confirmation messages, appointment changes, special deals, etc. Here, the VA initiates the conversation with the user.
### Inbound Virtual Agent
{% hint style="info" %}
*Please make sure you have a valid **WhatsApp business account** created through the* [*Vonage API Dashboard*](https://dashboard.nexmo.com/sign-up)*.*
{% endhint %}
Once you have created the WhatsApp agent and assigned a number to it, you can go ahead and test the flow. Add the virtual number to your contacts on your phone and start the conversation by sending the first message to the agent to start the flow.
You can send anything to start your agent. The content you send will be waiting in the `INITIAL_MESSAGE` parameter which is saved throughout the session of the conversation.

### Outbound Virtual Agent
{% hint style="info" %}
*Please make sure you have a valid **WhatsApp business account** created through the* [*Vonage API Dashboard*](https://dashboard.nexmo.com/sign-up).
{% endhint %}
For this type of conversation, you will need to create a WhatsApp template message and get it approved by Facebook.
{% hint style="info" %}
***WhatsApp templates** are the first message being sent from a business account to a customer, prompting them to start engaging with the Virtual agent. In order for a virtual agent to send outbound messages to customers, you’ll first need to create a WhatsApp template through your* [*Vonage API dashboard*](https://dashboard.nexmo.com/sign-up#_ga=2.199656422.978827859.1651051610-1380854260.1649770286)*.*
*Please note, that Facebook will review and approve every WhatsApp template, a process that may take up to a few days to complete.*
*You can read more about WhatsApp message templates on Facebook's* [*documentation page*](https://developers.facebook.com/docs/whatsapp/api/messages/message-templates) *or in* [*Vonage APIs Support Center*](https://api.support.vonage.com/hc/en-us/sections/360003733031-WhatsApp)*. If you are struggling with setting up your business account or your WhatsApp template messages, please* [*contact our support team*](https://api.support.vonage.com/hc/en-us/requests/new)*.*
{% endhint %}
Once you have a WhatsApp message template ready and approved, you can start sending outbound messages to customers. Since the template message is set through your Vonage API Dashboard on Facebook, you will not have any visibility to it from Vonage AI Studio.
Once a message template has been sent to the customer, the Virtual Agent will only be able to catch the customer’s response to it with no representation of the message template itself.
The customer’s response to the message template will initiate the conversation flow as designed in the AI Studio by triggering the “Start” node. The actual customer input will be automatically captured as the value of the `INITIAL_MESSAGE` system parameter and saved throughout the session of the conversation.
## WhatsApp Best Practice
### 1. Save your template message in a parameter
Since template messages rarely change, it’s a good idea to save the actual message creative as a parameter value for later reference in reports. To do so, create a custom parameter and manually insert the template message creative as the parameter’s value.
### 2. Use the initial message to determine the flow
This is mostly relevant for inbound customer care agents.
Use the `INITIAL_MESSAGE` parameter value to dictate the start of the conversation by creating custom conditions based on the customer’s input. This method is extremely effective for message templates that include quick reply buttons.
In the use case below, we have two intents - Office Location and Forgot Password. If the initial message of the user is not simply "Hi there, I have a question" but "I need help resetting my password", the agent can use and attempt to classify that input immediately, without waiting for the agent to prompt the user.
Add the Classification node with your intents right after the START node. This way the agent will check if the user's initial message matches an intent and can direct the conversation accordingly.
If no match is found, then the user's input will go to the Classification node's Missed tab and the agent will prompt the user normally.

{% hint style="info" %}
*If you want to create an outbound campaign sending a multitude of messages to different recipients at the same time, please* [*contact our support team*](https://api.support.vonage.com/hc/en-us/requests/new) *for help*.
{% endhint %}
## Monitoring & Reporting
Same as for regular telephony agents, you are able to see the conversation of a WhatsApp agent in the [reports](https://studio.docs.ai.vonage.com/agents-1/reports).
Additionally, AI Studio now allows you to view the delivery status of your virtual agents messages!
Within the Reports transcription, you will see the following signs to indicate the status of the message.
A **single tick** refers to the message being sent from the agent to the user. This can occur in cases where the user has limited network connectivity and is not able to receive the message.
**Double ticks** refer to the message being delivered to the user. The user has received the message however they haven't read it yet.
**Double blue ticks** refer to the message being delivered and read by the user.
{% hint style="info" %}
*You can also view the status of each message within the flow paths available in your reports.*
{% endhint %}
Want to take a quick look at the features available in this channel? Watch this video to learn more.
{% embed url="" %}
# Create your first conversational flow!
This tutorial shows how to create a simple but effective WhatsApp agent on the studio.
### **Your first conversation flow**
Here's a quick breakdown of Studio. Once you open the production canvas you will be greeted with the ToolBar and the Canvas:
**The ToolBar**
On the left side of your canvas you will be able to see the ToolBar which contains everything you need to access, build and run your agent.

In the center of the canvas, you will notice a node labeled **START**.

This is the starting point of the conversational flow. This node has to be attached to the rest of the conversational flow.
{% hint style="warning" %}
***Note:** Without having the **START** node connected to the rest of the conversation, the virtual agent cannot be used and will not execute your flow!*
{% endhint %}
To start building, simply drag and drop the nodes from the ToolBar to the middle of the studio.
{% hint style="info" %}
***Tip:** You can rename nodes by clicking on the default name of the node!*
{% endhint %}
### **Step 1: Create a Greeting Message**
For your first agent, once you've figured out an easy use case, start by adding a greeting statement to introduce your virtual agent and what it can do.
To do this you need to add a **Send Message** node.

{% hint style="warning" %}
***Note:** Make sure you connect all the nodes in your flow in the right order. The arrows indicate the direction of the flow, therefore, make sure the arrows are attached to the boxes correctly.*
{% endhint %}
{% hint style="info" %}
***Tip:** You can add a node by dragging and dropping from the toolbar or right clicking and selecting add a node.*
{% endhint %}
### **Step 2: Gather Input from your user**
At this stage, you’ll want to collect the intention of your user. To do this you need to add the **Collect Input** node.
WhatsApp Agents can accept various kinds of input and output messages including rich media (GIFs, videos, etc) text, image, audio, files and location. You also have the ability to include list [messages and reply buttons](https://studio.docs.ai.vonage.com/whatsapp/nodes/conversation/collect-input).
First, you’ll need to include a [*Parameter*](https://studio.docs.ai.vonage.com/properties-1/parameters) under which the input will be collected. Each *Parameter* needs to be attached to an [*Entity*](https://studio.docs.ai.vonage.com/properties-1/entities)*.* The *Entities* entail the various kinds of input your user will provide.
There are different entity types for example “sys.names” - to capture human names, “sys.phone numbers'' - to capture the phone number with country code and “sys.any” - which captures any kind of input from words, digits to serial numbers.
You can choose a pre-loaded system *Entity* or create your own. In this case we used “sys.any” which can collect any type of input.

{% hint style="success" %}
***Bonus Tip:** If you need to create a custom Entity, we recommend you go to Entities first, create your custom entity and then add the collect input node.*
{% endhint %}
You can then create prompts for the user with a question to answer here.

{% hint style="warning" %}
***Note:** We recommend that you name your Parameters in capital letters separated by an underscore.*
{% endhint %}
{% hint style="info" %}
***Tip:** You can access the* [*system entities list*](https://studio.docs.ai.vonage.com/entities/system-entities) *to see what's included.*
{% endhint %}
### **Step 3: Understand your user**
To now give your user an adequate answer, you need to match their input to the correct place within the flow and knowledge base that you have created.
After **Collect Input**, there are various follow-up options. You can either use the **Classification** or the **Conditions** node to classify the user input depending on your use case.
The node that we are going to choose for this flow is called **Classification**. In this case we want to be able to differentiate between our desired user intent.
By using the **Classification** node to categorize the different ways your user can imply the same intent, the agent building process becomes more efficient.
To be able to use this node we will first have to create the different **Intents** our users might want to access.
Under each specific **Intent**, we need to provide *training phrases*, i.e different ways a user can ask for the same topic. We recommend you add at least 10 unique phrases in the training set.

We can then add the **Classification** node to classify between the created **Intents.**

{% hint style="info" %}
***Note:** Be sure to use the right Parameter which you used to collect input!*
{% endhint %}
### **Step 4: Decide the rest of the flow!**
The rest of the flow depends on the Use Case you are trying to create.

Make sure to connect all the nodes in order, end your conversation with the **End Conversation** node and have a plan for fallbacks.
When we refer to fallbacks we mean cases where there are:-
* **No Inputs** - No input from the users end
* **Missed Inputs** - Perhaps your user said something that the agent wasn't able to catch?
* **Invalid Entries** - Cases where the wrong kind of input was provided by the user, eg. the user provides a name instead of a phone number.
For each of these, we recommend completing the happy path (i.e ideal flow) of the agent first and then deciding the best course of action for the unfavourable entries or lack thereof.
###
### **Step 5: TEST TEST TEST!**
Once you finish building your agent, be sure to test the flow using the inbuilt tester!
You can pre-fill Parameters you want to the agent to work with (by clicking on the settings icon) and also choose the mode of testing.

Make sure you publish your agent in order to be able to use it outside the testing environment as well!
### **Step: Fin**
This was an example of a bare bones agent. There's lots more you can accomplish with Studio!
If you need more information on the features available, the Studio Documentation dives deep into how to build a stellar agent. You can access it by clicking on the information symbol in any open node drawer.
Here's a video on how we built a quick agent for this channel:-
{% embed url="" %}
In case you think you're stuck or want more information than what's listed in the documentation, we are also available on [ai.studio.support@vonage.com](mailto:ai.support@vonage.com)
Godspeed!!
# Triggering an outbound WhatsApp virtual agent
{% hint style="warning" %}
**Are you within the limits?**
*Studio’s outbound call limits that is! We currently only allow one session per second however if your virtual agent needs to make more calls we can increase the limit up to 5 outbound sessions per second.*
*If you require an increased limit, please email* [*support@aistudio.vonage.com*](mailto:support@aistudio.vonage.com) *with the following details:-*
* *API key*
* *Agent ID(/s)*
* *Increase request: You can choose to increase your limit to 3 or 5 sessions per second*
*Once you receive confirmation from our teams that your request has been processed, please publish your agents and wait for about 5 minutes before you start triggering any new outbound sessions.*
*Please note that if your agent is not approved for a higher limit, any call made over the 1 call per second limit will fail and return a 429 error!*
{% endhint %}
You can jumpstart the outbound session from any platform of your choosing, e.g. Postman.
{% hint style="warning" %}
*Please make sure that you have configured and set up your WhatsApp template messages correctly. Learn more about creating WhatsApp templates* [*here.*](https://developers.facebook.com/docs/whatsapp/message-templates/guidelines)
{% endhint %}
You can add dynamic parameters to your template that will change according to the value you add to your query. See the example below for "`PARAM1_VALUE`".
The query will look like the following -
#### Endpoint (mandatory)
The endpoint depends on the region you selected for your agent
For EU agents --> `https://studio-api-eu.ai.vonage.com/messaging/conversation`
For US agents --> `https://studio-api-us.ai.vonage.com/messaging/conversation`
#### Method (mandatory)
POST
#### Headers (mandatory)
`X-Vgai-Key`
{% hint style="info" %}
*You can find the* `X-Vgai-Key` *on the top right of your canvas. Click on the "user" icon, and then "Generate API Key".*
{% endhint %}
#### Request Body
{% hint style="danger" %}
*Namespace, template, locale, to, agent ID, channel, and status URL are mandatory to include within the request body.*
{% endhint %}
```
{
"components": [
{
"type": "header",
"parameters": [
{
"type": "text",
"text": "PARAM1_VALUE"
}
]
},
{
"type": "body",
"parameters": [
{
"type": "text",
"text": "PARAM2_VALUE"
}
]
}
],
"namespace": "NAMESPACE_ID",
"template": "TEMPLATE_NAME",
"locale": "en",
"to": "TO_NUMBER",
"agent_id": "AGENT_ID",
"channel": "whatsapp",
"status_url": "string",
"session_parameters": [
{
"name": "string",
"value": "string"
}
]
}
```
Details surrounding **Namespace** and **Template** can be found on your [WhatApp Business Account](https://developers.facebook.com/docs/whatsapp/business-management-api/message-templates/) under the template you want to use.
For testing purposes, we recommend using the [Webhook site ](https://webhook.site/)for a dummy Status URL so that you can make sure you are receiving the status of your messages (sent, delivered, read, etc) accurately.
Once you have tested out this functionality, you can replace the **Status URL** with the actual URL you want to receive the message statuses on.
{% hint style="warning" %}
*Please do not use the Status URL that can be found within the Application associated with your Virtual Assistant on the Main API Dashboard as this will result in endless looping errors*
{% endhint %}
# Nodes
To build virtual agents on our platform you can utilize the boxes you see on the left side of the page.
The boxes are called **nodes** and are the building blocks of the conversation. Each of them has its own purpose, and together they create the conversational flow.
You can click on a box, drag it into the middle of the page, and can edit it accordingly by clicking on it again. It will open up on the right side of the page.
{% hint style="info" %}
*In order to create a flow, you have to connect the nodes to one another. Please connect them from the exit point of one module to the entry point of another.*
{% endhint %}

# Start node
The **Start** node is essential for the functionality of every agent and is automatically placed on the building canvas prior to creating the conversational flow.
This node indicates the beginning of the flow and has to be connected to the following nodes in order to initialize the flow. If not connected, the agent cannot be reached by the user.
# Conversation
To build virtual agents on our platform you can utilize the boxes you see on the left side of the page.
The boxes are called **nodes** and are the building blocks of the conversation. Each of them has its own purpose, and together they create the conversational flow.
You can click on a box, drag it into the middle of the page, and can edit it accordingly by clicking on it again. It will open up on the right side of the page.
Among the **Conversation nodes**, we have the nodes that guide the conversation like **Send Message**, **Collect Input**, and **Classification**.
{% hint style="info" %}
*In order to create a flow, you have to connect the nodes to one another. Please connect them from the exit point of one module to the entry point of another.*
{% endhint %}

# Collect Input
Fill in a specific parameter value based on user input. In every **Collect Input** node, the virtual agent will prompt a question to the user. The parameter value will be captured and stored if the input is matched to the correct entity type bound to the parameter
To fill in a parameter value, select the name of the parameter you would like to fill, and add the prompt and retry prompt.

### Receive files, images, and voice recordings as responses
Allow your virtual assistant to receive different input types such as text, images, audio, files, and location. Select which type of input you want to be accepted by the virtual assistant regardless of whether you are using regular text, reply buttons, or list messages in the Collect Input node. By default, your Collect Input node is set to "text", but you can select multiple different types.
{% hint style="info" %}
*If you select "Audio", you can choose between a regular audio recording as well as the option to transcribe it to text. To transcribe the input, select the ASR symbol on the top right of the "Audio" box.*
{% endhint %}


The tabs inside the node will show the input type you chose and map out a different flow based on that input.
**"Unexpected Input Type"** - If you have selected only a few possible input types, the agent will not be able to understand the others. For example, if you have only text and voice enabled and the user responds with an image, this is the flow that will be triggered.
**"Missed"** - When the input of the caller doesn't match the selected entity. The agent will repeat the prompt (how many times depends on the number of retries you added) before triggering the "Missed" flow. You can specify what kind of behavior you want the agent to follow in such a case, e.g. route the call or ask a follow-up question to redirect the flow.
## When to use Collect Input
To fill in a user ID that contains numbers only, create the parameter “USER\_ID” and assign the @sys.number entity to that parameter. A good prompt might be “What is your ID number please?”. You can also choose to dictate the flow of the conversation based on a value-filled by using the “Classification” or “Conditions” nodes.
{% hint style="info" %}
#### "Skip this node if value is already collected" - What if the value has been collected before in the same conversation?
*If the parameter value has been collected on a previous node (or even the same node in case the caller went back to the same node during the same conversation), you can choose to skip this Collect Input node and keep the original value collected. If you like to override the value, leave this box unchecked.*
{% endhint %}
### Receiving location as a response
Our WhatsApp virtual assistants also have the ability to receive and send locations in two formats:-
* **Longitude + Latitude:** Exact coordinates to pinpoint specific locations
* **Direct Address:** This can either be typed in or entered as a pinned location on a visual map
In order to use both of these methods the entity attached to the collection parameter must be the system entity - **sys.any.**
If you choose to use the Longitude/Latitude response option, your end users will be able to provide decimal degree coordinates in this syntax:-
`Latitude,Longitude`
Eg - "12.1, -31.4"
Please make sure to inform your users of the syntax in your Collect input prompt reduce the chances of missed input.
Using the pinning mechanism to mark a location on the map provides users with an easy, intuitive means of sending the virtual assistant a location for further processing. Using the "Address" option the parameter value/user input is stored as complete address in textual form for eg, 10 Park Walk, East Village, London E20 1DH, UK.
{% hint style="warning" %}
*End users will have to use the 'Location' option that becomes available when clicking on the paper clip option within WhatsApp UI. Text entered as plain text through the chat text input field will be classified as missed input*
{% endhint %}
## Reply Buttons & List Messages
In some cases, users will be asked to provide input that matches a narrow list of options, without using natural language (i.e appointment date/time, store branch, or list of products). In order to provide users an easy way to choose a value, you can set the Collect Input node to present a list of options for the user to choose from.
Vonage AI Studio offers two different options to present lists: **Reply Buttons** and **List Messages**.
### Reply Buttons
Reply Buttons present the user with up to 3 options to choose from. Once the user has chosen one of the options, WhatsApp will present their choice as a direct reply to the Virtual Agent’s message instead of asking them to type it in.

Under the Reply Buttons sub-menu, you will see the message properties:
* **Header** - The message header will be presented as the first line of the message, and always in Bold. *(optional)*
* **Body** - The body of the message. Use this field to ask a question, describe the options, or give context to the message. *(mandatory)*
* **Footer** - Use this field to add any notes relevant to the message. The footer will show in a smaller, more transparent font at the bottom of the message. *(optional)*
* **Buttons** - Add up to 3 buttons to display choices for your users. Each button has a “Title” and a “Value”. The Studio allows you to differentiate between what users see in the message and the actual parameter value collected.
* **Button Title** - This is the text that will be presented to the users. *(mandatory)*
* **Button Value** - This is the actual text that will be collected as the parameter value. *(mandatory)*
If you’re looking for a more flexible experience, you can set each property to be a parameter value or a contact (similar to mentions). You can also use a simple JSON code to set dynamic buttons - simply copy the code example and add it as a parameter value.
```
[
{
"title": "Button 1",
"value": "value1"
},
{
"title": "Button 2",
"value": "value2"
}
]
```
{% hint style="info" %}
*The parameter value that will be collected will always match the button value and not the button title. Make sure to set the following logic accordingly. Make sure to match @sys.any entity to the collected parameter to avoid mistakes.*
{% endhint %}
{% hint style="danger" %}
**Beware of Field limitations in Reply Buttons:**\
*- Header (max. 60 characters)*\
*- Body (max. 1024 characters)*\
*- Footer (max. 60 characters)*\
*- Button Title (max. 20 characters)*\
*- Button Value (max. 256 characters)*
{% endhint %}
#### View your Reply Buttons in the Chatbot Tester

### List Messages
List messages present multiple options for the user to choose from as a separated sub-menu within the message. The Virtual Agent will show a message followed by the “List” button that will show different options to choose from.

Under the List Messages sub-menu, you will see the message properties:
* **Header** - The message header will be presented as the first line of the message, and always in Bold. *(optional)*
* **Body** - The body of the message. Use this field to ask a question, describe the options, or give context to the message. *(mandatory)*
* **Footer** - Use this field to add any notes relevant to the message. The footer will show in a smaller, more transparent font at the bottom of the message. *(optional)*
* **List Title** - Choose a name for the list you’re creating. This name will be presented on the button users will tap to open the list of values. *(mandatory)*
* **Sections** - Define sections that will help users differentiate between the options presented to them. You can create up to 10 sections, with each section including up to 10 buttons. You must have at least 1 section included in the list message.
* **Section Title** - Give the section a name. mandatory Button Title - This is the text that will be presented to the users. *(mandatory)*
* **Button Description** - Add a description to the button - the description will show as a smaller, more transparent font below the title. *(optional)*
* **Button Value** - This is the actual text that will be collected as the parameter value. *(mandatory)*
If you’re looking for a more flexible experience, you can set each property to be a parameter value or a contact (similar to mentions). You can also use a simple JSON code to set dynamic buttons - simply copy the code example and add it as a parameter value.
```
[
{
"title": "Section 1",
"rows": [
{
"title": "Row 1",
"value": "row-1",
"description": "the first row"
},
{
"title": "Row 2",
"value": "row-2",
"description": "the 2nd row"
}
]
}
]
```
{% hint style="info" %}
*The parameter value that will be collected will always match the button value and not the button title. Make sure to set the following logic accordingly. Make sure to match @sys.any entity to the collected parameter to avoid mistakes.*
{% endhint %}
{% hint style="danger" %}
**Beware of Field limitations in List Messages:**\
*- Header (max. 60 characters)*\
*- Body (max. 1024 characters)*\
*- Footer (max. 60 characters)*\
*- List Title (max. 20 characters)*\
*- Section Title (max. 24 characters)*\
*- Button Title (max. 24 characters)*\
*- Button Description (max. 72characters)*\
*- Button Value (max. 200 characters)*
{% endhint %}
#### View your List Message in the Chatbot Tester

### Global Parameters
These parameters are being saved right from the start throughout the entire conversation. Feel free to use them in case e.g. you need to send a text message to the caller or use the call start date/ time in your reporting.
SENDER PHONE NUMBER - Phone number of the user
CONVERSATION START DATE - Date of the conversation
CONVERSATION START TIME - Time when the agent send or received the first message
AGENT PHONE NUMBER - Virtual phone number of the agent
INITIAL MESSAGE - The first message that the sender will send will be caught as the value of this parameter
SESSION ID - Sequence of numbers and letters to identify the specific conversation
# Entity Ambiguation
Once you define entities and their synonyms, sometimes you may encounter ambiguation.
For example, if a user wants to speak to someone named Ben, but there are multiple possible people named Ben, we refer to this scenario as "**Entity Ambiguation**".
To solve the disambiguation our agent will ask which of the entity values the user is referring to - “Which Ben did you mean? Ben Miller or Ben Brookes?” and the caller will need to choose between them by the last name.
{% hint style="info" %}
***The agent won't prompt the user automatically** in case of entity ambiguation. You will have to create the relevant flow to allow for the agent to identify this use case and act accordingly. See the steps below.*
{% endhint %}
## How to solve entity ambiguation
#### Step 1
Create or import your entity. This entity will contain ambiguous values. In our example, we want to solve the ambiguation for the possible user request "I want to speak to Ben". Therefore, our "Colleagues" entity will contain ambiguous values "Ben Miller" and "Ben Brookes".
{% hint style="info" %}
*Make sure that you include the **synonym** "Ben" that both names share and that will cause the ambiguation if requested "I want to speak to Ben". If you only add the entity values, the agent won't be able to identify the ambiguation.*
{% endhint %}

#### Step 2
Then, you will need to create a new parameter that will hold the values that might cause disambiguation. Select the entity you just created. Lastly, make sure to select "multi-value parameter" as it will hold the list of ambiguous aka similar values.

#### Step 3
In the **Collect Input** node that will ask the user who they'd like to speak to, add a parameter that will prompt something like "Who would you like to speak to today?". **This will NOT be the multi-value parameter just yet.** Here we are going to create a regular parameter we will call "COLLEAGUE\_NAME", with our previously created entity "Colleagues" attached.
Lastly, check the box of entity ambiguation and select the previously created multi-value parameter "COLLEAGUES".

#### Step 4
Once you leave the node, you will notice that there is a new tab below "Missed" that will be triggered in the event of entity ambiguation. You can connect it for instance to another Collect Input node, that will re-prompt the user "Do you mean Ben Miller or Ben Brookes?".
Add the "COLLEAGUE" parameter to allow the agent to save the correct name. In the prompt, you can enable the agent to read out the ambiguous values by adding a "$" to select the multi-value parameter from the drop-down. Lastly, choose, whether you want to separate between the values with "or", or "and".

#### Step 5
Once you connected all the lines, let's try the flow in the tester.

####
# Classification
Use this node when your agent’s response is dependent on the user input, similar to "**Conditions**". However, here we classify into intents.

In most cases, it will be the “**Classification**” node that follows “**Collect Input**”. Once you collect an input, it needs to be classified into the right intent. Click on the module and choose the parameter (the one you used in “**Collect Input**”) and the intent/s relevant for the classification.
“**Missed**” - This tab will be triggered if the agent is unable to classify the user input. You can define the default behavior by connecting “**Missed**” to any other node.
### Add Intents to the Classification node
The intent section is where you will **create the knowledge and training** for your agent, which later will be used to classify the user's intent. Each intent will encompass one use case, e.g. "I want to change my password" will be one intent and "
Your agent will use this list of utterances to **classify user inputs**. Every example you will enter should represent a sentence callers may use to attain a specific answer or action.
Add as many examples as possible to make sure your agent is trained and able to understand the different ways people are referring to one query.
**You will find more information on intents** [**here**](https://studio.docs.ai.vonage.com/intents)**.**
## Train & Test
Aside from the Tester, you can test your agent's accuracy with the **"Train & Test" Feature**.
Enter a user query you want to test and the feature will return the intent(s) it would classify the phrase into.
The test query does not need to already be part of the user expressions in the intent, feel free to choose new phrases. You can add any test sentence you tried matching it with an intent to the training set by clicking the "+" sign on the side.
The probability percentage shows you how accurately this phrase would be classified into an intent.
{% hint style="info" %}
*Don't get discouraged if the correct intent doesn't show 100% probability. It might show a few intents that get a very small percentage of probability as well. All intents the agent finds relevant for this query will get 100% probability together.*
*For very ambiguous intents, the probability might be below 70% and show yellow. You might want to have a look here at* [*how to improve your training set*](https://studio.docs.ai.vonage.com/intents) *or* [*deal with ambiguous intents*](https://studio.docs.ai.vonage.com/actions/basic/classification/intent-ambiguity)*.*
{% endhint %}

{% hint style="info" %}
*In case, the AI cannot match your query to any intent, it will give the intent "**sys.default**" as the highest score. Sys.default means that if tested, this query would go to the **Missed** tab.*
{% endhint %}
{% hint style="info" %}
*Large classification nodes with a vast number of intents tends to lead to ambiguity between intents and therefore lots of misclassifications. Use the hierarchical system to classify when you have a large number of intents.*
*Here's how to do it:-*
*In the first classification node include all the general intents, after that add another classification node to further classify the action or sub intent related to that intent.*
*For example, the first node includes the general intents of Reservations and Facilities. In the next adjoining classifications node will include intents for change reservation, new reservation, cancel reservation connected to Reservations in the first node and gym, pool, club attached to Facilities from the first node.*
*Use classification node only when the entity type is sys.any, for other entity types, use the condition node.*
{% endhint %}
# Intent Ambiguity
If your intents have a very similar training set and potentially compete in classification, this is called "intent ambiguation". It is possible that the AI might not be able to differentiate between them as easily.

### How it works
Using the example of a music school, the VA (Virtual Assistant) is helping interested new students to sign up for a lesson for their preferred instrument.

The VA will ask the user what instrument they’d like to play and the answer will be most likely along the lines of “I’d like to play the flute”, “I want to play the piano”.
However, the training set is very similar and there is a possibility that the AI won’t be able to classify correctly.

Therefore, we are going to enable the **intent ambiguation feature**, that allows us to clarify with the user if they meant playing the piano or playing the flute.
The feature can be turned on and off in the **Classification node** right below the intents. Once enabled, we have to add a new parameter that will prompt the user for clarification.
{% hint style="info" %}
*Due to the ambiguation in the entity values, you will need to choose a **multi-value parameter**.*
*To do that, upon parameter creation, click on the three dots next to the value and select "Set as multi-value".*
{% endhint %}

We will add a **Speak node** or **Collect Input node** where we have to add a phrase prior to the parameter that gives our the intent names, such as “Do you want to” and then we add the parameter.
The parameter, in this case, $INSTRUMENT\_TYPE, will give out the names of the intents. The intents in this agent are named "play the flute" and the other "play the piano" - coming together in this **Speak node**'s prompt as "Do you want to play the flute or play the piano?".

To enable the user to clarify, we connect the **Speak node** with the prompt back to the **Listen node** to allow the user's input to be classified again.

{% hint style="info" %}
*Currently, the limit of ambiguation is between the closest two competing intents. Even if you have more than two intents with alike training set, it will only re-prompt the two intents that our algorithm defines as closest to the user's query.*
{% endhint %}
{% hint style="danger" %}
***For more information on how to prevent intent ambiguity, please click*** [***here***](https://studio.docs.ai.vonage.com/intents#intent-ambiguity)***.***
{% endhint %}
# Send Message
The **Send Message** node works exactly like the [Speak](https://studio.docs.ai.vonage.com/actions/basic/speak) node. Input a text you would like the agent to present to the user via text. However, you are not able to add multiple responses.

### Send files, images, and voice recordings as responses
You can send different input types such as text, images, audio, files, and location. Select which type of input you want to send through this node. By default, your Send Message node is set to "text" and you can only select one option at a time.
{% hint style="info" %}
**Whatsapp Limitations**
*Images: jpg, jpeg and png.*
*Audio: aac, m4a, amr, mp3 and opus*
*Video: mp4 and 3gpp.*
*Note, only H.264 video codec and AAC audio codec is supported.*
*File: zip, csv and pdf.*
{% endhint %}
## When to use the Text Message node
Use the **Send Message** node to greet users as a first interaction. It’s a good idea to always have a Send Message node as the first node in every agent, introducing the service and providing a clear statement about the agent's abilities and features.
OR
If your virtual agent needs to answer knowledge questions (such as opening hours, etc.) then, after using **Classification** to classify into the right intent, you can use the **Send Message** node to reply to the user. This is only relevant if the agent is only supposed to respond and doesn’t expect any user input or want to end the conversation there.
{% hint style="info" %}
*Use clear, concise and example oriented instructions. Your user needs to be able to understand exactly what they need to provide to the agent at that specific point in the flow. As a designer you must be able to create this using as little words as possible.*
{% endhint %}
### Use WhatsApp Formatting to specify your text message
To define your text, you can use the WhatsApp formatting - just hover over the little information button next to **Agent Says**. Once you test your agent from your WhatsApp application, you will see the formatting you selected.
## How to use Location in the Send Message node
Some Use Cases require sending locations, e.g. if the user requires a store location or asks for directions. You can share a location either from a hardcoded value, that you input manually into the location node or a dynamic parameter value, that you collect from the user.
### Send a location based on a dynamic parameter value
Using e.g. a "LOCATION" parameter, the agent will send a dynamic address to the user. The agent will take this address and retrieve the correct store location via API request. Select "Parameter" as the mode and then select the specific parameter you want to store that new value in. In the conversation, the specific location you retrieved from the API request will then be sent to the user.
Agent: How can I help you?
User: I need to return something. Where's the closest store?
Agent: May I ask where you are located?
User: 7175 Us 93 Hwy S, Lakeside, MT, 59922
Agent: Great, thank you. I'm sending you the location.

####
### Send a pre-defined location
In this Use Case, the agent is required to answer a simple FAQ regarding the business's location. Select "Map" and add the correct location. The location will then be sent to the user.
Agent: How can I help you?
User: What is your address?
Agent: I'm sending you the location.

{% hint style="warning" %}
*Before enabling this WhatsApp bot to real traffic, check Google Maps API if the address gives out the right location.*
{% endhint %}
# Conditions
You can use this node when your agent’s response is dependent on the user input, similar to "**Classification**". However, here we classify based on entities. You can either use a manually created entity or use a predefined system entity (sys.number, sys.names, etc.).

## When to use Conditions
If you have a pizza delivery agent and the user chooses the size “large” he gets free drinks, you need a specific response for the parameter value “large”, and a different response for the values “small” and “medium”.
### How to use Conditions
Click on “Add New Condition''. You will be able to fill in a name of the condition you'd like to create. In our pizza example, you'd call on condition "large" and another one "medium". You don't have to create one for "small" as the "else" in the conditions takes care of the leftover value.
Now, you're prompted to add the parameter you'd like to perform a condition on. The parameter should be the same as the one you are using in the “**Collect Input**” module before the “**Conditions**”. Now you can decide on the type of condition (e.g. == equal, <= smaller than, etc.). Then fill in the entity value in the box on the right.
Once done, you will notice the “**Default**” box on the right side of the “**Conditions**” module. This is the “else” function, which means, whenever the user says something that is not part of the entity values you specified in the conditions, it will go to the else/ “Default” box. You can specify the behavior of the “**Default**” by connecting it to another node.

{% hint style="info" %}
*When creating conditions for sys.confirmation entities, include one condition for “yes” and a different one for “no”. This should be done in order to differentiate the response of the virtual assistant to the “no” condition from the response of the virtual assistant to the default condition.*
{% endhint %}
### Creating Condition Groups
In case you want to create a condition that will take into account multiple different parameters and values in order to trigger a flow, you can do so by adding one or more sub-conditions.

{% hint style="info" %}
## Operator Types
***Operators** are used to perform operations on variables and values*
### **1.** Date operators
*We currently support these date operators:*
#### *Date is After, Date is Before*
*Expects value of type yyyy-mm-dd (ISO format).*
*For example: 2021-01-14*
#### *Day of the week is, Day of the week is not*
*Expects value of type day name with uppercase.*
*For example: Sunday*
### **2. Time Operators**
*As used in CALL\_START\_TIME and sys.time*
*Syntax: HH:MM:SS*
{% endhint %}
# Advanced
To build virtual agents on the platform you can utilize the boxes you see on the left side of the page.
The boxes are called **nodes** and are the building blocks of the conversation. Each of them has its own purpose, and together they create the conversational flow.
You can click on a box, drag it into the middle of the page, and can edit it accordingly by clicking on it again. It will open up on the right side of the page.
{% hint style="info" %}
*In order to create a flow, you have to connect the nodes to one another. Please connect them from the exit point of one module to the entry point of another.*
{% endhint %}
# Reset Counter
{% hint style="info" %}
*When using one counter node for multiple nodes in the same agent, the counter will be filled very quickly as it does not reset or count how many times the specific node was triggered.*
{% endhint %}
You can reset the counter by adding a Reset Counter node at any point in the flow. By the time the user reaches the Reset Counter node in the flow, the previously triggered Counter node will be reset to 0.

###
# Counter
The **Counter** node will **count the number of times the node was triggered**, and allow you to modify the flow according to that number. This will grant the agent the ability to create more complex conversation flows, and create dynamic effects on the flow.
Use this node if you want to enable different outcomes for each time the user passes a certain node. The counter node has to be placed right after the node you want to influence.

You can **specify the number of scenarios**, the minimum being one and the maximum being five. Connect the exit points of the tabs in the counter node with the entry points of the new nodes you chose for your flow.
### When to use the Counter node?
If the agent misclassified in a Collect Input node with a sys.any parameter and an attached Classification node, it will go straight to “Missed” in the Classification node.
In this scenario, because we are using sys.any, we collect virtually any input in the Collect Input node, it is not possible to reprompt the user.
Therefore, add the Counter node after the Classification node, connecting the exit point of the Classification node’s “Missed” to the entry point of the Counter node.

{% hint style="info" %}
*Use the counters node to create context specific fallback. Try to let the user know why they failed or why they are being routed at that specific step so they either know what to fix or know what they did wrong so they are less likely to repeat the mistake the next time. General fallbacks like “I’m sorry that didn't work” do not provide any feedback for the user to improve their responses.*
{% endhint %}
# Set Parameter
You can use the **Set Parameter node** when you are looking to have a set value for a parameter - and don’t want the user to fill it in. We can either input the value manually or use a placeholder sign "$" and the name of the parameter you are referring to ("$PARAMETER\_NAME).

You can add multiple parameters to the node by clicking on "Add parameter".

## Best Practices - When to use Set Parameter?
### Influence the conversational flow
You can use the set param to tag that the user went through a specific part in the flow, and do a condition so he won’t go through it again.
For example, if the user is has got to the “missed” tab in the classification node, we can set a parameter that lets us know it was triggered once, and add a condition that has a different logic:
**Steps:**
1. Create a parameter and set a value in the set param node.

2\. Create a condition node that if the parameter has a value/is equal to the value you set in the set param node.

3\. Attach the “missed” in the classification node to the condition node.
4\. Attach the “default” to the logic you want the user to go first.
5\. Attach it to the set param node.
6\. Attach the set param node to the original classification node.
7\. Attach the condition you created to the logic you want the user to go to the second time.
### Set a specific parameter, not the user input
Another use case you can use the set param node is when you need to set a specific parameter after an intent (in the classification node) and not the user’s input. For example, when the parameter values need to be the same for all users.
All you need to do is to attach the set param node after the intent and set the value you want.
Usually, we set the intent’s name as the value of the parameter.
# Custom Code
This node gives you the ability to create **custom code in JavaScript** and launch it whenever this node is triggered. You can use it to manipulate and alter a selected parameter value.
For example, adding the country code to a selected phone number or a change the date of a conversation.
You can manipulate values collected by the agent during the conversation as well as information sent from a webhook.
{% hint style="info" %}
*The AI Studio uses the* `JS-Interpreter` *package to run the JavaScript code. Link to its documentation and its limitations* [*here*](https://neil.fraser.name/software/JS-Interpreter/docs.html)*.*
{% endhint %}


{% hint style="info" %}
*The returned value of the custom code is stored in the **Output Parameter**. The results should be only primitive types ( 'number', 'string', 'boolean'). You can use the same parameter as before, the value will be simply overridden.*
{% endhint %}
## How it works
{% hint style="info" %}
*In order to use the custom code node, you will need some knowledge of JavasScript. But don't worry, even if you don't, feel free to use some of the examples from our library below or consult with a JS developer.*
{% endhint %}
### Step by step example - Add 7 days to conversation start date
Take the example of an insurance company handling a mortgage request. Having collected all details, they want to tell their customers when they can expect to receive a response.
For the sake of our example, they usually respond after 7 days. In the custom code node, we are using JS code that will add 7 days to the original conversation start date.
**Step 1:** Get conversation start date parameter value. In our case, this will be a value populated in the $DATE parameter. This parameter can be either filled by receiving the value from a third-party service or by the user during the conversation.
```
var d = new Date($DATE);
```
**Step 2:** Increase the value of conversation\_start\_date days by 7
```
d.setDate(d.getDate() + 7);
```
**Step 3:** Return the value. The result of your JS code snippet will be stored in the output parameter. You can either choose a new parameter or the same one as before and override the previous value.
```
return d.toISOString();
```
{% hint style="info" %}
*If you want to go back in time and subtract some days from the given date in $DATE, just switch the + out for - .*
{% endhint %}

## Example Library
Feel free to copy-paste into your custom code node!
### >> Date & Time
### 1. Get the exact point of time when the custom code node was reached
```
var now = new Date().toISOString();
return now;
```
**Description:**
New Date = Date of right now (time you reach the node)
The custom code node will return '2022-03-15T14:50:22.520Z'
If you want to separate the date from the exact time, see below -
### 2. Eliminate the exact time from “new date”
```
var dateWithNoTime = $ARRIVAL_DATE.split(" ")[0]
return dateWithNoTime;
```
**Description:**
If you use “New Date” as indicated above, you will get '2022-03-15T14:50:22.520Z' returned as a value, if you want to only use the date, use this code snippet.
The custom code node will return '2022-03-15’
### 3. Change date format
```
return new Date($DATE_PARAM).toDateString();
```
**Description:**
Use this code if you want to change the way that the date is presented.
From 2022-03-16 to Wed Mar 16 2022
### 4. Change time format
```
var hour = Number($MEETING_TIME.split(':')[0])
var minute = $MEETING_TIME.split(':')[1]
var second = $MEETING_TIME.split(':')[2]
var code = "AM"
if (hour > 12) {
hour = hour - 12
code = "PM"
}
return hour + ":" + minute + " " + code
```
#### Description:
Use this code snippet if you want to change the way the time is being presented.
From 14:00:00 to 2:00 PM
### >> Numbers
### 1. Eliminate special characters from a number sequence
```
var phone1Val = $phone1
phone1Val = phone1Val.split("-").join("");
phone1Val = '1' + phone1Val;
return phone1Val;
```
**Description:**
Alter the way we present a sequence of numbers (e.g. relevant for phone numbers)
Before > 972-58-650-3020 ($phone1)
The custom code node will return 19725865053020 ($phone1Val)
###
### >> Others
### 1. Combine separate values into one parameter
```
var street = $streetname;
var streetnumber = $streetnumber;
var city = $city; var state = $state;
address = streetname + streetnumber + ‘,’ + city + ‘,’ + state;
return address;Counts the number of items in an array
```
**Description:**
Combine separate street name, street number, city, and state as a whole address with a comma ‘,’ in between
Before > fully separate values, e.g. from an API request > Benson Road ($streetname) 15 ($streetnumber) New York ($city) United States ($state)
The custom code node will return Beson Road 15, New York, United States
###
### 2. Count the number of items in an array
```
var result = $orders.length;
return result;
```
**Description:**
The original request shows many different entries of the same category. In our example, “orders”, each holding more information like “order\_Number”, “order\_Status”, etc, and this custom code counts how many orders there are. Imagine the API response as follows -
```
{
"orders": [
{
"orderNumber": "34534534245",
"orderDate": "10-13-2020",
"orderStatus": "Shipped",
},
{
"orderNumber": "00291408",
"orderDate": "10-08-2021",
"orderStatus": "Waiting Allocation",
},
```
The custom code node will return "2" as the value of the output parameter.
# Actions
To build virtual agents on our platform you can utilize the boxes you see on the left side of the page.
The boxes are called **nodes** and are the building blocks of the conversation. Each of them has its own purpose, and together they create the conversational flow.
You can click on a box, drag it into the middle of the page, and can edit it accordingly by clicking on it again. It will open up on the right side of the page.
The **action nodes** become relevant in case you want to send an SMS or Email.
{% hint style="info" %}
*In order to create a flow, you have to connect the nodes to one another. Please connect them from the exit point of one module to the entry point of another.*
{% endhint %}
# Send Email
### Send an Email to a Recipient
Once you click on the box, you will be able to fully customize the email you would like to send.
You can choose either from a contact or add the email address of the recipient manually. Then you can add a subject, e.g. "Your order confirmation".
You can fully customize the email body, e.g. enlarge a sentence, define headings, etc.


### Sending values collected in the conversation
In the Email, you are able to use parameter values collected in the conversation, simply use $PARAM\_NAME in the Email body.
E.g.
*Dear $CUSTOMER\_FIRSTNAME,*
*I have updated account Number $ACCOUNT\_NUMBER with the renewal of your subscription.*
*Have a good day!*
### Sending Parameter Attachments via Email
If you want to send a recorded user input via email, you can simply add the recording parameter below the email body. It will send the recording in file format for ease of use.
Select the correct node and either add the recordings link from the call reports or leave it empty and it will automatically fill in the value after the conversation.

{% hint style="info" %}
*Take advantage of all the features available to you! Use reply buttons and list messages wherever applicable and utilise all the different types of input and output that are available in WhatsApp agents, do whatever it takes to make your user journey better!*
{% endhint %}
# End Conversation
### Terminate the conversation
If you add this action to the flow, the conversation will be terminated at this point.

{% hint style="info" %}
*You might notice that this node has an **exit point** which means that there is room for actions beyond the end of the conversation.*
*You can choose to add an action like webhooks, send an email, etc., after your conversation has ended in order to send any relevant information to your user after their journey is complete.*
{% endhint %}
# Send SMS
### Send an SMS to a Recipient
Choose the recipient number, the masked phone number receivers will see, and the text message body.
Choose between a contact from the Contacts, manually adding a phone number, or enter a previously collected parameter (such as $CALLER\_PHONE\_NUMBER, etc.) that stores a phone number.

### Sending values collected in the conversation
In the SMS, you are able to use parameter values collected in the conversation, simply use $PARAM\_NAME in the SMS body.
E.g.
*Dear $CUSTOMER\_FIRSTNAME,*
*I have updated account Number $ACCOUNT\_NUMBER with the renewal of your subscription.*
*Have a good day!*
{% hint style="warning" %}
*In some countries like the US, it is not permitted to send and SMS without displaying the phone number and carriers will block these SMS.*
*Make sure to add the virtual assistant's phone number to the sender.*
{% endhint %}
###
### Sending an SMS to a collected phone number
If you want to send an SMS to a number that you collect in the conversation (instead of the caller ID) you will need to add the country code in a custom code node.
Place a Custom Code node after the Collect Input node, that collects the phone number from the user.
For US numbers, you will have to add this code to the custom code node.
```
var number = $PHONE_NUMBER
if (number) {
return ‘1’ + number.split(‘-’).join(‘’)
}
```
####
# Live Agent Routing
{% hint style="info" %}
*Want to learn how to set up a demo integration with Slack.* [*Head over to our developer's blog!*](https://developer.vonage.com/en/blog/how-to-switch-bot-human-via-text-channel-on-the-ai-studio)
{% endhint %}
Ever felt the need to route your text based virtual assistant flow to a human representative? Meet the **Live Agent Routing** node. Allow your human agents to assist your customers with escalations beyond the scope of a virtual agent using the Live agent routing mechanism made especially for text based agents.
This node allows your end users to interact with live agents without ever having to leave the conversation; the live agent will also have insight into what the conversation consisted of before the live agent routing was triggered. From the reporting perspective it also allows you to view the full conversation with both the virtual assistant and live agent in order to optimize the performance of your live agent.
{% hint style="info" %}
*Best practice is to use the **Send Message** node to notify your end user they are being routed to a live agent before the implementation of the Live Agent Routing node. This can also be done after the conversation has ended with the live agent.*
{% endhint %}
**Here's how it works:-**
***Start connection EP***
The endpoint entered here will receive the live agent confirmation, conversational history and system parameters that have been collected up until this node was triggered in the conversational flow.

Some of the sent data includes Agent ID, Session ID, transcription of the conversation (including both the user and agent utterances), and system parameters.
Here's a request example for this field:-
***Method:** Post*\
***Headers** : Content-Type: application/json*\
***Body*****:**
```
{
“sessionId”: string
“history”: {
“transcription”: [ “user”: string, “agent”: string ],
“parameters”: [ {
“name”: string,
“value”: string
}
]
}
}
```
***Inbound Transfer EP***
This endpoint is where all the inbound messages from the end user to the live agent are sent.

Here's a request example for this field:-
***Method:** Post*\
***Header:** Content-Type: application/json*\
***Body:***
```
{
sessionId: string,
text: string,
type: 'text'
}
```
***Status Delivery EP***
Now your live agents have the ability to see the status of their messages.
Enter the endpoint where you want the statuses of your messages to be delivered under the Status delivery EP text box.
Every time the status of a message changes, the live agent will receive an update on what the status is, providing them the ability of making imperative decisions that affect the flow of the conversation.
***Outbound transfer EP***
Outbound messages from the live agent to end user will be sent to this endpoint

Here's a request example for this field:-
## Outbound Transfer EP
`POST` `https://studio-api-eu.ai.vonage.com/live-agent/outbound/:session_id`
#### Headers
| Name | Type | Description |
| ---------------------------------------------- | ---- | ------------------------------------------------------------- |
| Content-Type\* | | application/json |
| X-Vgai-Key\* | | Use the appropriate VGAI key for the API key your agent is on |
{% tabs %}
{% tab title="200: OK " %}
```javascript
{
// Response
}
```
{% endtab %}
{% endtabs %}
Here is an outbound transfer request example for WhatsApp (Text,Image, Audio, Video, File, Custom media supported):-
***Location:***
```
{
"message_type": "custom",
"custom": {
"type": "location",
"location": {
"address": "11 Taylors Run, Tinton Falls, NJ 07712, USA",
"latitude": 40.25599129171469,
"longitude": -74.07644712105981
}
}
}
```
{% hint style="info" %}
*Please note that if location is sent, in the field either the address or latitude and longitude has to be sent.*
{% endhint %}
To learn more about the message types, please visit [this page](https://developer.vonage.com/api/messages-olympus?theme=dark).
***Stop Connection EP***
Confirmation that the conversation has ended with the live agent is sent to this endpoint. Once the confirmation has reached, the control of the conversation is given back to the virtual assistant.
Here's a what the API interface looks like for this field *(without the body)*:-
## Stop Connection EP
`POST` `https://studio-api-eu.ai.vonage.com/live-agent/disconnect/:session_id`
#### Headers
| Name | Type | Description |
| ---------------------------------------------- | ---- | ---------------- |
| Content-Type\* | | application/json |
{% tabs %}
{% tab title="200: OK " %}
```javascript
{
// Response
}
```
{% endtab %}
{% endtabs %}
{% hint style="warning" %}
*For outbound, disconnect endpoints, the permanent header is the generated API key from the Studio X-Vgai-Key.* [*Here's how*](https://api.support.vonage.com/hc/en-us/articles/7075840879380)*.*
{% endhint %}
You can also choose to save the whole chat including the parts with the live agent in the reports under call logs.
***Transfer Parameters***
You can now send all the parameters collected during the conversation between the user and the virtual assistant, prior to live agent connection, to the live agent. This includes custom, user and multi-value parameters.
This feature will help save time on behalf of both the live agent and the user, since no reiteration or scouring of collected information is required to understand the context of the conversation before routing.
***Agent response Waiting time***
The default response waiting time is 6.94 hours. This applies to any response from the live agent from start to finish. You can change this waiting period to suit your needs by selecting the number of hours in the “Agent response waiting time” drop down menu.
{% hint style="danger" %}
*Please note that the minimum waiting time is 1 hour and the maximum is 20 hours.*
{% endhint %}
**Here are some things to keep in mind whilst using this node:-**
* Default output will be executed once the live agent is connected and once the conversation is returned to the virtual assistants control.
* In the case that the live agent is not able to connect, output allocated under “Failed” will be executed.
* "No response" output will be executed when no response is received from Live agent after the configured response waiting time.
* The default response waiting time is 6.94 hours. This applies to any response from the live agent from start to finish.
* The text characters limit is currently 4096 characters in total.
* Transfers are asynchronous in nature which means that the message does not have to be ‘delivered’ in order for the transfer to happen. A caveat of this may be that in isolated cases the last sent user input may not be visible to the live agent.
**What if you want to send media to the live agent?**
Media can be used in this node only on the WhatsApp channel. Please refer to the list of support media types below:-
* Images - jpg, jpeg and png.
* Audio - aac, m4a, amr, mp3 and opus
* Video - mp4 and 3gpp. (Note, only H.264 video codec and AAC audio codec is supported.)
* File - zip, csv and pdf.
To learn more about supported media types, please visit [this page](https://developer.vonage.com/api/messages-olympus?theme=dark).
# Integrations
To build virtual agents on our platform you can utilize the boxes you see on the left side of the page.
The boxes are called **nodes** and are the building blocks of the conversation. Each of them has its own purpose, and together they create the conversational flow.
You can click on a box, drag it into the middle of the page, and can edit it accordingly by clicking on it again. It will open up on the right side of the page.
The **Integration nodes** become relevant when you want to connect with a third-party service to send and receive data.
{% hint style="info" %}
*In order to create a flow, you have to connect the nodes to one another. Please connect them from the exit point of one module to the entry point of another.*
{% endhint %}
# Webhook
This node enables you to seamlessly send and request data to and from third-party services.
{% hint style="info" %}
*You can click on the Webhook node and enter the name of the Webhook in the label field. This is not mandatory, but if you enter a label here, it should be something referring to the flow explaining what the API request is trying to achieve.*
{% endhint %}
**"Failed"** - In case there's an issue with the API request you are trying to send, e.g. the request didn't go through and the agent is waiting for a response for longer than 5 seconds or you didn't receive the correct parameters, you can use the "Failed" tab for error tracking. Simply decide on the behavior you'd like to happen in such a case.
{% hint style="info" %}
***For more information on our APIs, please click*** [***here***](https://studio.docs.ai.vonage.com/api-integration/authentication)***.***
{% endhint %}
## How to use the Webhook Node
#### There are a few different ways to send an API request:
GET - Retrieve some data from the external codebase
POST - Create some data for the external codebase
PUT - Update some data to the external codebase
DELETE - Delete data at the external codebase
PATCH - Apply partial modifications to data at an external codebase
### Headers
Some third-party services might require you to add HTTP headers (HyperText Transfer Protocol) to the request. This is a data transmission standard that defines how servers and browsers send and interpret data. Additional information transferred along with the HTTP request for purposes such as authorization and identification.
{% hint style="info" %}
*Use **Asynchronous Requests** if you want* *the execution of the code not to be blocked regardless of the response.*
{% endhint %}
### Body
Insert your JSON, HTML, text, X-WWW-FORM-URLENCODED, or XML file here if your request requires it. These code formats computers use to send information back and forth.
Not all API Requests will require a body. It is usually only relevant if you’d like to pass more parameters along, other than the query parameter in the Request Mapping.
### Query Parameters
In the Query Parameters section, enter the parameters you would like to send in your query.
You can either keep the value empty and have the user fill it during the conversation or you can add the value if you want to predefine it. Use $PARAM\_NAME if you want to either take the value from the parameters that you prepopulated in the parameter section or if you want the user to fill the parameter during the conversation
### Response Mapping
Response Mapping defines the way you receive the third party’s response.
Define the Object Path and the right parameter you’d like to send the value to. We support XML as well as JSON as part of the response mapping.
The studio supports two response mapping types, xml and json.
#### > Example of xml
```
ToveJaniReminder
Don't forget me this weekend!
```
{% hint style="info" %}
*To get for example, the* `Tove(note.to)`*value from the xml response, the value of the object path needs to be **`"note.to"`** or **`note['to']`***
{% endhint %}
#### > Example of json
```
{
"data": {
"userId":1,
"id":2,
"completed":false
}
}
```
{% hint style="info" %}
*To get for example the* `1 (data.userId)` *value from the json response, the value of the object path needs to be **`"data.userId"`** or **`data['userId']`***
{% endhint %}
#### > Arrays
```
[
{
"userId": 1,
"completed": false
},
{
"userId": 2,
"completed": false
}
]
```
{% hint style="info" %}
*To get **`1`**, for example, the **`(first item userId property)`** value from the json response, the value of the object path needs to be **`"$[0].userId"`** or **`$[0]['userId']`***
{% endhint %}
### Asynchronous Requests
Need your webhook to run in the background whilst the rest of your flow continues? Simply, toggle the asynchronous request within your webhook to allow the flow to proceed without depending on the node.
### Managing Timeout
Now you have the ability to set the webhook time out to any amount of time between 10 to 25 seconds. As per default, the slider will be set to 10 seconds for each webhook node.
## How to test the Webhook node
Once you have added all your request information, you can test if the webhook node is being executed correctly, by clicking on **Test Request** on the top right of the node settings.
{% hint style="warning" %}
In case your service requires **whitelisting of our IPs**, please use the following:
**For EU-based agents**
Frankfurt:
* 18.198.250.71
* 18.156.30.186
* 18.195.173.181
* 3.73.26.104
* 3.74.128.5
* 3.122.96.168
**For US-based agents**
Virginia:
* 54.90.42.141
* 54.88.7.65
* 52.44.45.61
* 50.17.224.159
* 18.204.242.10
* 52.2.131.195
* 3.227.70.216
* 100.29.86.76
* 3.219.120.27
{% endhint %}
### Webhook Signing
Webhook signing is a feature that allows your integrated application to verify that the request has been sent from Vonage and has not been tampered with in transit.
Whilst receiving a request, the Webhook will include a JWT token in the authorization header which is signed with your signature secret (which can be found under signed Webhooks in the API settings on the Nexmo dashboard).
**How to enable Webhook signing**
Webhook signing is enabled by default for voice agents built after June 2022. If your agent was built before this time period, follow the process listed below:-
* Log into your dashboard
* Go to the application settings
* Select the appropriate application
* Select “Edit”
* Scroll down to “Capabilities”
* Under the Voice capability select “Show Advanced Features”
* Select the “Use signed Webhooks” checkbox.
**How does the Webhook signing work?**
On the Vonage AI side there is one part to the process - Validating the request to ensure that no tampering has occurred.
***Validation of Request***
To verify the request, Webhook signing involves a JWT token in the authorization header. In order to identify which signature secret has been used to sign the request, check the API key which is included in the JWT claims.
To learn more about decoding Webhook signing, please visit [this page](https://developer.vonage.com/getting-started/concepts/webhooks#decoding-signed-webhooks).
### Response Status Code
You can now decide to change the course of your conversation based on the status of your Webhook! You can specify individual codes or code classes (e.g. 3xx to refer to codes from 300 to 399) to decide the turn of the conversation in each scenario.
Here's how to go about it:
The Response status code section is available within the Webhook node drawer.
{% hint style="success" %}
*The default output takes into account all successful 2xx responses (status code 200 to 299).*
{% endhint %}
You can specify either:-
* Individual codes: E.g. 301, 500, 400, etc.
* Code Classes: E.g. 4xx (which would mean all codes from 400 to 499), 5xx (all codes from 500 to 599), etc.
You can also save the resulting status code in a parameter for further use.
{% hint style="warning" %}
*Please make sure to create a parameter with the sys.any or sys.number entity type to save your response code.*
{% endhint %}
# Legacy Salesforce Authentication node
This node is part of the **Salesforce Integration nodes** and handles the required **authentication to access your Salesforce domain**. For this node to work it is imperative to have a connected app within SalesForce. Learn more on how to create a supported connected app[ here.](https://studio.docs.ai.vonage.com/whatsapp/nodes/integrations/salesforce-authentication/how-to-create-a-salesforce-connected-app)
The following details are unique to your Salesforce account and can be accessed via the UI of your domain.
All fields are mandatory and some can be hidden for privacy reasons.
| Field Name | Description |
| ------------------------ | -------------------------------------------------------------------------------------------------------- |
| Client ID | This is the "Consumer Key" of your SF domain. You will need to create a connected app prior. |
| Client Secret | This is the "Consumer Secret" of your SF domain. |
| User Name | Your Salesforce username. This user should have admin access permissions to the account. |
| Password | Your Salesforce password. |
|
Parameter
| This parameter will save the access token you will receive from Salesforce upon approved Authentication. |
{% hint style="warning" %}
**Check if your password contains special characters such as a #**
*If it does, please use URL encoding to change the format of your password. You can do this using postman.*
*E.g. instead of #42LBMDEH → %1242LBMDEH*
{% endhint %}
### **Test your node**
If you want to test your Salesforce Authentication node, you can do so by clicking on "Test Request" on the top right of the node.
It will open a new window that shows you Salesforce's response to your request in a raw JSON file. The previously defined parameter(s) you added in the Parameter tab will hold the access token under "Object Path" accessible when clicking on the "Test Results" tab.
In the example below, the Authentication was successful. Now, you can continue with the next action, e.g. requesting data from a Salesforce record with the[ Get Data node](https://studio.docs.ai.vonage.com/voice/nodes/integrations/salesforce-get-data).

{% hint style="info" %}
**Having trouble with your request?**
*For error tracking, please have a look at Salesforce's detailed documentation.*
*Authentication EP:*
[*https://help.salesforce.com/s/articleView?id=sf.remoteaccess\_oauth\_username\_password\_flow.htm\&type=5*](https://help.salesforce.com/s/articleView?id=sf.remoteaccess_oauth_username_password_flow.htm\&type=5)
*Creating Oauth connected app:*
[*https://developer.salesforce.com/docs/atlas.en-us.api\_rest.meta/api\_rest/intro\_oauth\_and\_connected\_apps.htm*](https://developer.salesforce.com/docs/atlas.en-us.api_rest.meta/api_rest/intro_oauth_and_connected_apps.htm)**
{% endhint %}
---
[Next Page](/llms-full.txt/1)